 |
| |
### fix/8363: Match editor "Place Order" button UI with frontend ([#9094](https://github.com/woocommerce/woocommerce-blocks/pull/9094))
1. Create a page or post;
2. Add the Checkout block to it;
3. On the editor, edit the Checkout block and make sure the "Place Order" UI match with the front-end Place Order button UI.
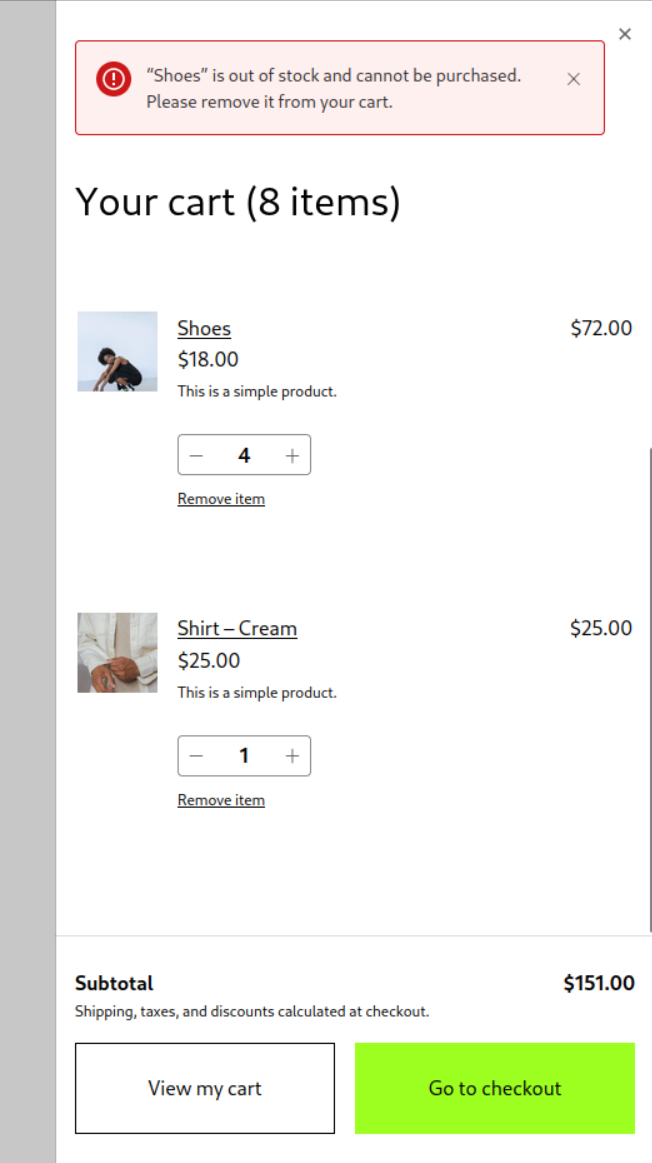
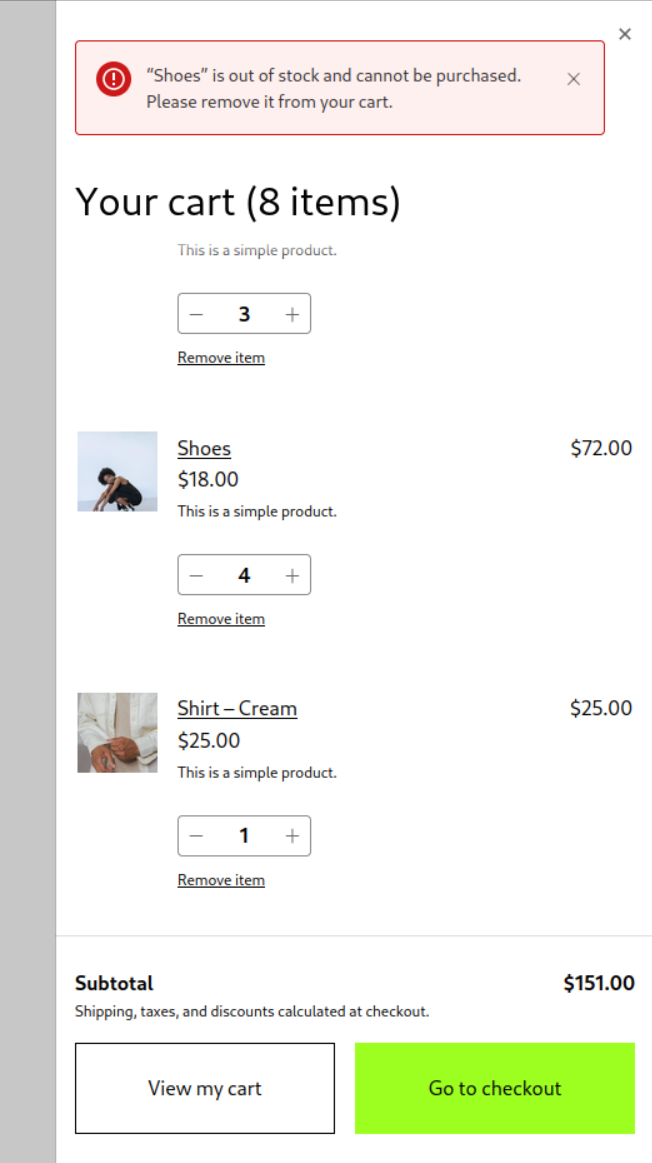
### Fix - "Order received" page does not display the payment method information. ([#9092](https://github.com/woocommerce/woocommerce-blocks/pull/9092))
1. Install the WooCommerce Block plugin on a WordPress site.
2. Create a product and add it to the site's shopping cart.
3. Proceed to checkout using the "Checkout" Block, which can be added to a page using the "WooCommerce" block category.
4. Complete the checkout process and confirm the order.
5. On the "Order received" page, observe that the payment method information is available.
6. Also check payment method on New Order Email, Order Listing page in wp-admin
### Get product by ID if there's more products returned from useStoreProducts ([#9079](https://github.com/woocommerce/woocommerce-blocks/pull/9079))
1. Go to Editor
2. Add All Products and Products blocks
3. Smoke test them, so that they display a correct data in the Editor and Frontend
4. During testing disable the "Inherit query from template" option for Products block and when disabled change the Advanced filters and make sure products are still loaded properly
### Product SKU: fix product SKU when added in the product meta block ([#8966](https://github.com/woocommerce/woocommerce-blocks/pull/8966))
1. Go to Appearance > Editor > Template > Single Product.
2. Remove the Product SKU block inside the Product Meta block.
3. Add the Product SKU block again.
4. Be sure that it is visible on the editor
5. On the frontend, visit a product with a defined SKU and ensure the block is visible.
### Pass proper data to On Sale badge when used in the scope of Product Image ([#9021](https://github.com/woocommerce/woocommerce-blocks/pull/9021))
1. Go to Editor
2. Add a Products block
3. Add "On Sale badge" block to the Products
4. **Expected:** There's no regression, so "Sale" badge appears in both places: Product Image and On Sale Badge
5. Save and go to frontend
6. Confirm they appear on the frontend as well
### Product Stock indicator: Add support for background color, margin, padding & various typography controls ([#8954](https://github.com/woocommerce/woocommerce-blocks/pull/8954))
#### Test using blocks sidebar
1. Create a new page or post
2. Add the "Products" block to your post.
3. Add Product Stock Indicator block as an inner block if not included already
4. Select the Product Stock Indicator block and open the block settings in the right sidebar.
5. Customize the block using the new styling options available:
5.1. Change the text color, background color, font family, font size, font appearance, line height, letter spacing, text decoration, letter case, margin, and padding under the appropriate settings sections.
6. Verify that the styling changes are immediately visible and correctly applied within the editor.
7. Save the post, then view it on the front end to ensure the styling changes are visible and applied correctly.
#### Test using Global Styles
1. Open the Global Styles sidebar by clicking the "Styles" button at the top right corner of the editor.
2. In the Global Styles sidebar, locate the "Product Stock Indicator" block.
3. Customize the block using the new styling options available under the "Product Stock Indicator" block in the Global Styles sidebar:
3.1. Change the text color, background color, font family, font size, font appearance, line height, letter spacing, text decoration, letter case, margin, and padding under the appropriate settings sections.
4. Verify that these applied correctly within editor & on frontend:
4.1. Create a new post
4.2. Add Products block
4.3. Add Product Stock Indicator block as an inner block if not included already
4.4. Check the Product Stock Indicator block in both the editor and on the front-end to ensure that the changes made through the Global styles UI are accurately applied:
4.4.1. In the editor, inspect Product Stock Indicator block & ensure it matches the values set in the Global styles UI.
4.4.2. Save the post & publish it. On frontend, inspect Product Stock Indicator block & ensure it matches the values set in the Global styles UI.
> Also, verify the changes in All Products block, which also uses Product Stock Indicator block.
### Use consistent and semantically correct HTML elements in the Cart and Checkout blocks ([#9065](https://github.com/woocommerce/woocommerce-blocks/pull/9065))
1. Create a test page and add the Cart block.
2. Within the post editor, verify that the `CART TOTALS` element, with the CSS class `.wc-block-cart__totals-title`, is using a `
|
### fix/8363: Match editor "Place Order" button UI with frontend ([#9094](https://github.com/woocommerce/woocommerce-blocks/pull/9094))
1. Create a page or post;
2. Add the Checkout block to it;
3. On the editor, edit the Checkout block and make sure the "Place Order" UI match with the front-end Place Order button UI.
### Fix - "Order received" page does not display the payment method information. ([#9092](https://github.com/woocommerce/woocommerce-blocks/pull/9092))
1. Install the WooCommerce Block plugin on a WordPress site.
2. Create a product and add it to the site's shopping cart.
3. Proceed to checkout using the "Checkout" Block, which can be added to a page using the "WooCommerce" block category.
4. Complete the checkout process and confirm the order.
5. On the "Order received" page, observe that the payment method information is available.
6. Also check payment method on New Order Email, Order Listing page in wp-admin
### Get product by ID if there's more products returned from useStoreProducts ([#9079](https://github.com/woocommerce/woocommerce-blocks/pull/9079))
1. Go to Editor
2. Add All Products and Products blocks
3. Smoke test them, so that they display a correct data in the Editor and Frontend
4. During testing disable the "Inherit query from template" option for Products block and when disabled change the Advanced filters and make sure products are still loaded properly
### Product SKU: fix product SKU when added in the product meta block ([#8966](https://github.com/woocommerce/woocommerce-blocks/pull/8966))
1. Go to Appearance > Editor > Template > Single Product.
2. Remove the Product SKU block inside the Product Meta block.
3. Add the Product SKU block again.
4. Be sure that it is visible on the editor
5. On the frontend, visit a product with a defined SKU and ensure the block is visible.
### Pass proper data to On Sale badge when used in the scope of Product Image ([#9021](https://github.com/woocommerce/woocommerce-blocks/pull/9021))
1. Go to Editor
2. Add a Products block
3. Add "On Sale badge" block to the Products
4. **Expected:** There's no regression, so "Sale" badge appears in both places: Product Image and On Sale Badge
5. Save and go to frontend
6. Confirm they appear on the frontend as well
### Product Stock indicator: Add support for background color, margin, padding & various typography controls ([#8954](https://github.com/woocommerce/woocommerce-blocks/pull/8954))
#### Test using blocks sidebar
1. Create a new page or post
2. Add the "Products" block to your post.
3. Add Product Stock Indicator block as an inner block if not included already
4. Select the Product Stock Indicator block and open the block settings in the right sidebar.
5. Customize the block using the new styling options available:
5.1. Change the text color, background color, font family, font size, font appearance, line height, letter spacing, text decoration, letter case, margin, and padding under the appropriate settings sections.
6. Verify that the styling changes are immediately visible and correctly applied within the editor.
7. Save the post, then view it on the front end to ensure the styling changes are visible and applied correctly.
#### Test using Global Styles
1. Open the Global Styles sidebar by clicking the "Styles" button at the top right corner of the editor.
2. In the Global Styles sidebar, locate the "Product Stock Indicator" block.
3. Customize the block using the new styling options available under the "Product Stock Indicator" block in the Global Styles sidebar:
3.1. Change the text color, background color, font family, font size, font appearance, line height, letter spacing, text decoration, letter case, margin, and padding under the appropriate settings sections.
4. Verify that these applied correctly within editor & on frontend:
4.1. Create a new post
4.2. Add Products block
4.3. Add Product Stock Indicator block as an inner block if not included already
4.4. Check the Product Stock Indicator block in both the editor and on the front-end to ensure that the changes made through the Global styles UI are accurately applied:
4.4.1. In the editor, inspect Product Stock Indicator block & ensure it matches the values set in the Global styles UI.
4.4.2. Save the post & publish it. On frontend, inspect Product Stock Indicator block & ensure it matches the values set in the Global styles UI.
> Also, verify the changes in All Products block, which also uses Product Stock Indicator block.
### Use consistent and semantically correct HTML elements in the Cart and Checkout blocks ([#9065](https://github.com/woocommerce/woocommerce-blocks/pull/9065))
1. Create a test page and add the Cart block.
2. Within the post editor, verify that the `CART TOTALS` element, with the CSS class `.wc-block-cart__totals-title`, is using a ``.
3. Create another test page and add the Checkout block.
4. Within the post editor, verify that the `Order summary` element, with the CSS class `.wc-block-components-order-summary`, is using a `` instead of an ``.
5. Go to the frontend and add a product to the cart.
6. On the page with the Cart block, verify that the `CART TOTALS` element, with the CSS class `.wc-block-cart__totals-title`, is using a `` instead of an ``.
7. On the page with the Checkout block, verify that the `Order summary` element, with the CSS class `.wc-block-components-order-summary`, is using a `` instead of an ``.
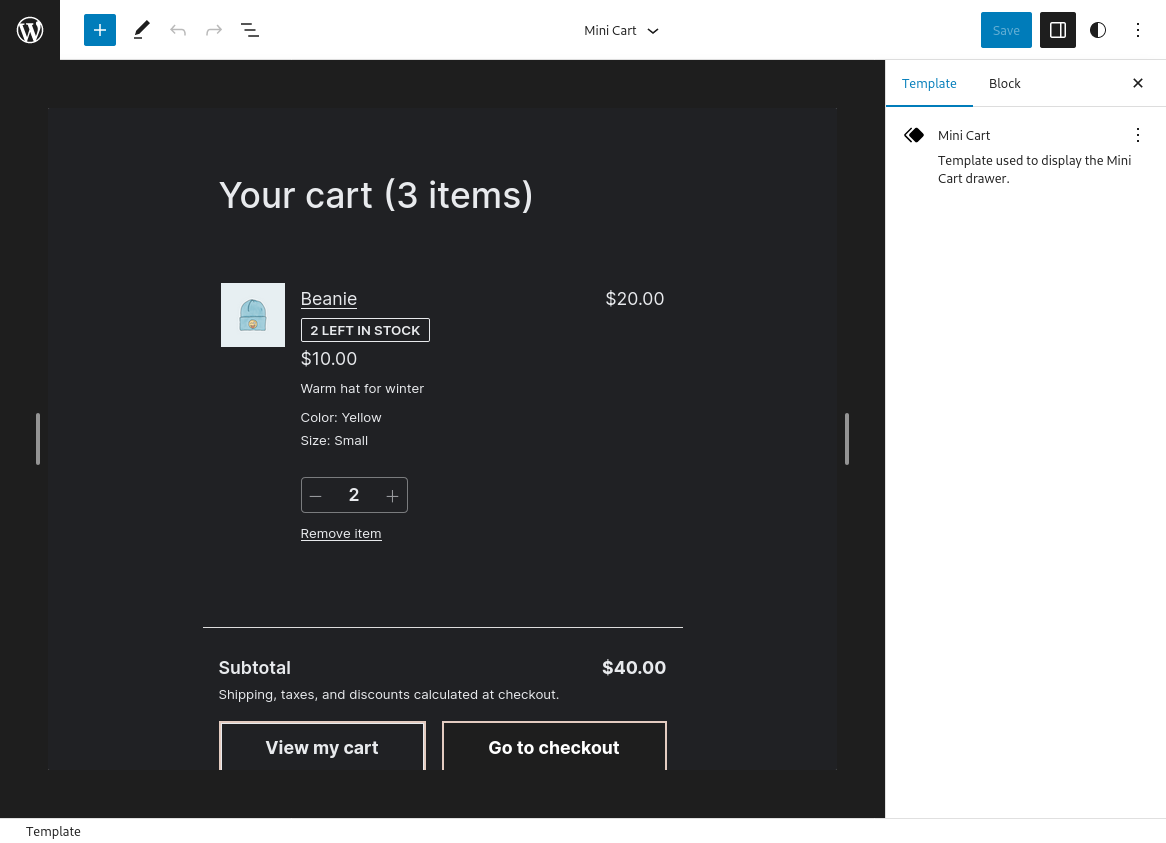
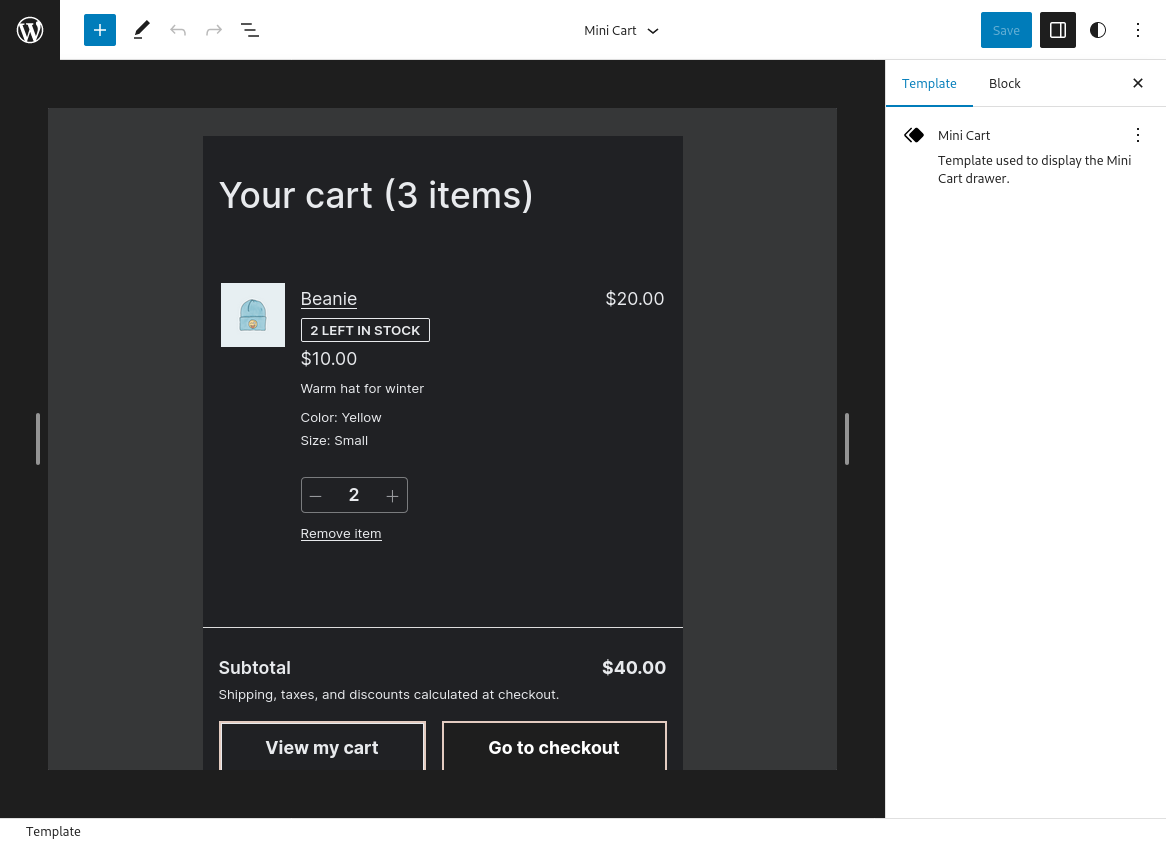
### Mini Cart: Remove excessive margin under cart items ([#9051](https://github.com/woocommerce/woocommerce-blocks/pull/9051))
1. With a block theme, add the Mini Cart block to the header of your page (via Appearance > Editor).
2. In the frontend, open the Mini Cart drawer.
3. Verify the margin between cart items has been reduced (see screenshots).
4. Create a page with the Cart block and verify there are no visual regressions regarding the margins between cart items.
| Before | After |
| ------ | ----- |
|  |  |
### Fix Mini Cart drawer not opening in RTL locales ([#9066](https://github.com/woocommerce/woocommerce-blocks/pull/9066))
1. With a block theme, add the Mini Cart block to the header of your site.
2. In, wp-admin, go to Settings > General and change your store language to a RTL locale, like Arabic (`العربية`).
3. In the frontend, click on the Mini Cart button to open the drawer.
4. Verify the drawer is opened correctly from the left side of the screen.
### Fix JS error visible in the editor caused by Mini Cart Contents buttons ([#9039](https://github.com/woocommerce/woocommerce-blocks/pull/9039))
1. Open the _Console_ of the browser devtools (F12).
2. In the WP admin, go to Appearance > Editor > Template Parts > Mini Cart.
3. Make some edits to the Mini Cart.
4. Verify there is no JS error making reference to `EditableButton`.
_Image of the error that **shouldn't** be visible:_
 ### Mini Cart template part: give user customized template priority over theme template ([#9005](https://github.com/woocommerce/woocommerce-blocks/pull/9005))
0. With [TT3](https://github.com/WordPress/twentytwentythree/), add the Mini Cart block to your store header via Appearance > Editor.
1. Also in Appearance > Editor, make some edits to the Mini Cart template part and save it.
2. Verify the edits are visible in the frontend when you open the Mini Cart drawer.
3. Now, let's imagine TT3 releases an update which introduces a custom Mini Cart template part. To do so, install this ZIP as a theme (it's TT3 with a `parts/mini-cart.html` file): [twentytwentythree.zip](https://github.com/woocommerce/woocommerce-blocks/files/11200877/twentytwentythree.zip).
4. Verify that going to Appearance > Editor > Template Parts > Mini Cart shows the template you modified in step 1 (instead of the theme template).
5. Verify that in the frontend the Mini Cart drawer shows the template you modified in step 1 (instead of the theme template).
In other words, given that you created a custom template in step 1, you should never see the template from the theme.
Editor | Frontend
--- | ---
 | 
### Display Mini Cart overlay in template part editor ([#9014](https://github.com/woocommerce/woocommerce-blocks/pull/9014))
1. Go to Appearance > Editor > Template Parts > Mini Cart.
2. Verify the Mini Cart template part is surrounded by space with a dimmed background (like the frontend overlay).
Before | After
--- | ---
 | 
### Mini cart: allow changing the drawer width ([#8930](https://github.com/woocommerce/woocommerce-blocks/pull/8930))
1. Go to the `Editor`, open the `Header` template, and insert the `Mini Cart` block.
2. Go to the `Editor > Template parts` and open the `Mini Cart` template.
3. Open the `List View` and click on the `Mini Cart Contents` block.
4. In the settings sidebar you should see a new `Dimensions` section with a width selector.
### Mini Cart template part: give user customized template priority over theme template ([#9005](https://github.com/woocommerce/woocommerce-blocks/pull/9005))
0. With [TT3](https://github.com/WordPress/twentytwentythree/), add the Mini Cart block to your store header via Appearance > Editor.
1. Also in Appearance > Editor, make some edits to the Mini Cart template part and save it.
2. Verify the edits are visible in the frontend when you open the Mini Cart drawer.
3. Now, let's imagine TT3 releases an update which introduces a custom Mini Cart template part. To do so, install this ZIP as a theme (it's TT3 with a `parts/mini-cart.html` file): [twentytwentythree.zip](https://github.com/woocommerce/woocommerce-blocks/files/11200877/twentytwentythree.zip).
4. Verify that going to Appearance > Editor > Template Parts > Mini Cart shows the template you modified in step 1 (instead of the theme template).
5. Verify that in the frontend the Mini Cart drawer shows the template you modified in step 1 (instead of the theme template).
In other words, given that you created a custom template in step 1, you should never see the template from the theme.
Editor | Frontend
--- | ---
 | 
### Display Mini Cart overlay in template part editor ([#9014](https://github.com/woocommerce/woocommerce-blocks/pull/9014))
1. Go to Appearance > Editor > Template Parts > Mini Cart.
2. Verify the Mini Cart template part is surrounded by space with a dimmed background (like the frontend overlay).
Before | After
--- | ---
 | 
### Mini cart: allow changing the drawer width ([#8930](https://github.com/woocommerce/woocommerce-blocks/pull/8930))
1. Go to the `Editor`, open the `Header` template, and insert the `Mini Cart` block.
2. Go to the `Editor > Template parts` and open the `Mini Cart` template.
3. Open the `List View` and click on the `Mini Cart Contents` block.
4. In the settings sidebar you should see a new `Dimensions` section with a width selector.
 5. Change the width, see the changes are visible on the editor, and save.
6. Go to the front-end and check the changes are also reflected there.
### [Mini cart] Make the title customizable ([#8905](https://github.com/woocommerce/woocommerce-blocks/pull/8905))
_**Use Case 1**_
1. With the previous version of the plugin (or `trunk` branch), go to the Site Editor and clear the customizations (if any) on the `Mini Cart` template.
3. Add any customization (for example, change the colors of any button).
4. Update the plugin to this PR version (or go to this branch `6259/customize-mini-cart-title`).
5. Go to the frontend, open the `Mini Cart`, and check the title is still visible.
6. Go to the editor and make some customizations to the title. Save.
7. Check the customizations are applied in the editor and in the frontend.
_**Use Case 2**_
1. Go to the Site Editor and clear the customizations (if any) on the `Mini Cart` template.
2. Enter the `Mini Cart` template (wp-admin/site-editor.php?postId=woocommerce%2Fwoocommerce%2F%2Fmini-cart&postType=wp_template_part&canvas=edit).
3. Click on the `Mini Cart` title and make sure the `Mini Cart Title` block has two inner blocks: `Mini Cart Title Label` and `Mini Cart Title Items Counter`.
5. Change the width, see the changes are visible on the editor, and save.
6. Go to the front-end and check the changes are also reflected there.
### [Mini cart] Make the title customizable ([#8905](https://github.com/woocommerce/woocommerce-blocks/pull/8905))
_**Use Case 1**_
1. With the previous version of the plugin (or `trunk` branch), go to the Site Editor and clear the customizations (if any) on the `Mini Cart` template.
3. Add any customization (for example, change the colors of any button).
4. Update the plugin to this PR version (or go to this branch `6259/customize-mini-cart-title`).
5. Go to the frontend, open the `Mini Cart`, and check the title is still visible.
6. Go to the editor and make some customizations to the title. Save.
7. Check the customizations are applied in the editor and in the frontend.
_**Use Case 2**_
1. Go to the Site Editor and clear the customizations (if any) on the `Mini Cart` template.
2. Enter the `Mini Cart` template (wp-admin/site-editor.php?postId=woocommerce%2Fwoocommerce%2F%2Fmini-cart&postType=wp_template_part&canvas=edit).
3. Click on the `Mini Cart` title and make sure the `Mini Cart Title` block has two inner blocks: `Mini Cart Title Label` and `Mini Cart Title Items Counter`.
 5. Select the `Mini Cart Title Label` and add some customizations on the settings sidebar (colors, typography).
6. Select the `Mini Cart Title Items Counter` and add some customizations on the settings sidebar (colors, typography).
7. Check the customizations are applied in the editor and in the frontend.
### Customer Account block: Fix padding for the block in the Editor ([#9009](https://github.com/woocommerce/woocommerce-blocks/pull/9009))
1. Log in to your WordPress dashboard;
2. Go to Appearance > Themes, and select a block theme (for example: Twenty-twenty three);
3. Go to Appearance > Site Editor;
4. Click the Edit button;
5. Click on the "+" icon to add a new block and search for "Customer Account" block in the search bar;
6. Click on the "Customer Account" block to add it to your page or post;
7. On the right side, click on the dropdown menu inside the Icon Options section;
8. Select the "Icon-only" option;
9. Check that the Customer Account block is displayed as an Icon and that it has some spacing around the icon
| Before | After |
| ------ | ----- |
| 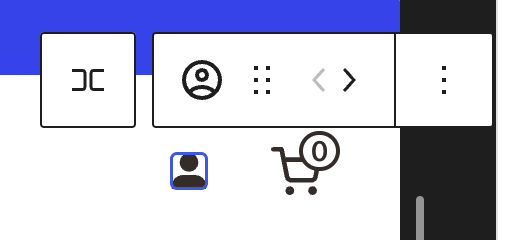 | 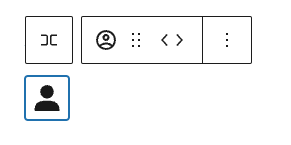 |
### Filter data count mismatch > Create the get_attribute_and_meta_counts method ([#8599](https://github.com/woocommerce/woocommerce-blocks/pull/8599))
1. With a block theme such as twenty-twenty-three enabled, head over to Edit Site > Templates > Product Catalog > Edit
2. Add the Products (Beta) block
3. Add the Filter by attribute block
4. Save and head over to your shop page
5. Ensure the filter is properly rendered, and when filtering the products, the counts always match the displayed results
6. Test all 7 combinations of filters as described and demonstrated in the description of this PR, ensure all of them work as expected.
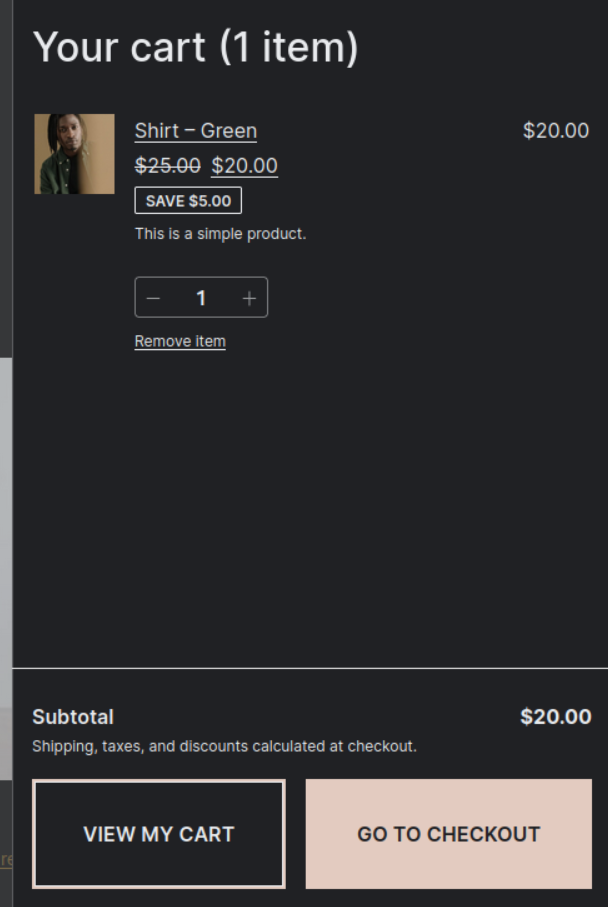
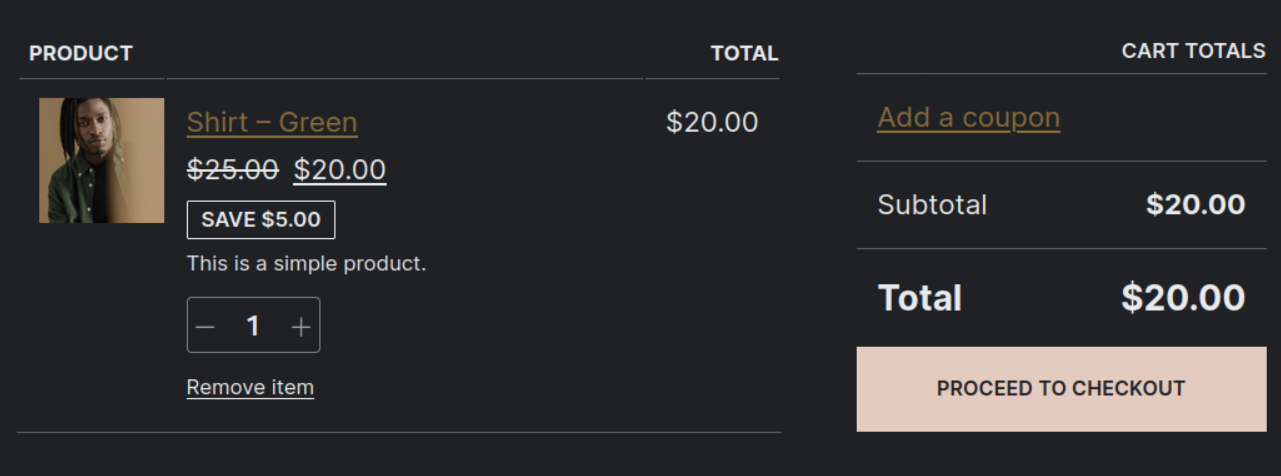
### Create specific stylesheet for CartLineItemsTable component ([#8967](https://github.com/woocommerce/woocommerce-blocks/pull/8967))
0. Add the Mini Cart block to the header of your store (via Appearance > Editor).
1. Add a product to your cart.
2. Open the Mini Cart drawer and verify there are no styling regressions and the list of items looks correctly.
3. Open a page with the Cart block and verify there are no styling regressions and the list of items looks correctly.
Mini Cart | Cart
--- | ---
 | 
5. Select the `Mini Cart Title Label` and add some customizations on the settings sidebar (colors, typography).
6. Select the `Mini Cart Title Items Counter` and add some customizations on the settings sidebar (colors, typography).
7. Check the customizations are applied in the editor and in the frontend.
### Customer Account block: Fix padding for the block in the Editor ([#9009](https://github.com/woocommerce/woocommerce-blocks/pull/9009))
1. Log in to your WordPress dashboard;
2. Go to Appearance > Themes, and select a block theme (for example: Twenty-twenty three);
3. Go to Appearance > Site Editor;
4. Click the Edit button;
5. Click on the "+" icon to add a new block and search for "Customer Account" block in the search bar;
6. Click on the "Customer Account" block to add it to your page or post;
7. On the right side, click on the dropdown menu inside the Icon Options section;
8. Select the "Icon-only" option;
9. Check that the Customer Account block is displayed as an Icon and that it has some spacing around the icon
| Before | After |
| ------ | ----- |
|  |  |
### Filter data count mismatch > Create the get_attribute_and_meta_counts method ([#8599](https://github.com/woocommerce/woocommerce-blocks/pull/8599))
1. With a block theme such as twenty-twenty-three enabled, head over to Edit Site > Templates > Product Catalog > Edit
2. Add the Products (Beta) block
3. Add the Filter by attribute block
4. Save and head over to your shop page
5. Ensure the filter is properly rendered, and when filtering the products, the counts always match the displayed results
6. Test all 7 combinations of filters as described and demonstrated in the description of this PR, ensure all of them work as expected.
### Create specific stylesheet for CartLineItemsTable component ([#8967](https://github.com/woocommerce/woocommerce-blocks/pull/8967))
0. Add the Mini Cart block to the header of your store (via Appearance > Editor).
1. Add a product to your cart.
2. Open the Mini Cart drawer and verify there are no styling regressions and the list of items looks correctly.
3. Open a page with the Cart block and verify there are no styling regressions and the list of items looks correctly.
Mini Cart | Cart
--- | ---
 | 
`.
5. Go to the frontend and add a product to the cart.
6. On the page with the Cart block, verify that the `CART TOTALS` element, with the CSS class `.wc-block-cart__totals-title`, is using a `` instead of an ``.
7. On the page with the Checkout block, verify that the `Order summary` element, with the CSS class `.wc-block-components-order-summary`, is using a `` instead of an ``.
### Mini Cart: Remove excessive margin under cart items ([#9051](https://github.com/woocommerce/woocommerce-blocks/pull/9051))
1. With a block theme, add the Mini Cart block to the header of your page (via Appearance > Editor).
2. In the frontend, open the Mini Cart drawer.
3. Verify the margin between cart items has been reduced (see screenshots).
4. Create a page with the Cart block and verify there are no visual regressions regarding the margins between cart items.
| Before | After |
| ------ | ----- |
|  |  |
### Fix Mini Cart drawer not opening in RTL locales ([#9066](https://github.com/woocommerce/woocommerce-blocks/pull/9066))
1. With a block theme, add the Mini Cart block to the header of your site.
2. In, wp-admin, go to Settings > General and change your store language to a RTL locale, like Arabic (`العربية`).
3. In the frontend, click on the Mini Cart button to open the drawer.
4. Verify the drawer is opened correctly from the left side of the screen.
### Fix JS error visible in the editor caused by Mini Cart Contents buttons ([#9039](https://github.com/woocommerce/woocommerce-blocks/pull/9039))
1. Open the _Console_ of the browser devtools (F12).
2. In the WP admin, go to Appearance > Editor > Template Parts > Mini Cart.
3. Make some edits to the Mini Cart.
4. Verify there is no JS error making reference to `EditableButton`.
_Image of the error that **shouldn't** be visible:_
### Mini Cart template part: give user customized template priority over theme template ([#9005](https://github.com/woocommerce/woocommerce-blocks/pull/9005))
0. With [TT3](https://github.com/WordPress/twentytwentythree/), add the Mini Cart block to your store header via Appearance > Editor.
1. Also in Appearance > Editor, make some edits to the Mini Cart template part and save it.
2. Verify the edits are visible in the frontend when you open the Mini Cart drawer.
3. Now, let's imagine TT3 releases an update which introduces a custom Mini Cart template part. To do so, install this ZIP as a theme (it's TT3 with a `parts/mini-cart.html` file): [twentytwentythree.zip](https://github.com/woocommerce/woocommerce-blocks/files/11200877/twentytwentythree.zip).
4. Verify that going to Appearance > Editor > Template Parts > Mini Cart shows the template you modified in step 1 (instead of the theme template).
5. Verify that in the frontend the Mini Cart drawer shows the template you modified in step 1 (instead of the theme template).
In other words, given that you created a custom template in step 1, you should never see the template from the theme.
Editor | Frontend
--- | ---
 | 
### Display Mini Cart overlay in template part editor ([#9014](https://github.com/woocommerce/woocommerce-blocks/pull/9014))
1. Go to Appearance > Editor > Template Parts > Mini Cart.
2. Verify the Mini Cart template part is surrounded by space with a dimmed background (like the frontend overlay).
Before | After
--- | ---
 | 
### Mini cart: allow changing the drawer width ([#8930](https://github.com/woocommerce/woocommerce-blocks/pull/8930))
1. Go to the `Editor`, open the `Header` template, and insert the `Mini Cart` block.
2. Go to the `Editor > Template parts` and open the `Mini Cart` template.
3. Open the `List View` and click on the `Mini Cart Contents` block.
4. In the settings sidebar you should see a new `Dimensions` section with a width selector.
5. Change the width, see the changes are visible on the editor, and save.
6. Go to the front-end and check the changes are also reflected there.
### [Mini cart] Make the title customizable ([#8905](https://github.com/woocommerce/woocommerce-blocks/pull/8905))
_**Use Case 1**_
1. With the previous version of the plugin (or `trunk` branch), go to the Site Editor and clear the customizations (if any) on the `Mini Cart` template.
3. Add any customization (for example, change the colors of any button).
4. Update the plugin to this PR version (or go to this branch `6259/customize-mini-cart-title`).
5. Go to the frontend, open the `Mini Cart`, and check the title is still visible.
6. Go to the editor and make some customizations to the title. Save.
7. Check the customizations are applied in the editor and in the frontend.
_**Use Case 2**_
1. Go to the Site Editor and clear the customizations (if any) on the `Mini Cart` template.
2. Enter the `Mini Cart` template (wp-admin/site-editor.php?postId=woocommerce%2Fwoocommerce%2F%2Fmini-cart&postType=wp_template_part&canvas=edit).
3. Click on the `Mini Cart` title and make sure the `Mini Cart Title` block has two inner blocks: `Mini Cart Title Label` and `Mini Cart Title Items Counter`.
5. Select the `Mini Cart Title Label` and add some customizations on the settings sidebar (colors, typography).
6. Select the `Mini Cart Title Items Counter` and add some customizations on the settings sidebar (colors, typography).
7. Check the customizations are applied in the editor and in the frontend.
### Customer Account block: Fix padding for the block in the Editor ([#9009](https://github.com/woocommerce/woocommerce-blocks/pull/9009))
1. Log in to your WordPress dashboard;
2. Go to Appearance > Themes, and select a block theme (for example: Twenty-twenty three);
3. Go to Appearance > Site Editor;
4. Click the Edit button;
5. Click on the "+" icon to add a new block and search for "Customer Account" block in the search bar;
6. Click on the "Customer Account" block to add it to your page or post;
7. On the right side, click on the dropdown menu inside the Icon Options section;
8. Select the "Icon-only" option;
9. Check that the Customer Account block is displayed as an Icon and that it has some spacing around the icon
| Before | After |
| ------ | ----- |
|  |  |
### Filter data count mismatch > Create the get_attribute_and_meta_counts method ([#8599](https://github.com/woocommerce/woocommerce-blocks/pull/8599))
1. With a block theme such as twenty-twenty-three enabled, head over to Edit Site > Templates > Product Catalog > Edit
2. Add the Products (Beta) block
3. Add the Filter by attribute block
4. Save and head over to your shop page
5. Ensure the filter is properly rendered, and when filtering the products, the counts always match the displayed results
6. Test all 7 combinations of filters as described and demonstrated in the description of this PR, ensure all of them work as expected.
### Create specific stylesheet for CartLineItemsTable component ([#8967](https://github.com/woocommerce/woocommerce-blocks/pull/8967))
0. Add the Mini Cart block to the header of your store (via Appearance > Editor).
1. Add a product to your cart.
2. Open the Mini Cart drawer and verify there are no styling regressions and the list of items looks correctly.
3. Open a page with the Cart block and verify there are no styling regressions and the list of items looks correctly.
Mini Cart | Cart
--- | ---
 | 
` instead of an ``.
### Mini Cart: Remove excessive margin under cart items ([#9051](https://github.com/woocommerce/woocommerce-blocks/pull/9051))
1. With a block theme, add the Mini Cart block to the header of your page (via Appearance > Editor).
2. In the frontend, open the Mini Cart drawer.
3. Verify the margin between cart items has been reduced (see screenshots).
4. Create a page with the Cart block and verify there are no visual regressions regarding the margins between cart items.
| Before | After |
| ------ | ----- |
|  |  |
### Fix Mini Cart drawer not opening in RTL locales ([#9066](https://github.com/woocommerce/woocommerce-blocks/pull/9066))
1. With a block theme, add the Mini Cart block to the header of your site.
2. In, wp-admin, go to Settings > General and change your store language to a RTL locale, like Arabic (`العربية`).
3. In the frontend, click on the Mini Cart button to open the drawer.
4. Verify the drawer is opened correctly from the left side of the screen.
### Fix JS error visible in the editor caused by Mini Cart Contents buttons ([#9039](https://github.com/woocommerce/woocommerce-blocks/pull/9039))
1. Open the _Console_ of the browser devtools (F12).
2. In the WP admin, go to Appearance > Editor > Template Parts > Mini Cart.
3. Make some edits to the Mini Cart.
4. Verify there is no JS error making reference to `EditableButton`.
_Image of the error that **shouldn't** be visible:_