# Testing notes and ZIP for release 9.9.0
Zip file for testing: [woocommerce-gutenberg-products-block.zip](https://github.com/woocommerce/woocommerce-blocks/files/11113569/woocommerce-gutenberg-products-block.zip)
## WooCommerce Core
### Move Related Products's notice component to the Inspector Control section. ([8843](https://github.com/woocommerce/woocommerce-blocks/pull/8843))
1. Go to Appearance > Themes and activate a Blockfied theme, such as: Twenty-twenty Three;
2. After the theme is activated, go to Appearance > Editor (Beta);
3. Inside the Design section, click on Templates;
4. Select the Single Product template;
5. On the top left of the page, click on the Edit button;
6. Using the Block Inserter, type: Related Products, and add the block to the Site Editor;
7. Click on the Save button;
8. Check that the Skeleton component appears above the Add To Cart button.
| Before | After |
| ------ | ----- |
|  |
|  |
### Product SKU Block: Don't render the prefix when the SKU isn't defined. ([8837](https://github.com/woocommerce/woocommerce-blocks/pull/8837))
1. Create a post/page.
2. Add the `Products` block.
3. Inside the `Products` block, add the Product SKU block.
4. Save the post/page.
5. Edit a Product that will be visible in `Products` block.
6. Scroll down until you see the “Inventory” section. In that section, it is visible a field labeled “SKU.” Remove the SKU in that field, and then click on the “Update” button at the bottom of the page.
7. On the front end, visit the saved post/page and check the `Products` block.
8. Ensure that the edited product doesn't have the SKU prefix visible.
| Before | After |
|--------|--------|
|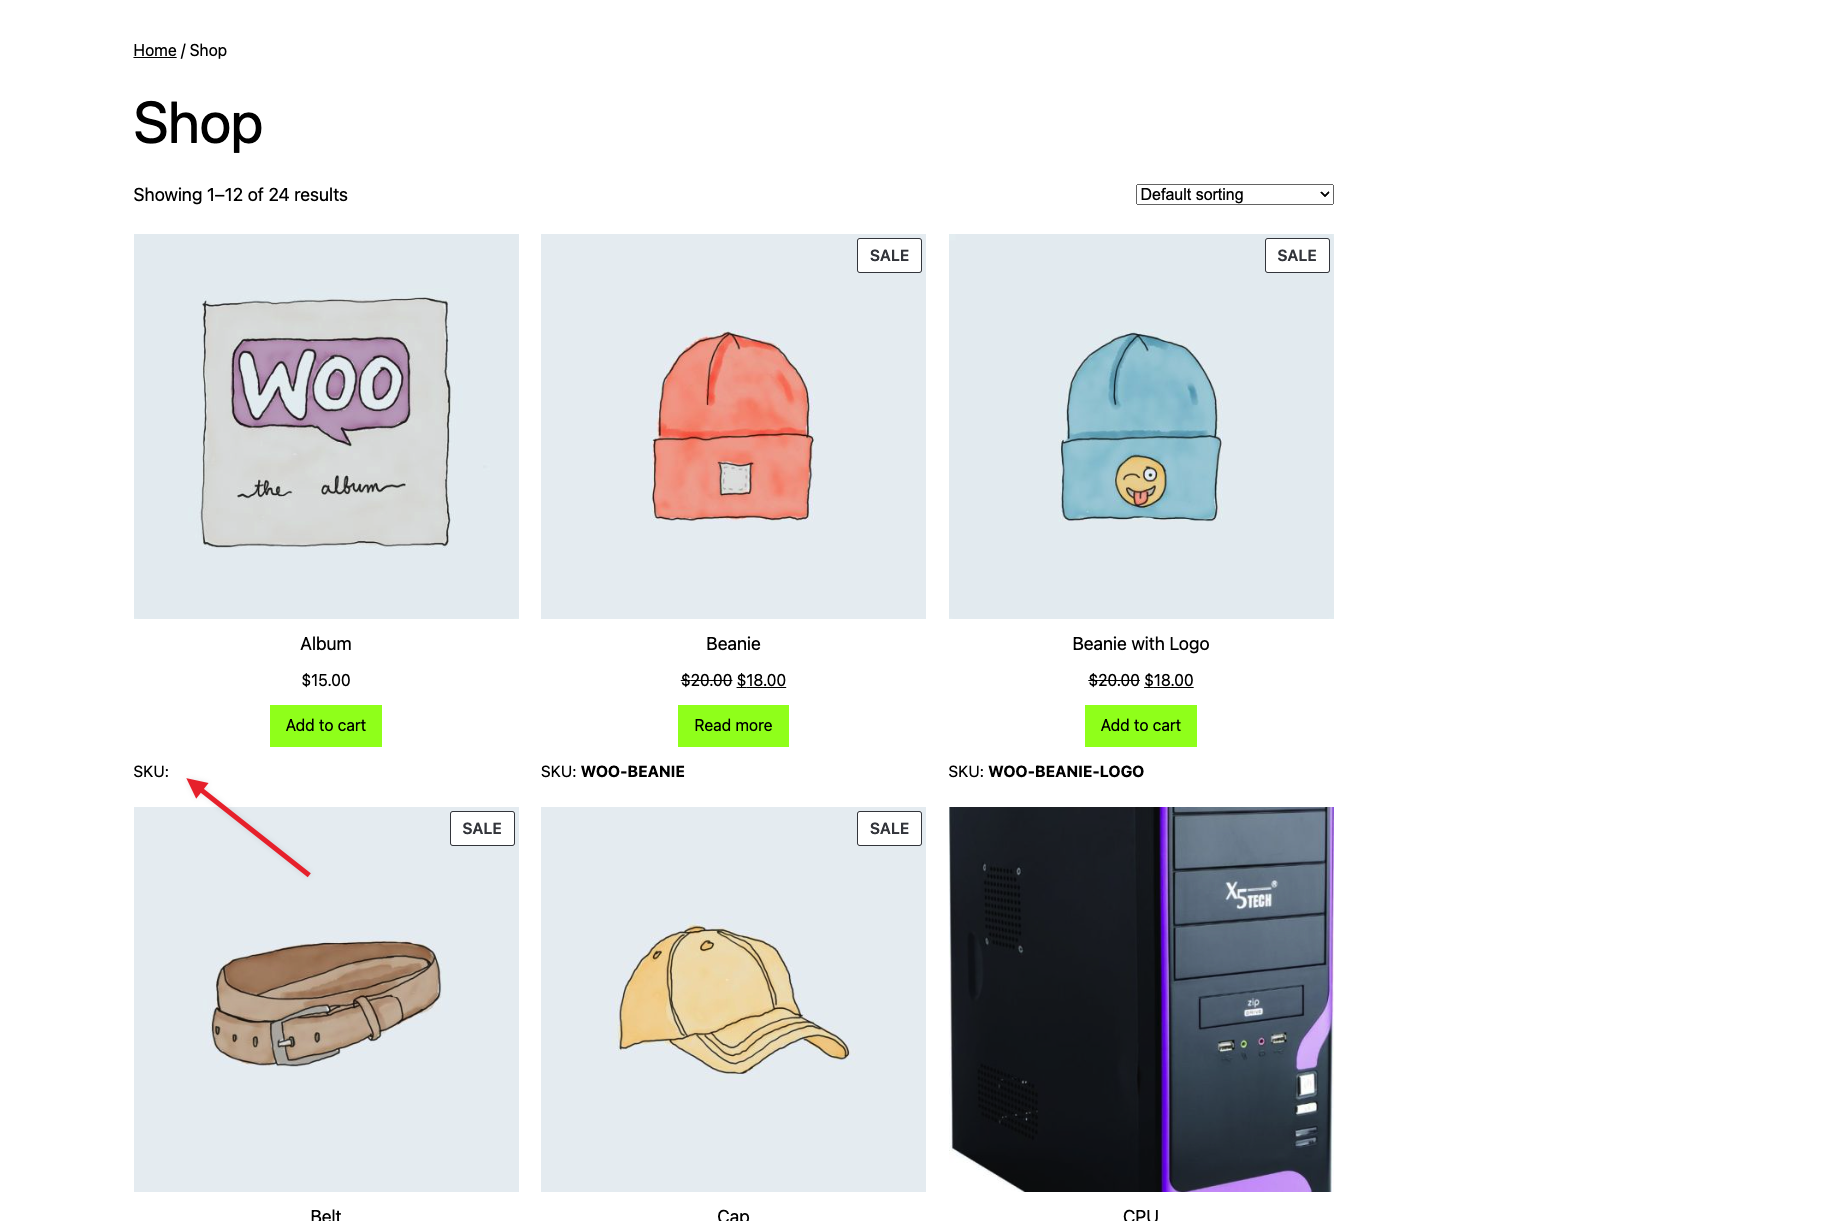||
### Mini-cart: Add the option to change the style between 'Outline' and 'Fill' in all the buttons. ([8835](https://github.com/woocommerce/woocommerce-blocks/pull/8835))
1. Add the `Mini cart` block to the header template of your site.
2. Go to the `Site Editor` and edit the `Mini cart` template part.
3. Open the `List view` and select the `Empty Mini Cart view`.
4. Click on the `Start shopping` button, check that you can change the button style between `Default` and `Outline` in the sidebar settings and change it from the default and save.
6. Go to the frontend and check the button has the style you just picked on the Site editor.
7. Repeat the same steps for the `Filled Mini Cart view` and the `View my cart` and the `Go to checkout` buttons.
### Product SKU: Make the block focusable in editor. ([8804](https://github.com/woocommerce/woocommerce-blocks/pull/8804))
1. Create a new post
2. Add Products block
3. Add Product SKU block to Products
4. Hover and click on the product
5. **Expected:** Product SKU can be focused on and contextual menu is displayed. Block can be moved up and down to switch places with other blocks.
| Before | After |
| ------ | ----- |
|
|
### Product SKU Block: Don't render the prefix when the SKU isn't defined. ([8837](https://github.com/woocommerce/woocommerce-blocks/pull/8837))
1. Create a post/page.
2. Add the `Products` block.
3. Inside the `Products` block, add the Product SKU block.
4. Save the post/page.
5. Edit a Product that will be visible in `Products` block.
6. Scroll down until you see the “Inventory” section. In that section, it is visible a field labeled “SKU.” Remove the SKU in that field, and then click on the “Update” button at the bottom of the page.
7. On the front end, visit the saved post/page and check the `Products` block.
8. Ensure that the edited product doesn't have the SKU prefix visible.
| Before | After |
|--------|--------|
|||
### Mini-cart: Add the option to change the style between 'Outline' and 'Fill' in all the buttons. ([8835](https://github.com/woocommerce/woocommerce-blocks/pull/8835))
1. Add the `Mini cart` block to the header template of your site.
2. Go to the `Site Editor` and edit the `Mini cart` template part.
3. Open the `List view` and select the `Empty Mini Cart view`.
4. Click on the `Start shopping` button, check that you can change the button style between `Default` and `Outline` in the sidebar settings and change it from the default and save.
6. Go to the frontend and check the button has the style you just picked on the Site editor.
7. Repeat the same steps for the `Filled Mini Cart view` and the `View my cart` and the `Go to checkout` buttons.
### Product SKU: Make the block focusable in editor. ([8804](https://github.com/woocommerce/woocommerce-blocks/pull/8804))
1. Create a new post
2. Add Products block
3. Add Product SKU block to Products
4. Hover and click on the product
5. **Expected:** Product SKU can be focused on and contextual menu is displayed. Block can be moved up and down to switch places with other blocks.
| Before | After |
| ------ | ----- |
|  |
|  |
### Add style to the `Mini Cart` buttons. ([8776](https://github.com/woocommerce/woocommerce-blocks/pull/8776))
1. Add the `Mini cart` block to the header template of your site.
2. Go to the `Site Editor` and edit the `Mini cart` template part.
3. Open the `List view` and select the `Filled Mini Cart view`.
4. Click on the `View my cart` button and check that you can change the background and text colors of the button.
5. Click on the `Go to checkout` button and check that you can change the background and text colors of the button.
7. Save, go to the frontend, and check the buttons have the colors you just picked on the Site editor.
### Add the ability to change the background and text colors of the Mini Cart block "Start shopping" button. ([8766](https://github.com/woocommerce/woocommerce-blocks/pull/8766))
1. Add the `Mini cart` block to the header template of your site.
2. Go to the `Site Editor` and edit the `Mini cart` template part.
3. Open the `List view` and select the `Empty Mini Cart view`.
4. Click on the `Start shopping` button and check that you can change the background and text colors of the button.
5. Change both of them and save.
6. Go to the frontend and check the button has the colors you just picked on the Site editor.
### Mini-cart: Add setting to not render the block on the cart & checkout pages. ([8700](https://github.com/woocommerce/woocommerce-blocks/pull/8700))
#### Site Editor
1. Go to the Site Editor > Template parts and edit the header template to add the `Mini Cart` block. Save.
2. Edit the block and make sure you see the new setting:
|
### Add style to the `Mini Cart` buttons. ([8776](https://github.com/woocommerce/woocommerce-blocks/pull/8776))
1. Add the `Mini cart` block to the header template of your site.
2. Go to the `Site Editor` and edit the `Mini cart` template part.
3. Open the `List view` and select the `Filled Mini Cart view`.
4. Click on the `View my cart` button and check that you can change the background and text colors of the button.
5. Click on the `Go to checkout` button and check that you can change the background and text colors of the button.
7. Save, go to the frontend, and check the buttons have the colors you just picked on the Site editor.
### Add the ability to change the background and text colors of the Mini Cart block "Start shopping" button. ([8766](https://github.com/woocommerce/woocommerce-blocks/pull/8766))
1. Add the `Mini cart` block to the header template of your site.
2. Go to the `Site Editor` and edit the `Mini cart` template part.
3. Open the `List view` and select the `Empty Mini Cart view`.
4. Click on the `Start shopping` button and check that you can change the background and text colors of the button.
5. Change both of them and save.
6. Go to the frontend and check the button has the colors you just picked on the Site editor.
### Mini-cart: Add setting to not render the block on the cart & checkout pages. ([8700](https://github.com/woocommerce/woocommerce-blocks/pull/8700))
#### Site Editor
1. Go to the Site Editor > Template parts and edit the header template to add the `Mini Cart` block. Save.
2. Edit the block and make sure you see the new setting:
 3. Make sure the default option is `Hide`.
4. In the store, go to the Cart page and make sure the `Mini Cart` is rendered but invisible. Repeat but for the Checkout page.
5. Go back to the Site Editor, change the `Mini Cart` setting to `Remove`, and save.
6. In the store, go to the Cart page and make sure the `Mini Cart` markup is not rendered at all. Repeat but for the Checkout page.
#### Post/page
1. Create a new post or page.
2. Insert the `Mini Cart`.
3. Make sure the new `Mini Cart in cart and checkout pages` setting does not appear.
### Ensure shipping rates do not show in the Checkout block if the "Hide shipping costs until an address is entered option is selected". ([8682](https://github.com/woocommerce/woocommerce-blocks/pull/8682))
1. Go to `WooCommerce -> Settings -> Shipping -> Local Pickup`, enable Local Pickup and add a location.
2. Go to the Checkout block in the Page editor, click on the Shipping Options block - in the block sidebar, enable the `Hide shipping costs until an address is entered` option.
3. In WooCommerce -> Settings -> General change `Default customer location` to `No location by default`.
4. In an incognito window, add an item to your cart and go to the Checkout block.
5. Ensure no shipping rates are shown, and ensure the "Shipping" button for method selection says `calculated with an address`
6. Enter an address (one that you have rates set up for) - as you fill in the address, be sure the rates don't populate until it's completely filled in. (address 1, city, state, country, postcode).
7. Ensure you can change rates etc.
8. Disable the `Hide shipping costs until an address is entered` in the Page editor and ensure the rates show as usual as soon as the country/state are entered and the rest of the address is empty. (note you should enter a country that you have rates for!).
### Move option to hide shipping costs until an address is entered to the Checkout block. ([8680](https://github.com/woocommerce/woocommerce-blocks/pull/8680))
1. Go to WooCommerce -> Settings -> Shipping -> Local Pickup, enable Local Pickup and add a location.
2. Go to the Checkout block in the Page editor. Select the `Shipping Method` block
3. See the `Hide shipping costs until an address is entered` option in the block sidebar.
4. Toggle it and ensure it works. Remember the value you toggled it to.
5. Select the `Shipping options` block, see the same option. Ensure the value is the same as what it was in step 4.
6. If the option is `true` then you should see the text `Shipping options will be displayed here after entering your full shipping address.` instead of shipping options.
7. Toggle the option and ensure the inner block changes to either shipping options or the text.
8. Go back to the `Shipping Method` block and toggle the option there. View the `Shipping options` block while toggling and ensure it changes.
| Before | After |
| ------ | ----- |
|
3. Make sure the default option is `Hide`.
4. In the store, go to the Cart page and make sure the `Mini Cart` is rendered but invisible. Repeat but for the Checkout page.
5. Go back to the Site Editor, change the `Mini Cart` setting to `Remove`, and save.
6. In the store, go to the Cart page and make sure the `Mini Cart` markup is not rendered at all. Repeat but for the Checkout page.
#### Post/page
1. Create a new post or page.
2. Insert the `Mini Cart`.
3. Make sure the new `Mini Cart in cart and checkout pages` setting does not appear.
### Ensure shipping rates do not show in the Checkout block if the "Hide shipping costs until an address is entered option is selected". ([8682](https://github.com/woocommerce/woocommerce-blocks/pull/8682))
1. Go to `WooCommerce -> Settings -> Shipping -> Local Pickup`, enable Local Pickup and add a location.
2. Go to the Checkout block in the Page editor, click on the Shipping Options block - in the block sidebar, enable the `Hide shipping costs until an address is entered` option.
3. In WooCommerce -> Settings -> General change `Default customer location` to `No location by default`.
4. In an incognito window, add an item to your cart and go to the Checkout block.
5. Ensure no shipping rates are shown, and ensure the "Shipping" button for method selection says `calculated with an address`
6. Enter an address (one that you have rates set up for) - as you fill in the address, be sure the rates don't populate until it's completely filled in. (address 1, city, state, country, postcode).
7. Ensure you can change rates etc.
8. Disable the `Hide shipping costs until an address is entered` in the Page editor and ensure the rates show as usual as soon as the country/state are entered and the rest of the address is empty. (note you should enter a country that you have rates for!).
### Move option to hide shipping costs until an address is entered to the Checkout block. ([8680](https://github.com/woocommerce/woocommerce-blocks/pull/8680))
1. Go to WooCommerce -> Settings -> Shipping -> Local Pickup, enable Local Pickup and add a location.
2. Go to the Checkout block in the Page editor. Select the `Shipping Method` block
3. See the `Hide shipping costs until an address is entered` option in the block sidebar.
4. Toggle it and ensure it works. Remember the value you toggled it to.
5. Select the `Shipping options` block, see the same option. Ensure the value is the same as what it was in step 4.
6. If the option is `true` then you should see the text `Shipping options will be displayed here after entering your full shipping address.` instead of shipping options.
7. Toggle the option and ensure the inner block changes to either shipping options or the text.
8. Go back to the `Shipping Method` block and toggle the option there. View the `Shipping options` block while toggling and ensure it changes.
| Before | After |
| ------ | ----- |
|  |
|  |
### Remove certain Shipping settings from WooCommerce -> Settings -> Shipping -> Shipping Options when using the Cart or Checkout blocks, these have been moved to setting on the blocks. ([8679](https://github.com/woocommerce/woocommerce-blocks/pull/8679))
1. Go to `WooCommerce -> Settings -> Advanced` - set the Cart and Checkout pages to pages containing the **shortcode** cart/checkout experience. Save.
2. Go to `WooCommerce -> Settings -> Shipping -> Shipping Options` - observe the two options, `Hide shipping costs until an address is entered` and `Enable the shipping calculator on the cart page`.
3. Go to `WooCommerce -> Settings -> Advanced` - set the **Cart** page to one containing the **Cart Block**. Save.
4. Go to `WooCommerce -> Settings -> Shipping -> Shipping Options` - observe that where the two options were in step 2, only, `Hide shipping costs until an address is entered` remains. Ensure it displays correctly and looks OK.
5. Go to `WooCommerce -> Settings -> Advanced` - set the **Checkout** page to one containing the **Checkout Block**. Save.
6. Go to `WooCommerce -> Settings -> Shipping -> Shipping Options` - observe that where the two options were in step 2 nothing appears.
7. Go to `WooCommerce -> Settings -> Advanced` - set the **Cart** page to one containing the **Shortcode cart**. Save.
8. Go to `WooCommerce -> Settings -> Shipping -> Shipping Options` - observe that where the two options were in step 2 only `Enable the shipping calculator on the cart page` appears. Ensure it displays correctly.
Expected results
| | Shortcode Cart | Block Cart |
|-|----------------|------------|
| **Shortcode Checkout** |
|
### Remove certain Shipping settings from WooCommerce -> Settings -> Shipping -> Shipping Options when using the Cart or Checkout blocks, these have been moved to setting on the blocks. ([8679](https://github.com/woocommerce/woocommerce-blocks/pull/8679))
1. Go to `WooCommerce -> Settings -> Advanced` - set the Cart and Checkout pages to pages containing the **shortcode** cart/checkout experience. Save.
2. Go to `WooCommerce -> Settings -> Shipping -> Shipping Options` - observe the two options, `Hide shipping costs until an address is entered` and `Enable the shipping calculator on the cart page`.
3. Go to `WooCommerce -> Settings -> Advanced` - set the **Cart** page to one containing the **Cart Block**. Save.
4. Go to `WooCommerce -> Settings -> Shipping -> Shipping Options` - observe that where the two options were in step 2, only, `Hide shipping costs until an address is entered` remains. Ensure it displays correctly and looks OK.
5. Go to `WooCommerce -> Settings -> Advanced` - set the **Checkout** page to one containing the **Checkout Block**. Save.
6. Go to `WooCommerce -> Settings -> Shipping -> Shipping Options` - observe that where the two options were in step 2 nothing appears.
7. Go to `WooCommerce -> Settings -> Advanced` - set the **Cart** page to one containing the **Shortcode cart**. Save.
8. Go to `WooCommerce -> Settings -> Shipping -> Shipping Options` - observe that where the two options were in step 2 only `Enable the shipping calculator on the cart page` appears. Ensure it displays correctly.
Expected results
| | Shortcode Cart | Block Cart |
|-|----------------|------------|
| **Shortcode Checkout** |  |
|  |
| **Block Checkout** |
|
| **Block Checkout** |  |
|  |
### Add spacing between Mini Cart title and products list when scrolled. ([8676](https://github.com/woocommerce/woocommerce-blocks/pull/8676))
1. With a block theme, add the Mini Cart block to the header of your site.
2. Add many products to your cart.
3. Click on the Mini Cart button to open the drawer.
4. Scroll down the list of products in the Mini Cart drawer and verify there is some space between the title and product list.
5. Go to Appearance > Editor > Template parts and edit the Mini Cart template part.
6. Change the background color to something different.
7. Repeat steps 3 and 4 and verify the space between the Mini Cart title and the products list honors that color.
Before | After | After (with custom background color)
--- | --- | ---
 |  | 
### Add new ExperimentalOrderLocalPickupPackages Slot/Fill. ([8636](https://github.com/woocommerce/woocommerce-blocks/pull/8636))
1. Go to WooCommerce -> Settings -> Shipping -> Local Pickup and activate Local Pickup. Ensure you have added a couple of locations.
2. Add an item to your cart and go to the Checkout block.
3. Select Local Pickup and ensure the options you set up in step 1 are visible.
### Add client side postcode validation. ([8503](https://github.com/woocommerce/woocommerce-blocks/pull/8503))
1. Add a product to the Cart and go to the Checkout block page.
2. Select United Kingdom (UK) as country.
3. Verify that the postcode `AA9A 9AA` passes the validation.
4. Verify that the postcode `9999 999` fails the validation.
5. Verify that it's not possible to have spaces before the postcode, .e.g. ` AA9A 9AA`.
6. Verify that lowercase letters, e.g. `aa9A 9aa`, are automatically converted to uppercase letters, e.g. `AA9A 9AA`.
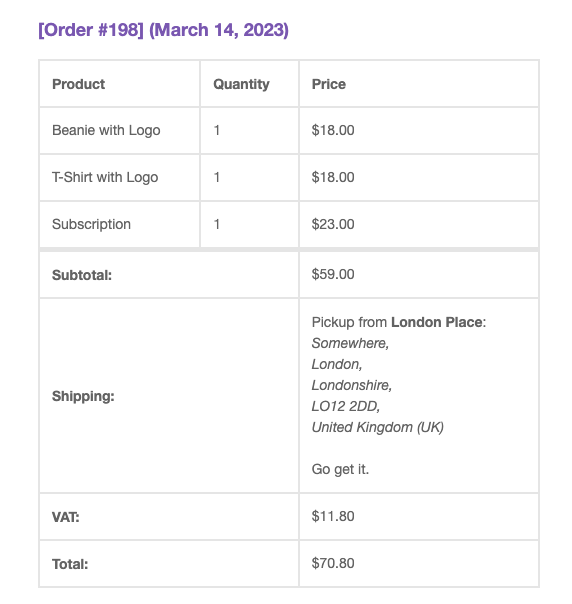
### Display pickup location details in order confirmations. ([8727](https://github.com/woocommerce/woocommerce-blocks/pull/8727))
1. Place an order using the Checkout block, selecting Local Pickup as your shipping method.
2. Check the order confirmation page shows pickup details.
3. Confirm the order confirmation page hides the "shipping address".
4. Check the order email confirmation shows the same pickup details.
### Local Pickup: Merge country and state into same field in location modal. ([8408](https://github.com/woocommerce/woocommerce-blocks/pull/8408))
1. `Enable local pickup` in `WooCommerce -> Settings -> Shipping -> Local pickup -> General`.
2. Under `Pickup locations`, click on `Add pickup location`. The `Pickup location` modal should open
3. Choose a country with a state. Ensure it's displayed in one field
4. Fill in the other fields of the modal form, click on `done`, then save changes
5. Go to your store, add a product to the cart, then go to the Checkout Block page
6. Under the `Shipping method` section, select `Local Pickup`
7. Ensure the correct country and state you previously selected are correctly showing under `Pickup options`
8. Go back to the local pickup settings from step 1. Follow the same steps from 2 to 7, but in step 3, choose a country without a state (e.g., Cameroon) and ensure that the `State` text field is displayed. Fill in the form and continue with the rest of the instructions.
| Before | After |
| ------ | ----- |
|
|
### Add spacing between Mini Cart title and products list when scrolled. ([8676](https://github.com/woocommerce/woocommerce-blocks/pull/8676))
1. With a block theme, add the Mini Cart block to the header of your site.
2. Add many products to your cart.
3. Click on the Mini Cart button to open the drawer.
4. Scroll down the list of products in the Mini Cart drawer and verify there is some space between the title and product list.
5. Go to Appearance > Editor > Template parts and edit the Mini Cart template part.
6. Change the background color to something different.
7. Repeat steps 3 and 4 and verify the space between the Mini Cart title and the products list honors that color.
Before | After | After (with custom background color)
--- | --- | ---
 |  | 
### Add new ExperimentalOrderLocalPickupPackages Slot/Fill. ([8636](https://github.com/woocommerce/woocommerce-blocks/pull/8636))
1. Go to WooCommerce -> Settings -> Shipping -> Local Pickup and activate Local Pickup. Ensure you have added a couple of locations.
2. Add an item to your cart and go to the Checkout block.
3. Select Local Pickup and ensure the options you set up in step 1 are visible.
### Add client side postcode validation. ([8503](https://github.com/woocommerce/woocommerce-blocks/pull/8503))
1. Add a product to the Cart and go to the Checkout block page.
2. Select United Kingdom (UK) as country.
3. Verify that the postcode `AA9A 9AA` passes the validation.
4. Verify that the postcode `9999 999` fails the validation.
5. Verify that it's not possible to have spaces before the postcode, .e.g. ` AA9A 9AA`.
6. Verify that lowercase letters, e.g. `aa9A 9aa`, are automatically converted to uppercase letters, e.g. `AA9A 9AA`.
### Display pickup location details in order confirmations. ([8727](https://github.com/woocommerce/woocommerce-blocks/pull/8727))
1. Place an order using the Checkout block, selecting Local Pickup as your shipping method.
2. Check the order confirmation page shows pickup details.
3. Confirm the order confirmation page hides the "shipping address".
4. Check the order email confirmation shows the same pickup details.

### Local Pickup: Merge country and state into same field in location modal. ([8408](https://github.com/woocommerce/woocommerce-blocks/pull/8408))
1. `Enable local pickup` in `WooCommerce -> Settings -> Shipping -> Local pickup -> General`.
2. Under `Pickup locations`, click on `Add pickup location`. The `Pickup location` modal should open
3. Choose a country with a state. Ensure it's displayed in one field
4. Fill in the other fields of the modal form, click on `done`, then save changes
5. Go to your store, add a product to the cart, then go to the Checkout Block page
6. Under the `Shipping method` section, select `Local Pickup`
7. Ensure the correct country and state you previously selected are correctly showing under `Pickup options`
8. Go back to the local pickup settings from step 1. Follow the same steps from 2 to 7, but in step 3, choose a country without a state (e.g., Cameroon) and ensure that the `State` text field is displayed. Fill in the form and continue with the rest of the instructions.
| Before | After |
| ------ | ----- |
|  |
|  |
### Enable users to migrate to the blockified Single Product template. ([8324](https://github.com/woocommerce/woocommerce-blocks/pull/8324))
1. Enter the `Single Product` template.
2. Check that the placeholder description says "This block serves as a placeholder for your WooCommerce Single Product Block. We recommend upgrading to the Single Products block for more features to edit your products visually. Don't worry, you can always revert back.".
3. Click the `Upgrade to Blockified Single Product Template` button.
4. See new templates work in the Site Editor and on the front end.
| Before | After |
| ------ | ----- |
|
|
### Enable users to migrate to the blockified Single Product template. ([8324](https://github.com/woocommerce/woocommerce-blocks/pull/8324))
1. Enter the `Single Product` template.
2. Check that the placeholder description says "This block serves as a placeholder for your WooCommerce Single Product Block. We recommend upgrading to the Single Products block for more features to edit your products visually. Don't worry, you can always revert back.".
3. Click the `Upgrade to Blockified Single Product Template` button.
4. See new templates work in the Site Editor and on the front end.
| Before | After |
| ------ | ----- |
|  |
|