|
|
||
|---|---|---|
| .ebextensions | ||
| api | ||
| babybuddy | ||
| core | ||
| dashboard | ||
| etc | ||
| gulpfile.js | ||
| reports | ||
| .coveragerc | ||
| .gitignore | ||
| .travis.yml | ||
| Dockerfile | ||
| LICENSE | ||
| Pipfile | ||
| Pipfile.lock | ||
| Procfile | ||
| README.md | ||
| app.json | ||
| boxfile.yml | ||
| docker-compose.yml | ||
| docker.env.example | ||
| manage.py | ||
| package-lock.json | ||
| package.json | ||
| screenshot.png | ||
| screenshot_mobile.png | ||
README.md
Baby Buddy
A buddy for babies! Helps caregivers track sleep, feedings, diaper changes, and tummy time to learn about and predict baby's needs without (as much) guess work.
Table of Contents
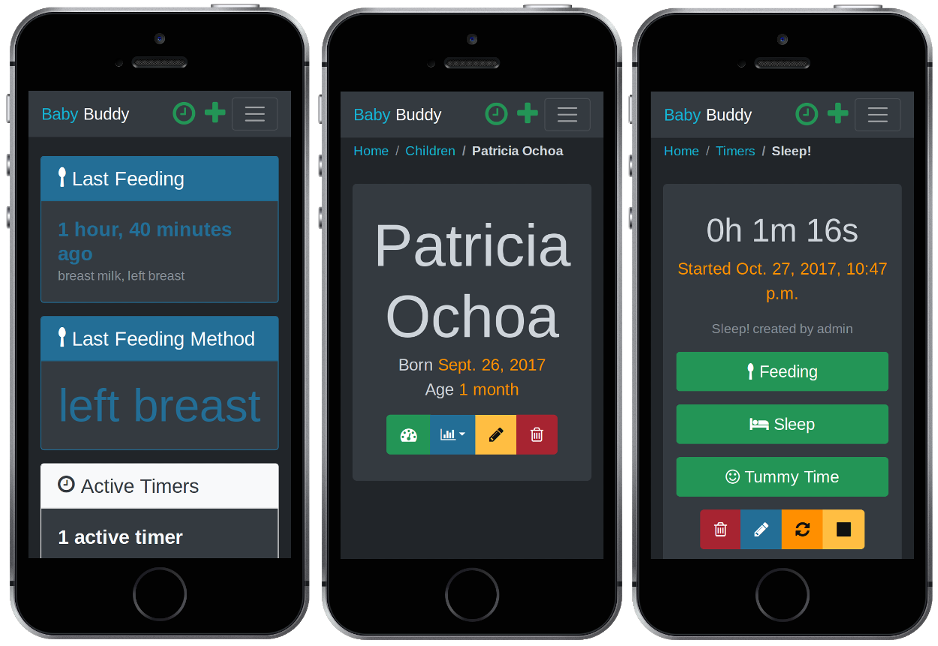
Demo
A demo of Baby Buddy is available on Heroku. The demo instance resets every hour. Login credentials are:
- Username:
admin - Password:
admin
Deployment
⚠️ Baby Buddy is still in early development and does not yet have a stable production deployment flow. ⚠️
The default user name and password for Baby Buddy is admin/admin. For any
deployment, log in and change the default password immediately.
AWS Elastic Beanstalk
A basic Elastic Beanstalk
configuration is provided in .ebextensions/babybuddy.config. The steps
below are a rough guide to deployment. See Working with Python
for detailed information.
-
Clone/download the Baby Buddy repo
git clone https://github.com/cdubz/babybuddy.git -
Enter the cloned/downloaded directory
cd babybuddy -
Change the
SECRET_KEYvalue to something random in.ebextensions/babybuddy.config -
Create an IAM user in AWS with EB, EC2, RDS and S3 privileges.
-
Initialize the Elastic Bean application (using the IAM user from the previous step)
eb init -
Create/deploy the environment! 🚀
eb create -db -db.engine postgres
The create command will also do an initial deployment. Run eb deploy to
redeploy the app (e.g. if there are errors or settings are changed).
Nanobox
An example Nanobox configuration, boxfile.yml, is
provided with Baby Buddy. The steps below are a rough guide to deployment. See
Create and Deploy a Custom Django App
for detailed information about Nanobox's deployment and configuration process.
-
Clone/download the Baby Buddy repo
git clone https://github.com/cdubz/babybuddy.git -
Enter the cloned/downloaded directory
cd babybuddy -
Add the
SECREY_KEYandDJANGO_SETTINGS_MODULEenvironment variablesnanobox evar add DJANGO_SETTINGS_MODULE=babybuddy.settings.nanobox nanobox evar add SECRET_KEY=<CHANGE TO SOMETHING RANDOM> -
Deploy! 🚀
nanobox deploy
Heroku
For manual deployments to Heroku without using the deploy button, make sure to
create two settings before pushing using heroku config:set:
heroku config:set DJANGO_SETTINGS_MODULE=babybuddy.settings.heroku
heroku config:set SECRET_KEY=<CHANGE TO SOMETHING RANDOM>
Manual
There are a number of ways to deploy Baby Buddy manually to any server/VPS. The application can run fine in low memory (below 1GB) situations, however a 32-bit operating system is recommended in such cases. This is primarily because the build process can be memory intensive and cause excessive memory usage on 64-bit systems. If all fails, assets can be built on a local machine and then uploaded to a server.
Requirements
- Python 2.7+, pip, pipenv
- Web server (nginx, Apache, etc.)
- Application server (uwsgi, gunicorn, etc.)
- Database (sqlite, Postgres, MySQL, etc.)
- NodeJS 8.x and NPM 5.x (for building assets)
- Gulp (for building assets)
Example deployment
This example assumes a 512MB VPS instance with Ubuntu 16.04 x32. It uses Python 3.x, nginx, uwsgi and sqlite and should be sufficient for a few users (e.g. two parents and 1+ child).
-
Install Python 3.x, pip, nginx and uwsgi
sudo apt-get install python3 python3-pip nginx uwsgi uwsgi-plugin-python3 -
Install pipenv
sudo -H pip install pipenv -
Install NodeJS, NPM and Gulp
curl -sL https://deb.nodesource.com/setup_8.x | sudo -E bash - sudo apt-get install nodejs sudo npm install -g gulp-cli -
Set up directories and files
sudo mkdir /var/www/babybuddy sudo chown user:user /var/www/babybuddy mkdir -p /var/www/babybuddy/data/media sudo chown -R www-data:www-data /var/www/babybuddy/data git clone https://github.com/cdubz/babybuddy.git /var/www/babybuddy/public -
Move in to the application folder
cd /var/www/babybuddy/public -
Initiate the Python environment
pipenv --three --dev -
Build static assets
npm install gulp build -
Create a production settings file and set the
SECRET_KEYandALLOWED_HOSTSvaluescp babybuddy/settings/production.example.py babybuddy/settings/production.py editor babybuddy/settings/production.py -
Initiate the application
export DJANGO_SETTINGS_MODULE=babybuddy.settings.production gulp collectstatic gulp migrate -
Set appropriate permissions on the database and data folder
sudo chown www-data:www-data /var/www/babybuddy/data/db.sqlite3 sudo chmod 640 /var/www/babybuddy/data/db.sqlite3 sudo chmod 750 /var/www/babybuddy/data -
Create and configure the uwsgi app
 sudo editor /etc/uwsgi/apps-available/babybuddy.ini
 sudo ln -s /etc/uwsgi/apps-available/babybuddy.ini /etc/uwsgi/apps-enabled/babybuddy.ini
 sudo service uwsgi restart
Example config:
 [uwsgi]
 plugins = python3
 project = babybuddy
 base_dir = /var/www/babybuddy

 virtualenv = /home/user/.local/share/virtualenvs/babybuddy-XXXXXXXX
 chdir = %(base_dir)/babybuddy
 module =  %(project).wsgi:application
 env = DJANGO_SETTINGS_MODULE=%(project).settings.production
 master = True
 vacuum = True
See the uWSGI documentation for more advanced configuration details.
Note: Find the location of the pipenv virtual environment with the command
pipenv --venv. -
Create and configure the nginx server
 sudo vim /etc/nginx/sites-available/babybuddy
 sudo ln -s /etc/nginx/sites-available/babybuddy /etc/nginx/sites-enabled/babybuddy
 sudo service nginx restart
Example config:
 upstream babybuddy {
     server unix:///var/run/uwsgi/app/babybuddy/socket;
 }

 server {
     listen 80;
     server_name babybuddy.example.com;

     location / {
         uwsgi_pass babybuddy;
         include uwsgi_params;
     }
 }
See the nginx documentation for more advanced configuration details.
-
That's it (hopefully)! 🎉
Development
Installation
pip install pipenv
pipenv install --dev
npm install -g gulp-cli
npm install
gulp migrate
gulp
Open http://127.0.0.1:8000 and log in with the default
user name and password (admin/admin).
Fake data
Add some fake data to the database with the following command:
gulp fake
By default, fake creates one child and 31 days of random data. Use the
--children and --days flags to change the default values, e.g.
gulp fake --children 5 --days 7 to generate five fake children and seven
days of data for each.
Testing
❗ Tests require static files to be collected, it may be necessary
to execute gulp build && gulp collectstatic before tests (if static files
have changed).
gulp test


