Add ability to upload picture of child with thumbnailing capabilities. |
||
|---|---|---|
| .ebextensions | ||
| api | ||
| babybuddy | ||
| core | ||
| dashboard | ||
| etc | ||
| gulpfile.js | ||
| reports | ||
| .coveragerc | ||
| .gitignore | ||
| .travis.yml | ||
| LICENSE | ||
| Pipfile | ||
| Pipfile.lock | ||
| Procfile | ||
| README.md | ||
| app.json | ||
| boxfile.yml | ||
| manage.py | ||
| package-lock.json | ||
| package.json | ||
| screenshot.png | ||
| screenshot_mobile.png | ||
README.md
Baby Buddy
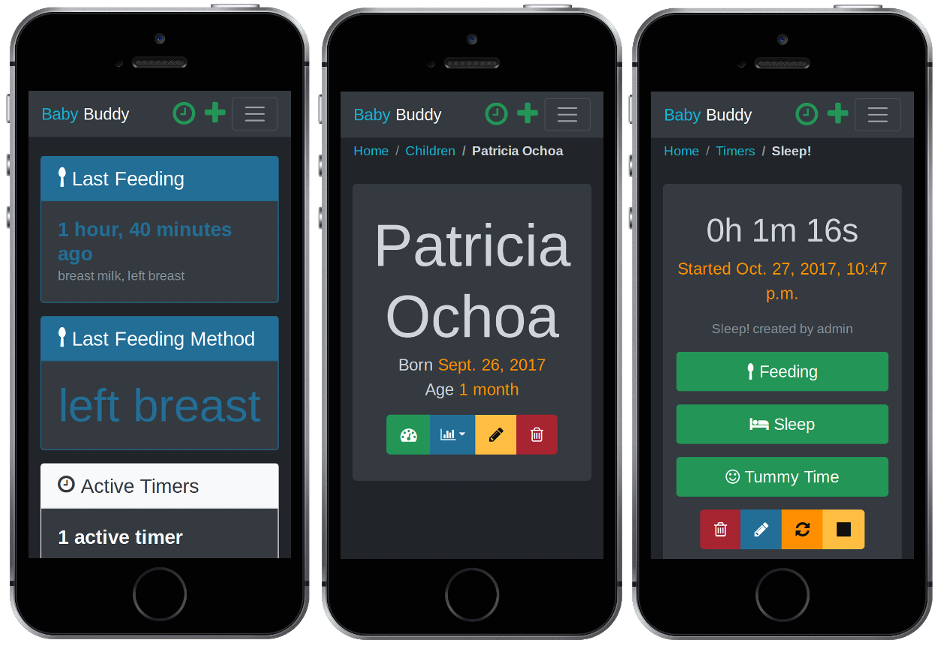
A buddy for babies! Helps caregivers track sleep, feedings, diaper changes, and tummy time to learn about and predict baby's needs without (as much) guess work.
Table of Contents
Demo
A demo of Baby Buddy is available on Heroku. The demo instance resets every hour. Login credentials are:
- Username:
admin - Password:
admin
Deployment
⚠️ Baby Buddy is still in early development and does not yet have a stable production deployment flow. ⚠️
The default user name and password for Baby Buddy is admin/admin. For any
deployment, log in and change the default password immediately.
AWS Elastic Beanstalk
A basic Elastic Beanstalk
configuration is provided in .ebextensions\babybuddy.config. The steps
below are a rough guide to deployment. See Working with Python
for detailed information.
-
Clone/download the Baby Buddy repo
git clone https://github.com/cdubz/babybuddy.git -
Enter the cloned/downloaded directory
cd babybuddy -
Change the
SECREY_KEYvalue to something random in.ebextensions\babybuddy.config -
Create an IAM user in AWS with EB, EC2, RDS and S3 privileges.
-
Initialize the Elastic Bean application (using the IAM user from the previous step)
eb init -
Create/deploy the environment! 🚀
eb create -db -db.engine postgres
The create command will also do an initial deployment. Run eb deploy to
redeploy the app (e.g. if there are errors or settings are changed).
Nanobox
An example Nanobox configuration, boxfile.yml, is
provided with Baby Buddy. The steps below are a rough guide to deployment. See
Create and Deploy a Custom Django App
for detailed information about Nanobox's deployment and configuration process.
-
Clone/download the Baby Buddy repo
git clone https://github.com/cdubz/babybuddy.git -
Enter the cloned/downloaded directory
cd babybuddy -
Add the
SECREY_KEYandDJANGO_SETTINGS_MODULEenvironment variablesnanobox evar add DJANGO_SETTINGS_MODULE=babybuddy.settings.nanobox nanobox evar add SECRET_KEY=<CHANGE TO SOMETHING RANDOM> -
Deploy! 🚀
nanobox deploy
Heroku
For manual deployments to Heroku without using the deploy button, make sure to
create two settings before pushing using heroku config:set:
heroku config:set DJANGO_SETTINGS_MODULE=babybuddy.settings.heroku
heroku config:set SECRET_KEY=<CHANGE TO SOMETHING RANDOM>
Development
Installation
pip install pipenv
pipenv install --dev
npm install -g gulp-cli
npm install
gulp migrate
gulp
Open http://127.0.0.1:8000 and log in with the default
user name and password (admin/admin).
Fake data
Add some fake data to the database with the following command:
gulp fake
By default, fake creates one child and 31 days of random data. Use the
--children and --days flags to change the default values, e.g.
gulp fake --children 5 --days 7 to generate five fake children and seven
days of data for each.
Testing
❗ Tests require static files to be collected, it may be necessary
to execute gulp build && gulp collectstatic before tests (if static files
have changed).
gulp test


