365 lines
22 KiB
Markdown
365 lines
22 KiB
Markdown
|
|
# Testing notes and ZIP for release 10.2.0
|
|||
|
|
|
|||
|
|
Zip file for testing: [woocommerce-gutenberg-products-block.zip](https://github.com/woocommerce/woocommerce-blocks/files/11450388/woocommerce-gutenberg-products-block.zip)
|
|||
|
|
|
|||
|
|
## WooCommerce Core
|
|||
|
|
|
|||
|
|
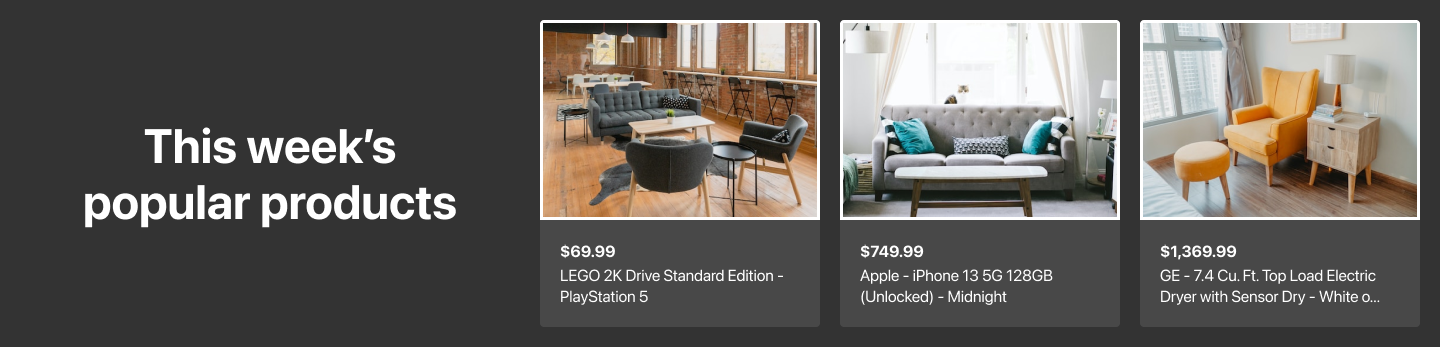
### Add shop by price pattern ([#9373](https://github.com/woocommerce/woocommerce-blocks/pull/9373))
|
|||
|
|
|
|||
|
|
1. Create a page and use the block inserter->patterns->WooCommerce and to insert the Shop by Price pattern.
|
|||
|
|
2. Check that the preview shows up nicely and add the pattern to the page.
|
|||
|
|
3. Update/save and check the frontend and ensure it is displaying nicely per design.
|
|||
|
|
|
|||
|
|

|
|||
|
|
|
|||
|
|
### Mini Cart drawer: print width in PHP [#9329](https://github.com/woocommerce/woocommerce-blocks/pull/9329)
|
|||
|
|
|
|||
|
|
1. Add the Mini Cart block to the header of your site (via Appearance > Editor).
|
|||
|
|
2. In the frontend, open the Mini Cart drawer clicking on the button.
|
|||
|
|
3. Verify the drawer is opened instantly. Until now, there might be a small delay if the shopper clicked the button very quickly right after the page was loaded and the network was slow.
|
|||
|
|
|
|||
|
|
Before | After
|
|||
|
|
--- | ---
|
|||
|
|
 | 
|
|||
|
|
|
|||
|
|
### Convert to use WP core blocks [#9340](https://github.com/woocommerce/woocommerce-blocks/pull/9340)
|
|||
|
|
|
|||
|
|
1. Create a page and use the block inserter->patterns->WooCommerce and to insert the Featured Category Triple pattern.
|
|||
|
|
2. Check that the preview shows up nicely and add the pattern to the page.
|
|||
|
|
3. Update/save and check the frontend and ensure it is displaying nicely per design.
|
|||
|
|
|
|||
|
|

|
|||
|
|
|
|||
|
|
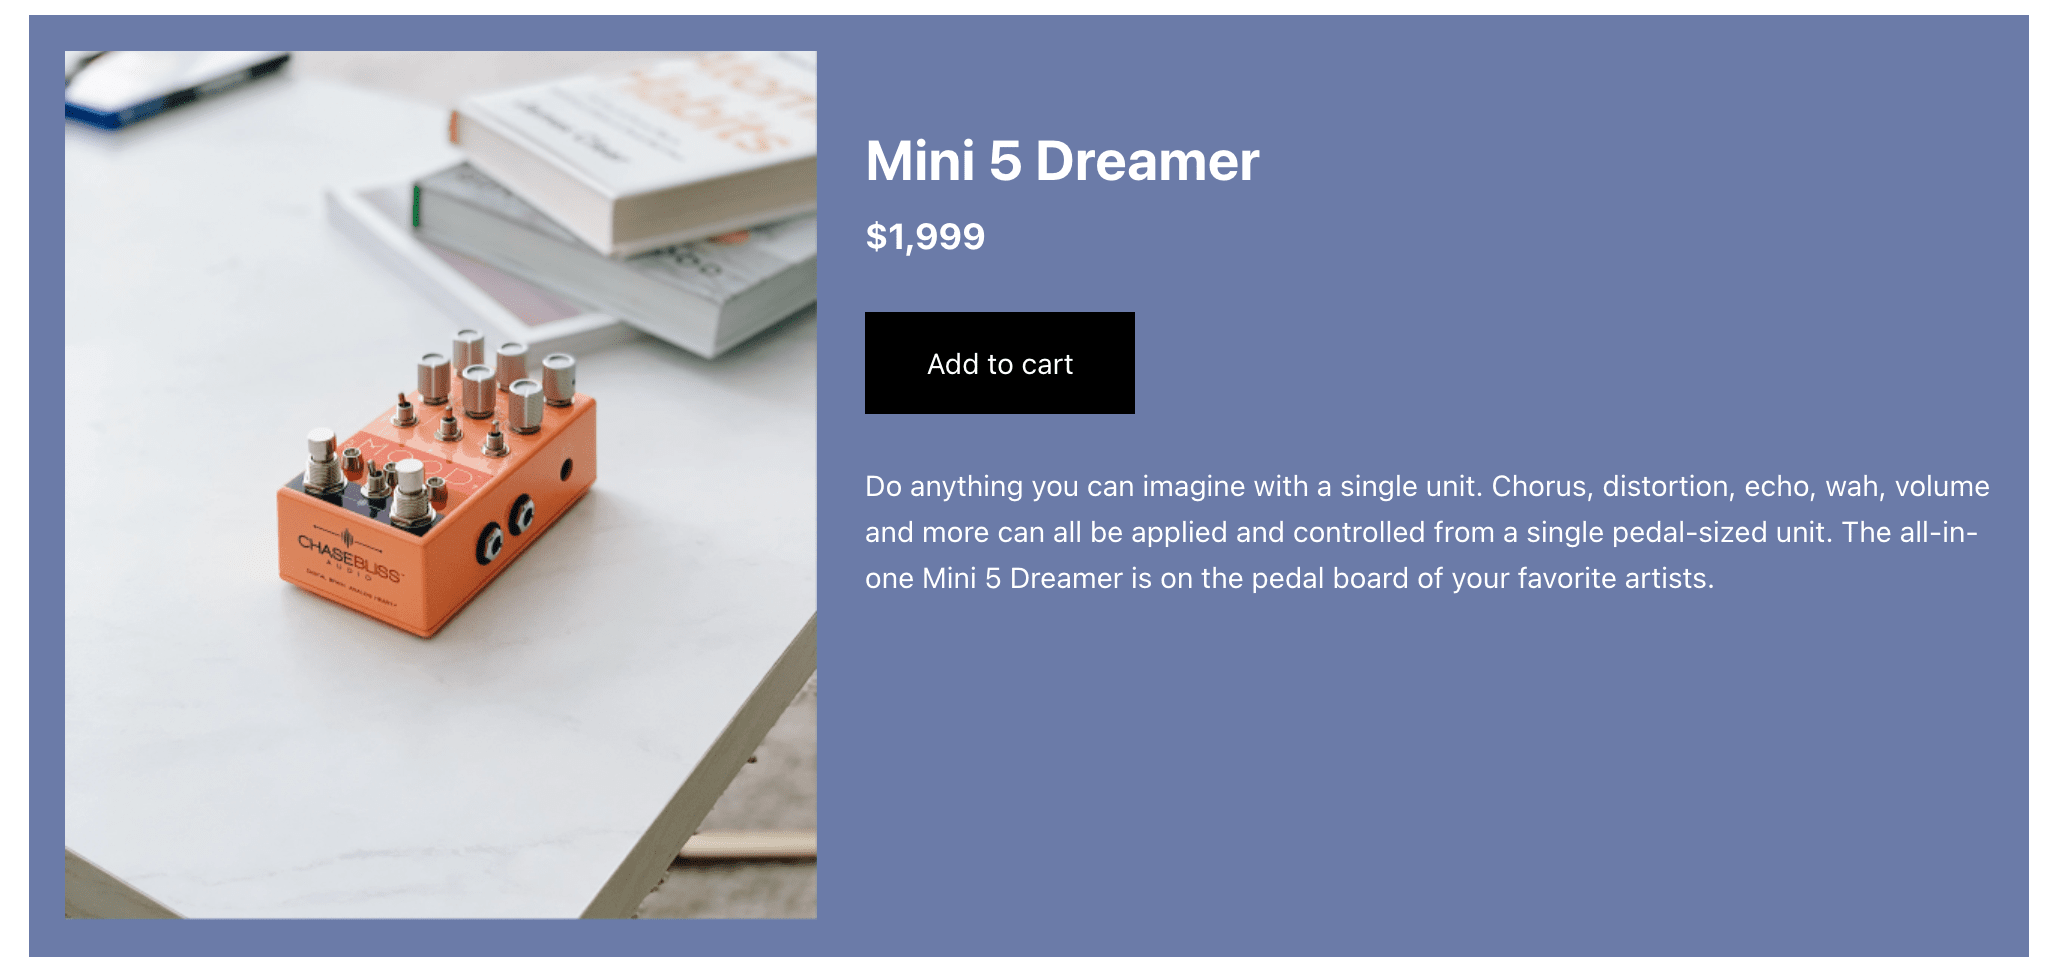
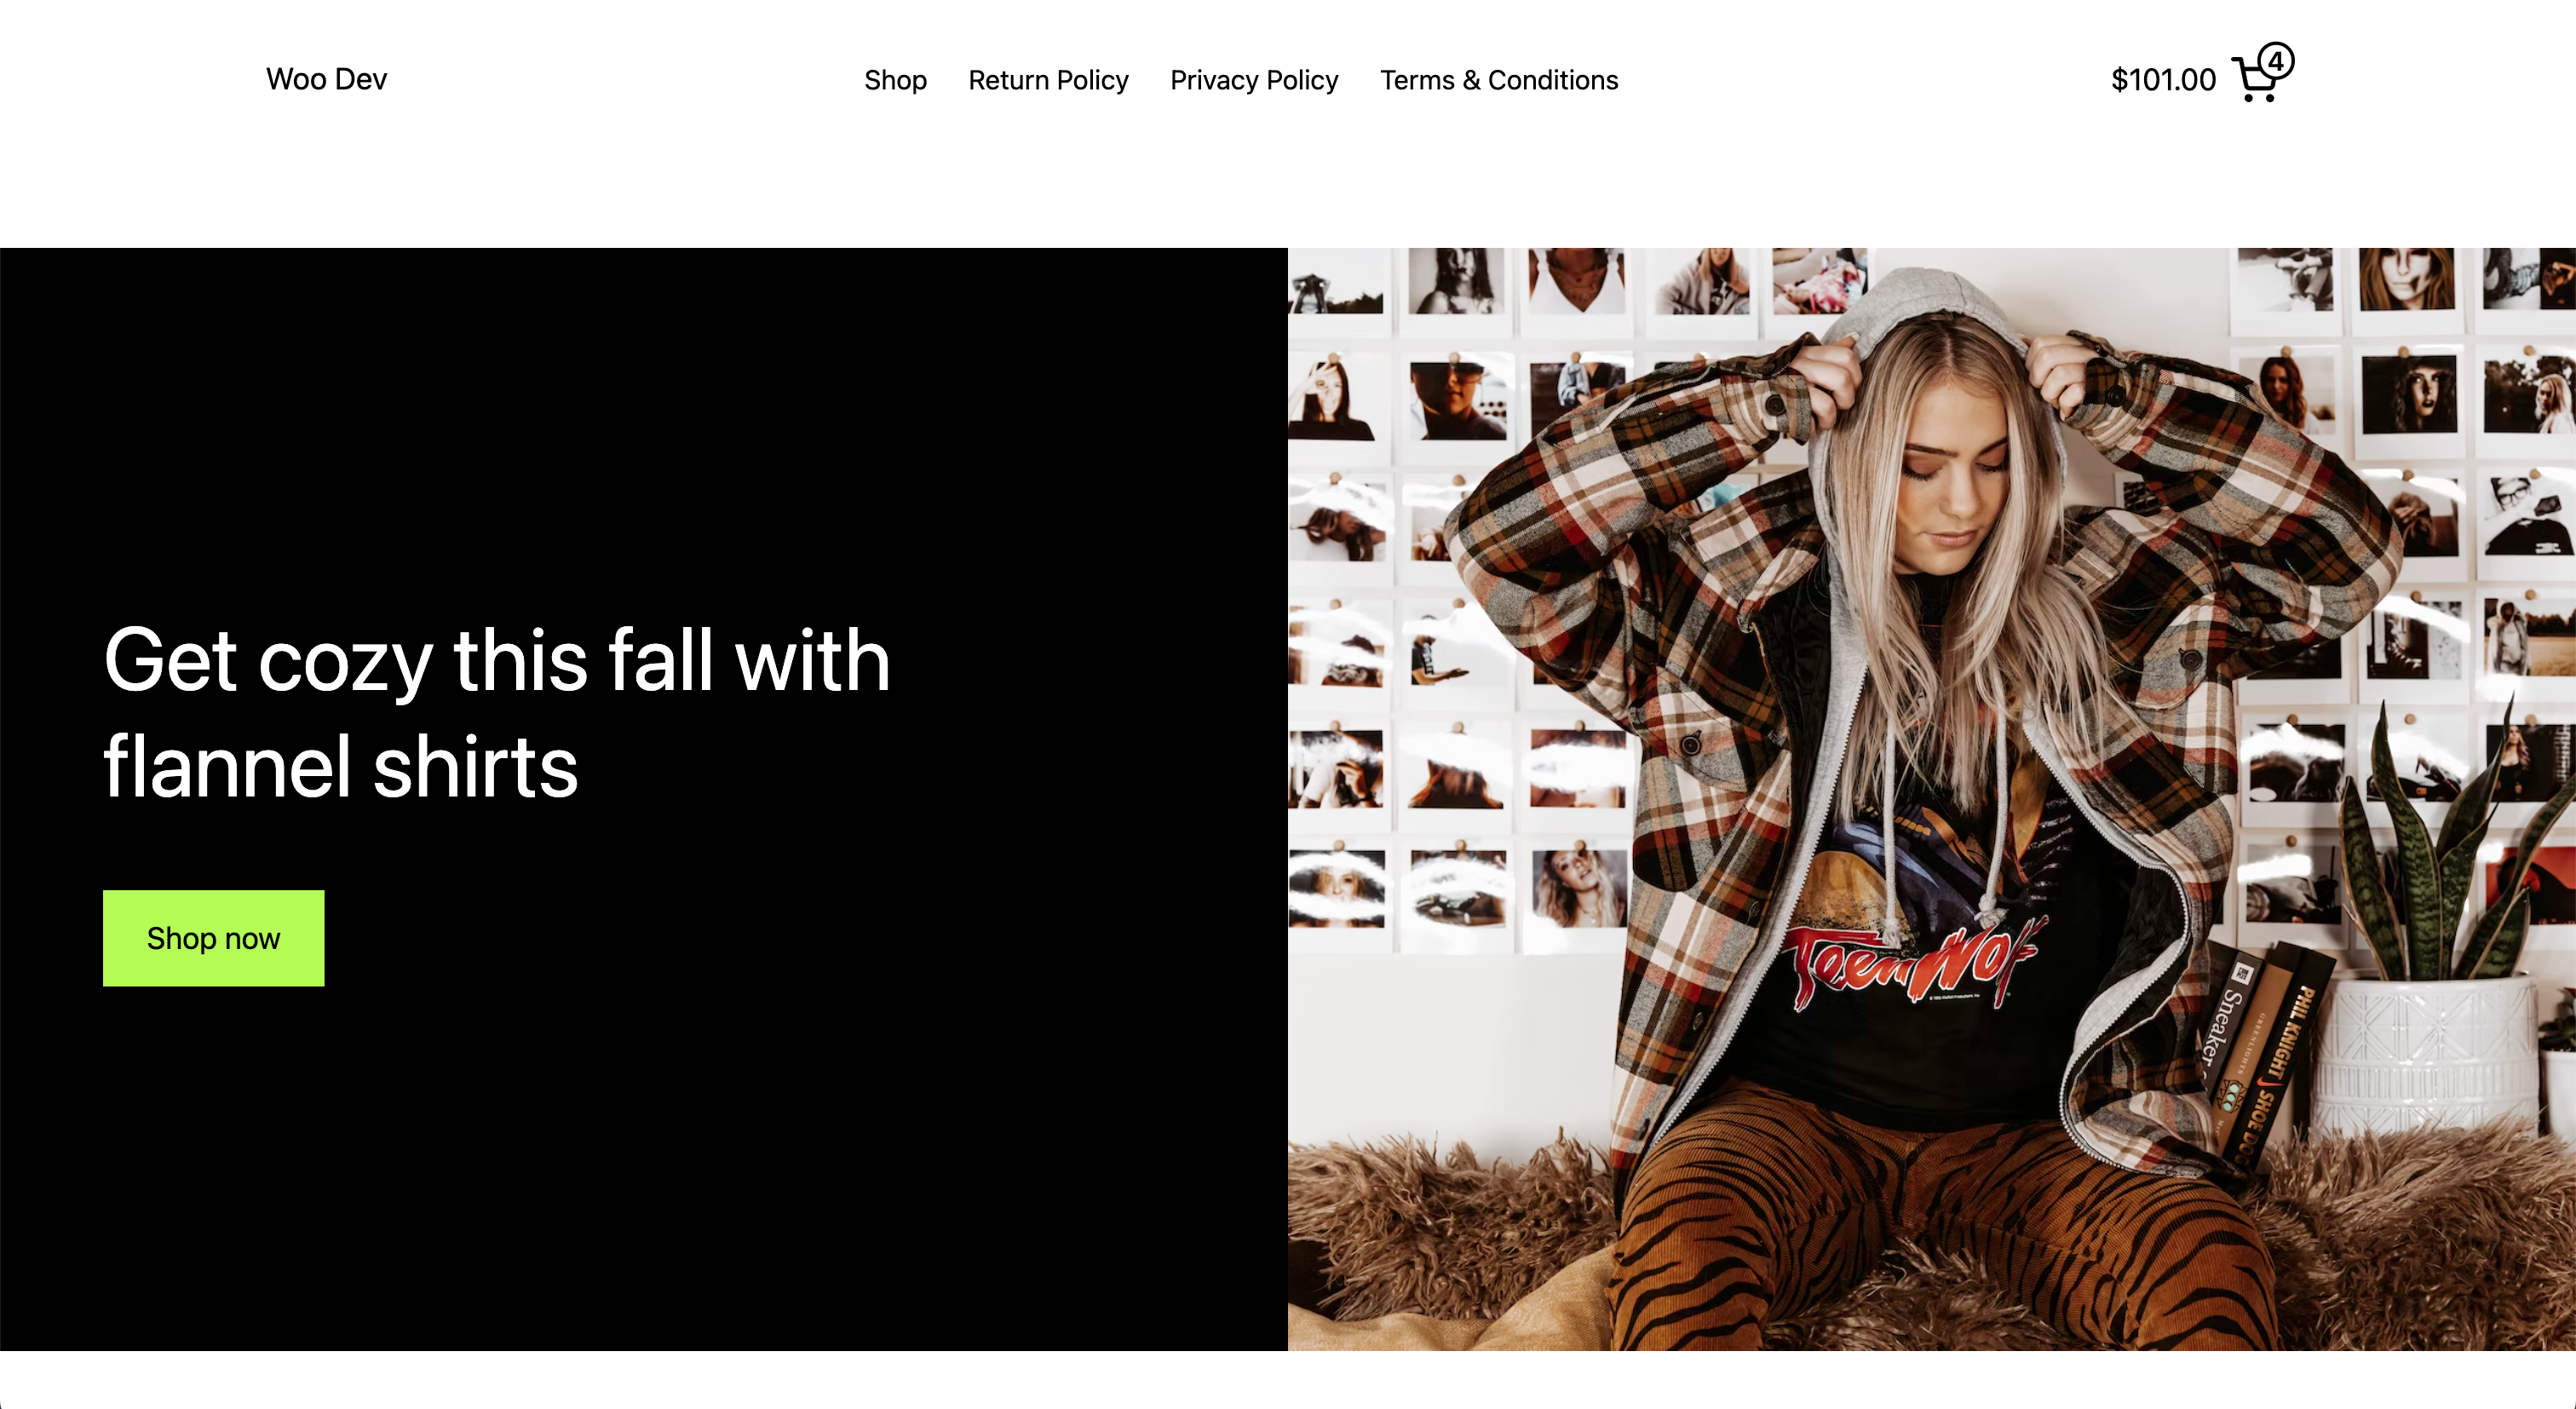
### Add product hero pattern [#9181](https://github.com/woocommerce/woocommerce-blocks/pull/9181)
|
|||
|
|
|
|||
|
|
1. Create a page/post and use the block inserter->patterns->WooCommerce->Product Hero | Wide
|
|||
|
|
2. Update/save and ensure the design is close to the suggested design seen below.
|
|||
|
|
|
|||
|
|
|
|||
|
|
|
|||
|
|
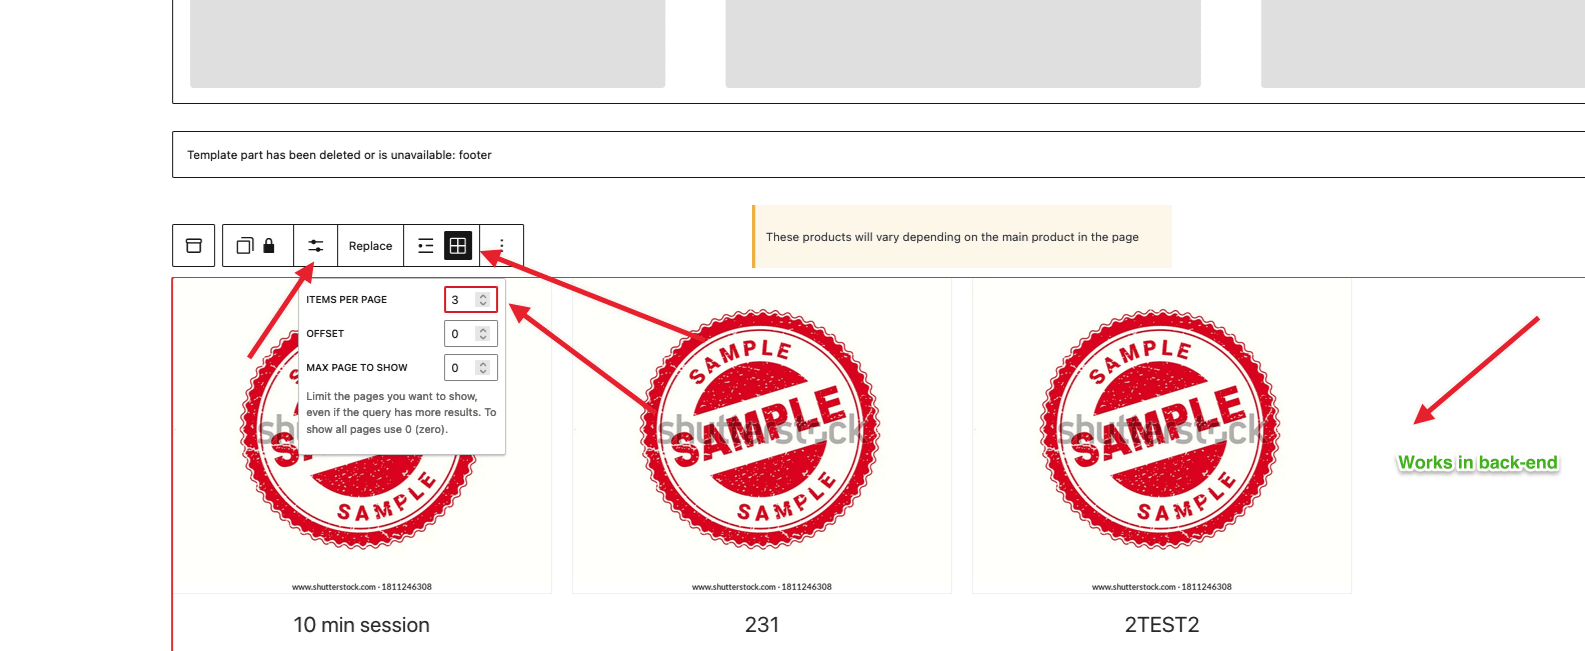
### Single Product Template - Related Products: fix items per page option [#9286](https://github.com/woocommerce/woocommerce-blocks/pull/9286)
|
|||
|
|
|
|||
|
|
1. Edit the Single Product Template.
|
|||
|
|
2. Click on the button `Upgrade to Blockified Single Product template`.
|
|||
|
|
3. Focus the `Related Products Controls` block.
|
|||
|
|
4. Change the option `Items per Page`, for example put 1. (check the image below)
|
|||
|
|
5. Save the template.
|
|||
|
|
6. Visit a Product and be sure that the Related Products block shows the number of products that you selected before. (if you select a high number, there is the risk that there will be displayed fewer products. It is not a bug, but it means that aren't so many related products).
|
|||
|
|
|
|||
|
|
|
|||
|
|
|
|||
|
|
### Remove duplicated code in BlockTypesController.php [#9283](https://github.com/woocommerce/woocommerce-blocks/pull/9283)
|
|||
|
|
|
|||
|
|
1. Change your theme to a classic theme (ie: Storefront).
|
|||
|
|
2. Go to Appearance > Widgets.
|
|||
|
|
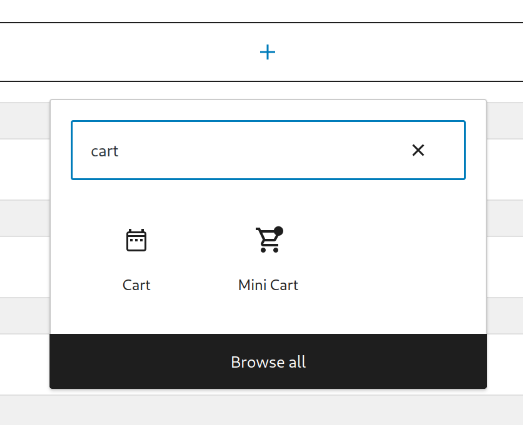
3. Verify the All Products, Cart and Checkout block don't appear in the inserter.
|
|||
|
|
|
|||
|
|
(Note: there is _Cart_ widget which _is_ available in the inserter, you can distinguish it from the block because it doesn't have a trolley icon)
|
|||
|
|
|
|||
|
|
|
|||
|
|
|
|||
|
|
### Fix Product Price styles leaking into the Mini Cart, Cart and Checkout blocks [#9276](https://github.com/woocommerce/woocommerce-blocks/pull/9276)
|
|||
|
|
|
|||
|
|
#### Product Price styles don't leak into the Mini Cart block
|
|||
|
|
|
|||
|
|
1. Go to Appearance > Editor > Template Parts > Mini Cart.
|
|||
|
|
2. Open the Styles sidebar > Blocks > Product Price.
|
|||
|
|
3. Set some margin and color to the Product Price.
|
|||
|
|
4. Verify that the new styles aren't applied to the product prices shown in the Mini Cart.
|
|||
|
|
5. Go to the frontend and open the Mini Cart drawer.
|
|||
|
|
6. Verify again that the styles you set in step 3 don't affect the product prices shown in the Mini Cart drawer.
|
|||
|
|
|
|||
|
|
#### Product Price styles are still applied to the Single Product template
|
|||
|
|
|
|||
|
|
1. Go to Appearance > Editor > Templates > Single Product. Add the Product Price block somewhere in the template.
|
|||
|
|
2. Open the Styles sidebar > Blocks > Product Price.
|
|||
|
|
3. Set some margin and color to the Product Price.
|
|||
|
|
4. Verify that the Product Price block has the margin and color you set.
|
|||
|
|
7. Open the single product page in the frontend.
|
|||
|
|
8. Verify that the Product Price block has the margin and color you set.
|
|||
|
|
|
|||
|
|
#### Product Price styles are still applied to the Products and All Products blocks
|
|||
|
|
|
|||
|
|
1. Go to Appearance > Editor > Templates > Product Catalog. Add the Products and All Products blocks somewhere in the template.
|
|||
|
|
2. Open the Styles sidebar > Blocks > Product Price.
|
|||
|
|
3. Set some margin and color to the Product Price.
|
|||
|
|
4. Verify that the Product Price inner blocks have the margin and color you set.
|
|||
|
|
7. Open the Shop page in the frontend.
|
|||
|
|
8. Verify that the Product Price inner blocks have the margin and color you set.
|
|||
|
|
|
|||
|
|
### Implement new Hero Product – Split pattern [#9191](https://github.com/woocommerce/woocommerce-blocks/pull/9191)
|
|||
|
|
|
|||
|
|
1. Create a new page or post
|
|||
|
|
2. Make sure the `WooCommerce Hero Product – Split` pattern appears under the WooCommerce category dropdown.
|
|||
|
|
3. Insert in and make sure it shows as expected on the design.
|
|||
|
|
|
|||
|
|
|
|||
|
|
|
|||
|
|
### Add featured category cover image [#9284](https://github.com/woocommerce/woocommerce-blocks/pull/9284)
|
|||
|
|
|
|||
|
|
1. Create a page and use the block inserter->patterns->WooCommerce and to insert the Featured Category Cover Image.
|
|||
|
|
2. Insert the pattern and update/save and check the frontend and ensure it is displaying close to the design from [#9046](https://github.com/woocommerce/woocommerce-blocks/issues/9046)
|
|||
|
|
|
|||
|
|

|
|||
|
|
|
|||
|
|
### Prevent email address being removed when changing shipping method/entering shipping address [#9328](https://github.com/woocommerce/woocommerce-blocks/pull/9328)
|
|||
|
|
|
|||
|
|
1. Enable local pickup (WooCommerce -> Settings -> Shipping -> Local Pickup) and add some locations.
|
|||
|
|
2. Add some shipping locations in WooCommerce -> Settings -> Shipping.
|
|||
|
|
3. In an incognito window, add an item to your cart and go to the Checkout block.
|
|||
|
|
4. Click the "Local Pickup" button in the shipping method selector.
|
|||
|
|
5. Enter your email address, then click the "Shipping" button. Ensure the email address remains as you entered it.
|
|||
|
|
6. Change the email address again, put something different in.
|
|||
|
|
7. Edit the "First name" field of the shipping address. Ensure the email address remains as you entered it.
|
|||
|
|
8. Uncheck the "Use shipping as billing" checkbox and check out with two different addresses. Ensure the addresses are correct in the order confirmation email and in the WooCommerce back end.
|
|||
|
|
|
|||
|
|
### [Pattern] Add new Hero product 3 split pattern [#9319](https://github.com/woocommerce/woocommerce-blocks/pull/9319)
|
|||
|
|
|
|||
|
|
1. Create a new page or post
|
|||
|
|
2. Make sure the `Hero product 3 split` pattern appears under the WooCommerce category dropdown.
|
|||
|
|
3. Insert in and make sure it shows as expected on the design.
|
|||
|
|
|
|||
|
|

|
|||
|
|
|
|||
|
|
### Rename Add to Cart [#9315](https://github.com/woocommerce/woocommerce-blocks/pull/9315)
|
|||
|
|
|
|||
|
|
1. Open the Site Editor.
|
|||
|
|
2. Go to the Single Product Template.
|
|||
|
|
3. Click on the button "Upgrade to Blockified Single Product Template".
|
|||
|
|
4. Click on the `Add to Cart" button.
|
|||
|
|
5. On the sidebar, check the name of the block. Be sure that the name is "Add to Cart with Options".
|
|||
|
|
|
|||
|
|
### Product Image Gallery: fix resize width when the window resizes [#9299](https://github.com/woocommerce/woocommerce-blocks/pull/9299)
|
|||
|
|
|
|||
|
|
1. Edit the Single Product Template.
|
|||
|
|
2. Switch to the blockified version.
|
|||
|
|
3. Save.
|
|||
|
|
4. Visit a product page that has multiple images (if you are using test products, you can visit the `Logo Collection` product.
|
|||
|
|
5. Be sure that the Product Image Gallery block doesn't overlap with the text when you resize the window.
|
|||
|
|
|
|||
|
|
| Before | After |
|
|||
|
|
| ------ | ----- |
|
|||
|
|
|<video src=https://user-images.githubusercontent.com/4463174/235451588-b6efc60f-d15a-4fec-a841-cf1977d47a01.mp4 />| <video src=https://user-images.githubusercontent.com/4463174/235451495-96530cb7-ac9f-4754-9afd-55a183ad3dd7.mp4 />|
|
|||
|
|
|
|||
|
|
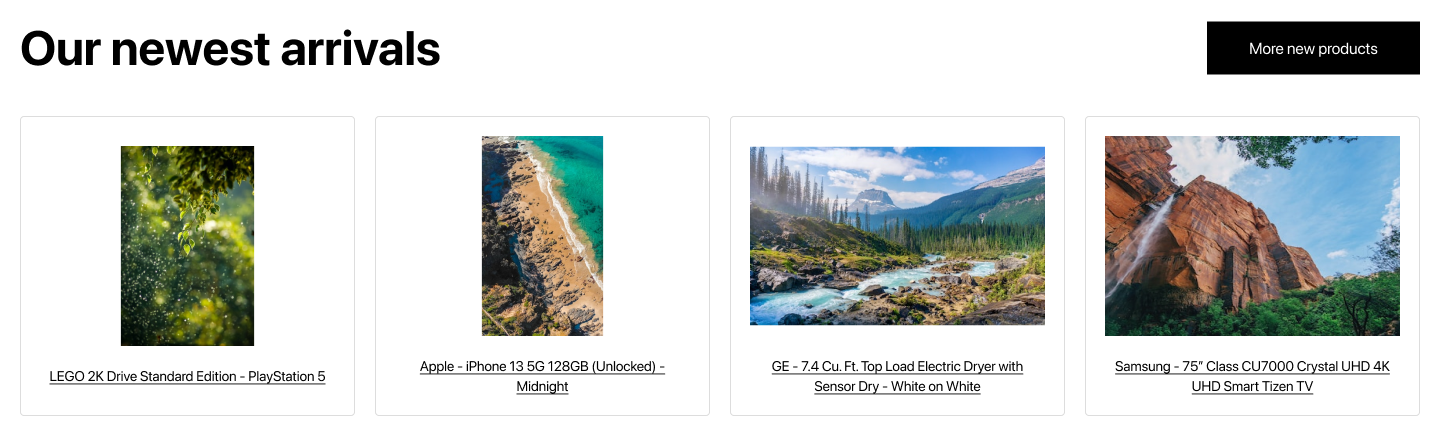
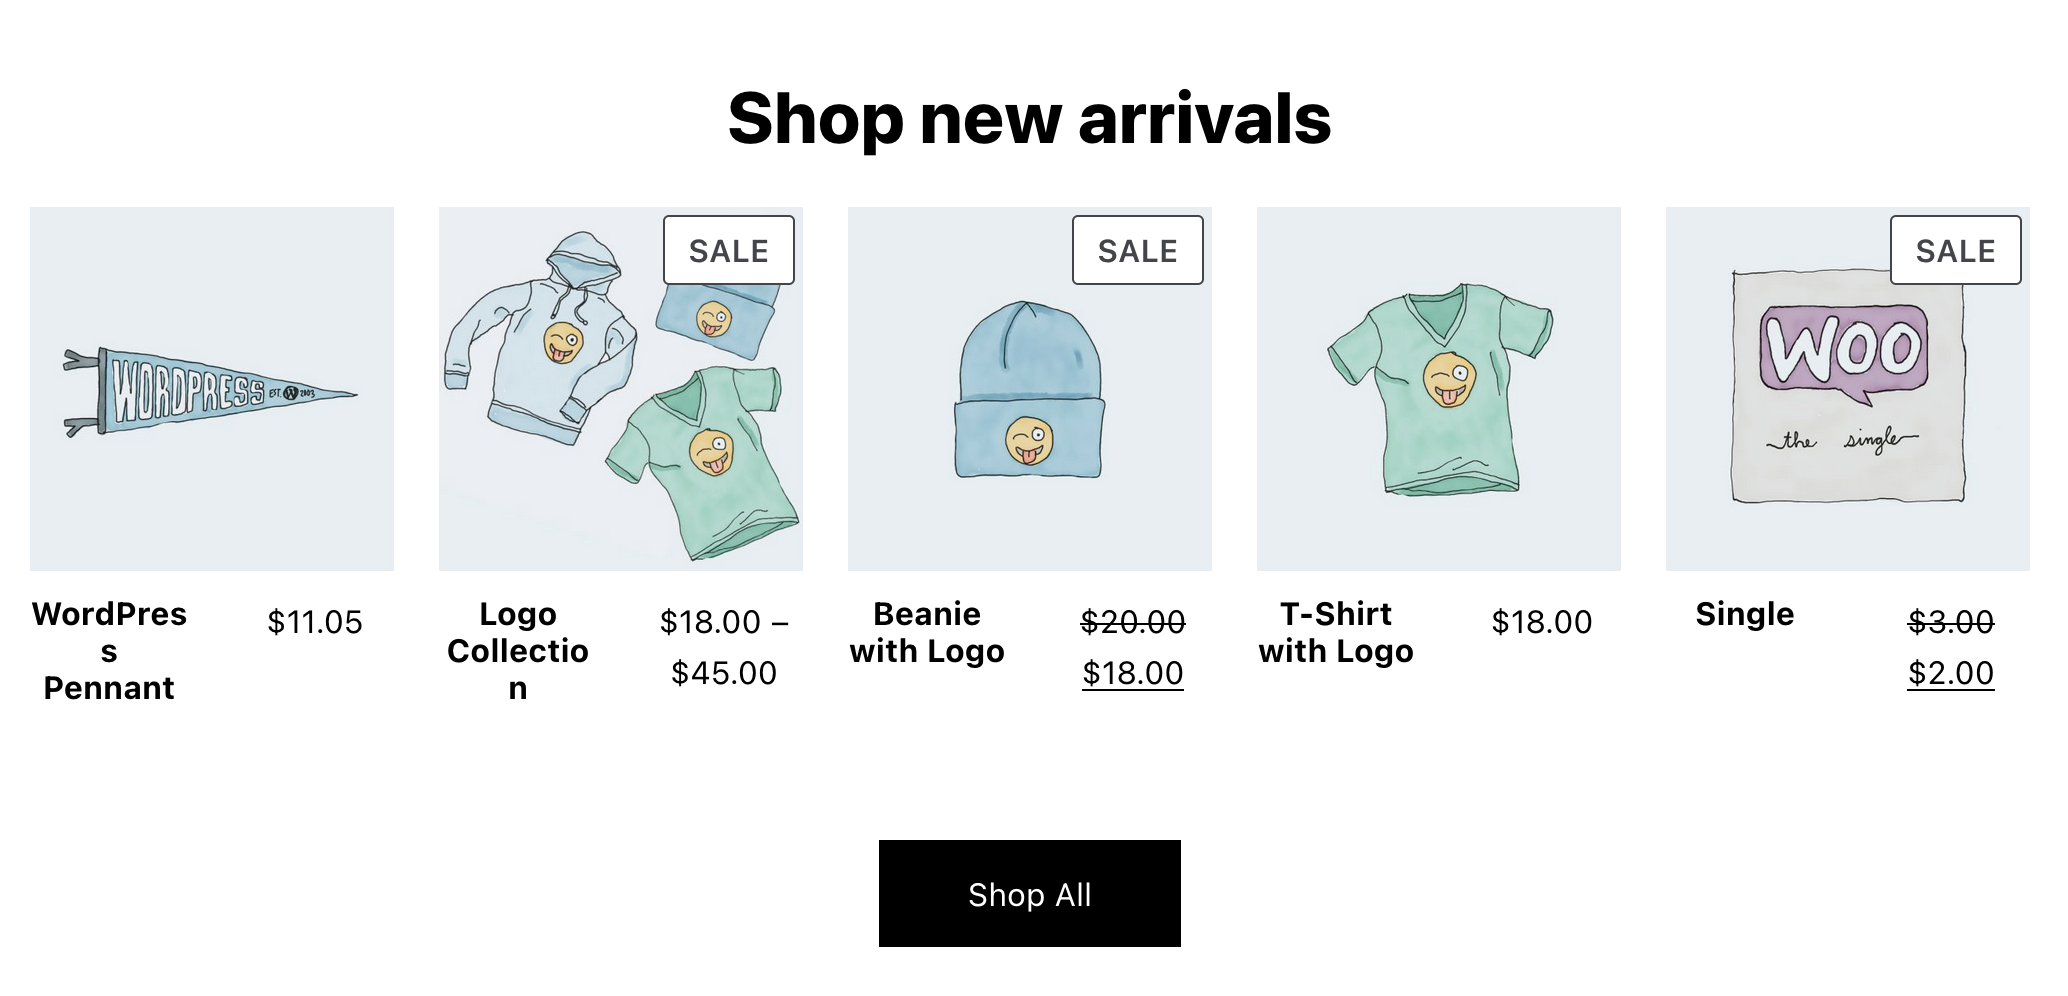
### [Pattern] Add new Product Collections: Newest Arrivals pattern [#9240](https://github.com/woocommerce/woocommerce-blocks/pull/9240)
|
|||
|
|
|
|||
|
|
1. Create a new page or post
|
|||
|
|
2. Make sure the `Product Collections: Newest Arrivals` pattern appears under the WooCommerce category dropdown.
|
|||
|
|
3. Insert in and make sure it shows as expected on the design.
|
|||
|
|
|
|||
|
|
|
|||
|
|
|
|||
|
|
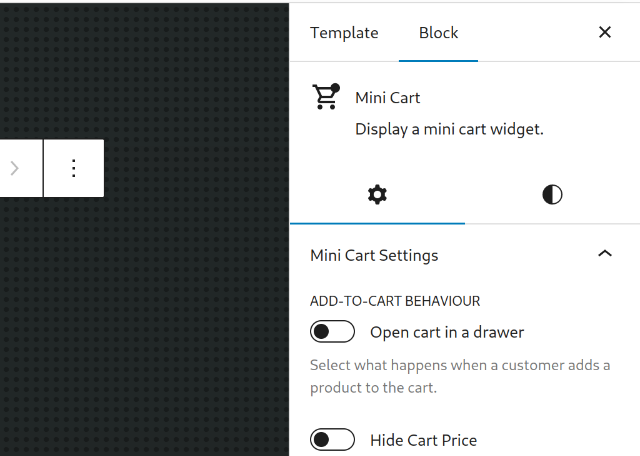
### Fix Mini Cart block not respecting Add-to-Cart behaviour attribute when adding the first product [#9257](https://github.com/woocommerce/woocommerce-blocks/pull/9257)
|
|||
|
|
|
|||
|
|
1. Go to Appearance > Editor and add the Mini Cart block to the header of your store.
|
|||
|
|
2. Make sure the _Open cart in a drawer_ option is disabled:
|
|||
|
|
|
|||
|
|
3. Go to the frontend and add a product to your cart from the Shop page.
|
|||
|
|
4. Verify the drawer doesn't open but the Mini Cart value increases.
|
|||
|
|
5. Go back to the site editor and enable the _Open cart in a drawer_ option.
|
|||
|
|
6. Again from the frontend add a product to your cart.
|
|||
|
|
7. Verify now the drawer does open.
|
|||
|
|
|
|||
|
|
### Fix shipping notices for multiple packages [#9285](https://github.com/woocommerce/woocommerce-blocks/pull/9285)
|
|||
|
|
|
|||
|
|
- Enable “Multiple Packages for WooCommerce” extension.
|
|||
|
|
- Go to WooCommerce > Settings > Multiple packages
|
|||
|
|
- Select "group by" product, then save changes.
|
|||
|
|
- Add several items to your cart.
|
|||
|
|
- Go to the cart page, toggle open a package section, and choose “local pickup”
|
|||
|
|
- Toggle open another package and choose something other than "local pickup"
|
|||
|
|
- See the “Multiple shipments must have the same pickup location” notice above the packages
|
|||
|
|
- Go to the checkout page
|
|||
|
|
- Choose "shipping" in the shipping method block
|
|||
|
|
- Quickly look at the shipping section below and ensure no notice was visible
|
|||
|
|
|
|||
|
|
### Add/featured category focus pattern [#9322](https://github.com/woocommerce/woocommerce-blocks/pull/9322)
|
|||
|
|
|
|||
|
|
1. Create a page and use the block inserter->patterns->WooCommerce and to insert the Featured Category Focus.
|
|||
|
|
2. Notice the preview shows per design screenshot shown above.
|
|||
|
|
3. Insert the pattern and then update/save and check the frontend and ensure it is displaying as the screenshot above.
|
|||
|
|
|
|||
|
|

|
|||
|
|
|
|||
|
|
### Related Products: make Product Title a link by default [#9179](https://github.com/woocommerce/woocommerce-blocks/pull/9179)
|
|||
|
|
|
|||
|
|
1. Go to Appearance > Site Editor > Templates > Single Product.
|
|||
|
|
2. Add the Related Products somewhere in the page.
|
|||
|
|
3. Click on the Product Title inner block.
|
|||
|
|
4. Verify the _Make title a link_ toggle is on by default.
|
|||
|
|
|
|||
|
|

|
|||
|
|
|
|||
|
|
### Product Image Gallery: fix inline [#9297](https://github.com/woocommerce/woocommerce-blocks/pull/9297)
|
|||
|
|
|
|||
|
|
1. Edit the Single Product Template.
|
|||
|
|
2. Switch to the blockified version.
|
|||
|
|
3. Move the Product Image Gallery before the block `Store breadcrumbs`.
|
|||
|
|
4. Save.
|
|||
|
|
5. Visit a product page.
|
|||
|
|
6. Be sure that the Product Image Gallery isn't displayed inline.
|
|||
|
|
|
|||
|
|
### Add new Product collections: Featured Collection pattern [#9246](https://github.com/woocommerce/woocommerce-blocks/pull/9246)
|
|||
|
|
|
|||
|
|
1. Create a new page or post
|
|||
|
|
2. Make sure the `Product Collections: Featured Collection` pattern appears under the WooCommerce category dropdown.
|
|||
|
|
3. Insert in and make sure it shows as expected on the design.
|
|||
|
|
|
|||
|
|
|
|||
|
|
|
|||
|
|
### Remove min-height and padding for WP Button elements [#9260](https://github.com/woocommerce/woocommerce-blocks/pull/9260)
|
|||
|
|
|
|||
|
|
1. Enable TT3 theme with the Aubergine style.
|
|||
|
|
2. Go to the Site Editor and add the mini-cart block to the header and save.
|
|||
|
|
3. Go to the Site Editor and edit the mini-cart template part and save.
|
|||
|
|
4. Check the cart buttons in the editor vs the cart buttons in the front-end are the same.
|
|||
|
|
5. Enable TT3 theme with the Whisper style.
|
|||
|
|
2. Create a new page and add a Single Product and a Checkout block and save.
|
|||
|
|
3. Check the cart buttons in the editor vs the cart buttons in the front-end are the same.
|
|||
|
|
|
|||
|
|
#### Before
|
|||
|
|
|
|||
|
|
| Editor | Front-end |
|
|||
|
|
| ------ | ----- |
|
|||
|
|
| <img width="486" alt="Screenshot 2023-02-28 at 10 41 52" src="https://user-images.githubusercontent.com/186112/221814583-b6cf968b-5b5b-4d70-821b-7667f83aa5f9.png"> | <img width="485" alt="Screenshot 2023-02-28 at 10 41 46" src="https://user-images.githubusercontent.com/186112/221814479-f42ec118-b41e-4372-9ec8-c52a1d927716.png"> |
|
|||
|
|
|
|||
|
|
| Editor | Front-end |
|
|||
|
|
| ------ | ----- |
|
|||
|
|
| <img width="499" alt="Screenshot 2023-03-01 at 10 01 41" src="https://user-images.githubusercontent.com/186112/222092514-201d45e3-88be-47c5-ad9a-58af77f8ef97.png">|<img width="512" alt="Screenshot 2023-03-01 at 10 01 51" src="https://user-images.githubusercontent.com/186112/222092537-fae29747-d360-406c-b0df-35f02a5b78b3.png">|
|
|||
|
|
|
|||
|
|
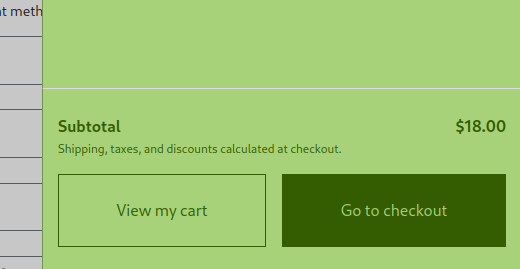
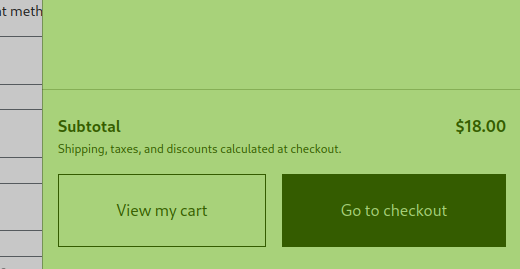
#### After
|
|||
|
|
|
|||
|
|
| Editor | Frontend |
|
|||
|
|
| ------ | ----- |
|
|||
|
|
| 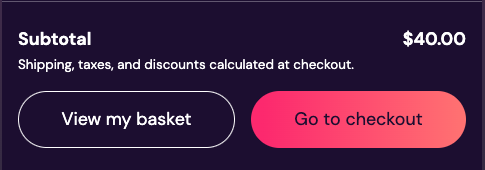 |  |
|
|||
|
|
|
|||
|
|
| Editor | Frontend |
|
|||
|
|
| ------ | ----- |
|
|||
|
|
|| |
|
|||
|
|
|
|||
|
|
### Products block: Using nested selector to add margin between Product elements [#8993](https://github.com/woocommerce/woocommerce-blocks/pull/8993)
|
|||
|
|
|
|||
|
|
1. Create a new post & Add Products block to it.
|
|||
|
|
2. Add all product elements as inner blocks
|
|||
|
|
<img width="274" alt="image" src="https://user-images.githubusercontent.com/16707866/233044525-50b864de-0236-4d11-8bdc-9e89c539b611.png">
|
|||
|
|
|
|||
|
|
3. Save & publish
|
|||
|
|
4. Verify that on Editor & Frontend, There is equal space between the product elements.
|
|||
|
|
5. Now using following steps, verify that user can still change margin-top & bottom of products elements using Global styles:
|
|||
|
|
1. Open the Global Styles sidebar by clicking the "Styles" button at the top right corner of the editor. [video](https://user-images.githubusercontent.com/16707866/228781997-24a9a29f-4be7-46d4-b1b3-41520692d86d.mov)
|
|||
|
|
2. In the Global Styles sidebar, locate any product element, for example, "Product Price" block.
|
|||
|
|
3. Change margin-top & bottom and save the changes.
|
|||
|
|
4. Check the Product Price block in both the editor and on the front-end to ensure that the changes made through the Global styles UI are accurately applied:
|
|||
|
|
- In the editor, inspect Product Price block & ensure it matches the value set in the Global styles UI.
|
|||
|
|
- Save the post & publish it. On frontend, inspect Product Price block & ensure it matches the value set in the Global styles UI.
|
|||
|
|
|
|||
|
|
### [Patterns]: Add new Header Centered Search pattern [#9081](https://github.com/woocommerce/woocommerce-blocks/pull/9081)
|
|||
|
|
|
|||
|
|
1. Create a new page or post
|
|||
|
|
2. Make sure the `WooCommerce Header Centered Search` pattern appears under the WooCommerce category dropdown.
|
|||
|
|
3. Insert in and make sure it shows as expected on the design.
|
|||
|
|
|
|||
|
|

|
|||
|
|
|
|||
|
|
### [Patterns] Add new Footer with 3 menus menu [#9175](https://github.com/woocommerce/woocommerce-blocks/pull/9175)
|
|||
|
|
|
|||
|
|
1. Create a new page or post
|
|||
|
|
2. Make sure the `Footer with 3 menus` pattern appears under the WooCommerce category dropdown.
|
|||
|
|
3. Insert in and make sure it shows as expected on the design.
|
|||
|
|
|
|||
|
|

|
|||
|
|
|
|||
|
|
### Use currentColor for Mini Cart footer border [#9245](https://github.com/woocommerce/woocommerce-blocks/pull/9245)
|
|||
|
|
|
|||
|
|
1. Go to the Appearance > Editor > Template Parts, open the `Header template`, and insert the `Mini Cart` block.
|
|||
|
|
2. Go to the Appearance > Editor > Template Parts and open the `Mini Cart` template part.
|
|||
|
|
3. Change the text color of the Mini Cart template part to something different than black or gray. For example, set it to red, blue or green.
|
|||
|
|
4. Save it and, in the frontend, open the Mini Cart drawer.
|
|||
|
|
5. Verify the border between the main content of the Mini Cart drawer and the Mini Cart footer follows the text color (it's expected to be a translucent version of that color, similar to the border of the quantity input field of products).
|
|||
|
|
|
|||
|
|
Before | After
|
|||
|
|
--- | ---
|
|||
|
|
 | 
|
|||
|
|
|
|||
|
|
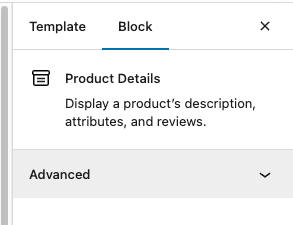
### Update the icon and description for the Product Details block [#9241](https://github.com/woocommerce/woocommerce-blocks/pull/9241)
|
|||
|
|
|
|||
|
|
1. Open the Site Editor.
|
|||
|
|
2. Go to the Single Product Template.
|
|||
|
|
3. Click on the button "Upgrade to Blockified Single Product Template".
|
|||
|
|
4. Get the focus on the Product Details Block.
|
|||
|
|
5. On the sidebar, check the icon of the block and the description are equals to the image below:
|
|||
|
|
|
|||
|
|
|
|||
|
|
|
|||
|
|
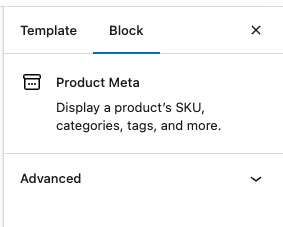
### Update icon and description for the Product Meta block [#9243](https://github.com/woocommerce/woocommerce-blocks/pull/9243)
|
|||
|
|
|
|||
|
|
1. Open the Site Editor.
|
|||
|
|
2. Go to the Single Product Template.
|
|||
|
|
3. Click on the button "Upgrade to Blockified Single Product Template".
|
|||
|
|
4. Get focus on the Product Meta Block.
|
|||
|
|
5. On the sidebar, check the icon of the block and the description are equals to the image below:
|
|||
|
|
|
|||
|
|
|
|||
|
|
|
|||
|
|
### [Patterns]: Add new Featured products: 5-item grid pattern [#9006](https://github.com/woocommerce/woocommerce-blocks/pull/9006)
|
|||
|
|
|
|||
|
|
1. Create a new page or post
|
|||
|
|
2. Make sure the `WooCommerce Featured Products 5-item grid` pattern appears under the WooCommerce category dropdown.
|
|||
|
|
3. Insert in and make sure it shows as expected on the design.
|
|||
|
|
|
|||
|
|
|
|||
|
|
|
|||
|
|
### Implement Hand-Picked Products block [#7925](https://github.com/woocommerce/woocommerce-blocks/pull/7925)
|
|||
|
|
|
|||
|
|
#### Simplest path
|
|||
|
|
|
|||
|
|
1. Add a “Products (Beta)” block to your page.
|
|||
|
|
2. Go to the “Advanced Filters” within the Inspector Controls and add “Hand-picked Products”.
|
|||
|
|
3. Start typing to select some products.
|
|||
|
|
4. Ensure the preview is correctly updated as you narrow down your selection.
|
|||
|
|
5. Click Publish.
|
|||
|
|
6. Ensure the front-end is correct.
|
|||
|
|
|
|||
|
|
#### Complex path
|
|||
|
|
|
|||
|
|
1. Repeat steps 1–4 above.
|
|||
|
|
2. Add additional filters (such as “On sale”).
|
|||
|
|
3. Ensure the block only applies the subsequent filters to the subset of products you have selected.
|
|||
|
|
|
|||
|
|
### Only validate postcode if its required or filled [#9377](https://github.com/woocommerce/woocommerce-blocks/pull/9377)
|
|||
|
|
|
|||
|
|
1. Set country to something with an optional postcode like Vietnam
|
|||
|
|
2. Try to checkout with the field empty, it should pass fine.
|
|||
|
|
|
|||
|
|
### Remove `<br>` In Hero Product – Split Pattern Heading [#9409](https://github.com/woocommerce/woocommerce-blocks/pull/9409)
|
|||
|
|
|
|||
|
|
1. In the editor, insert the `Hero Product – Split` pattern.
|
|||
|
|
2. Inspect the output and confirm that there is no `<br>` in the heading.
|
|||
|
|
3. Adjust the browser/viewport width and confirm that the text flows naturally without any unexpected line-breaks.
|
|||
|
|
|
|||
|
|

|
|||
|
|
|
|||
|
|
### Related Products: Fix hardcoded limit product [#9407](https://github.com/woocommerce/woocommerce-blocks/pull/9407)
|
|||
|
|
|
|||
|
|
1. Open the Single Product Template.
|
|||
|
|
2. Switch to the blockified template.
|
|||
|
|
3. Focus on the `Related Products Controls` block.
|
|||
|
|
4. Change the option `Items per Page`, for example, put 10.
|
|||
|
|
5. Be sure that there are often related products. (if not, you can just clone the same product multiple times)
|
|||
|
|
6. Save the template.
|
|||
|
|
7. Visit a Product and be sure that the Related Products block shows the number of products that you selected before. (if you select a high number, there is the risk that there will be displayed fewer products. It is not a bug, but it means that aren't so many related products).
|
|||
|
|
|
|||
|
|
## Feature plugin
|
|||
|
|
|
|||
|
|
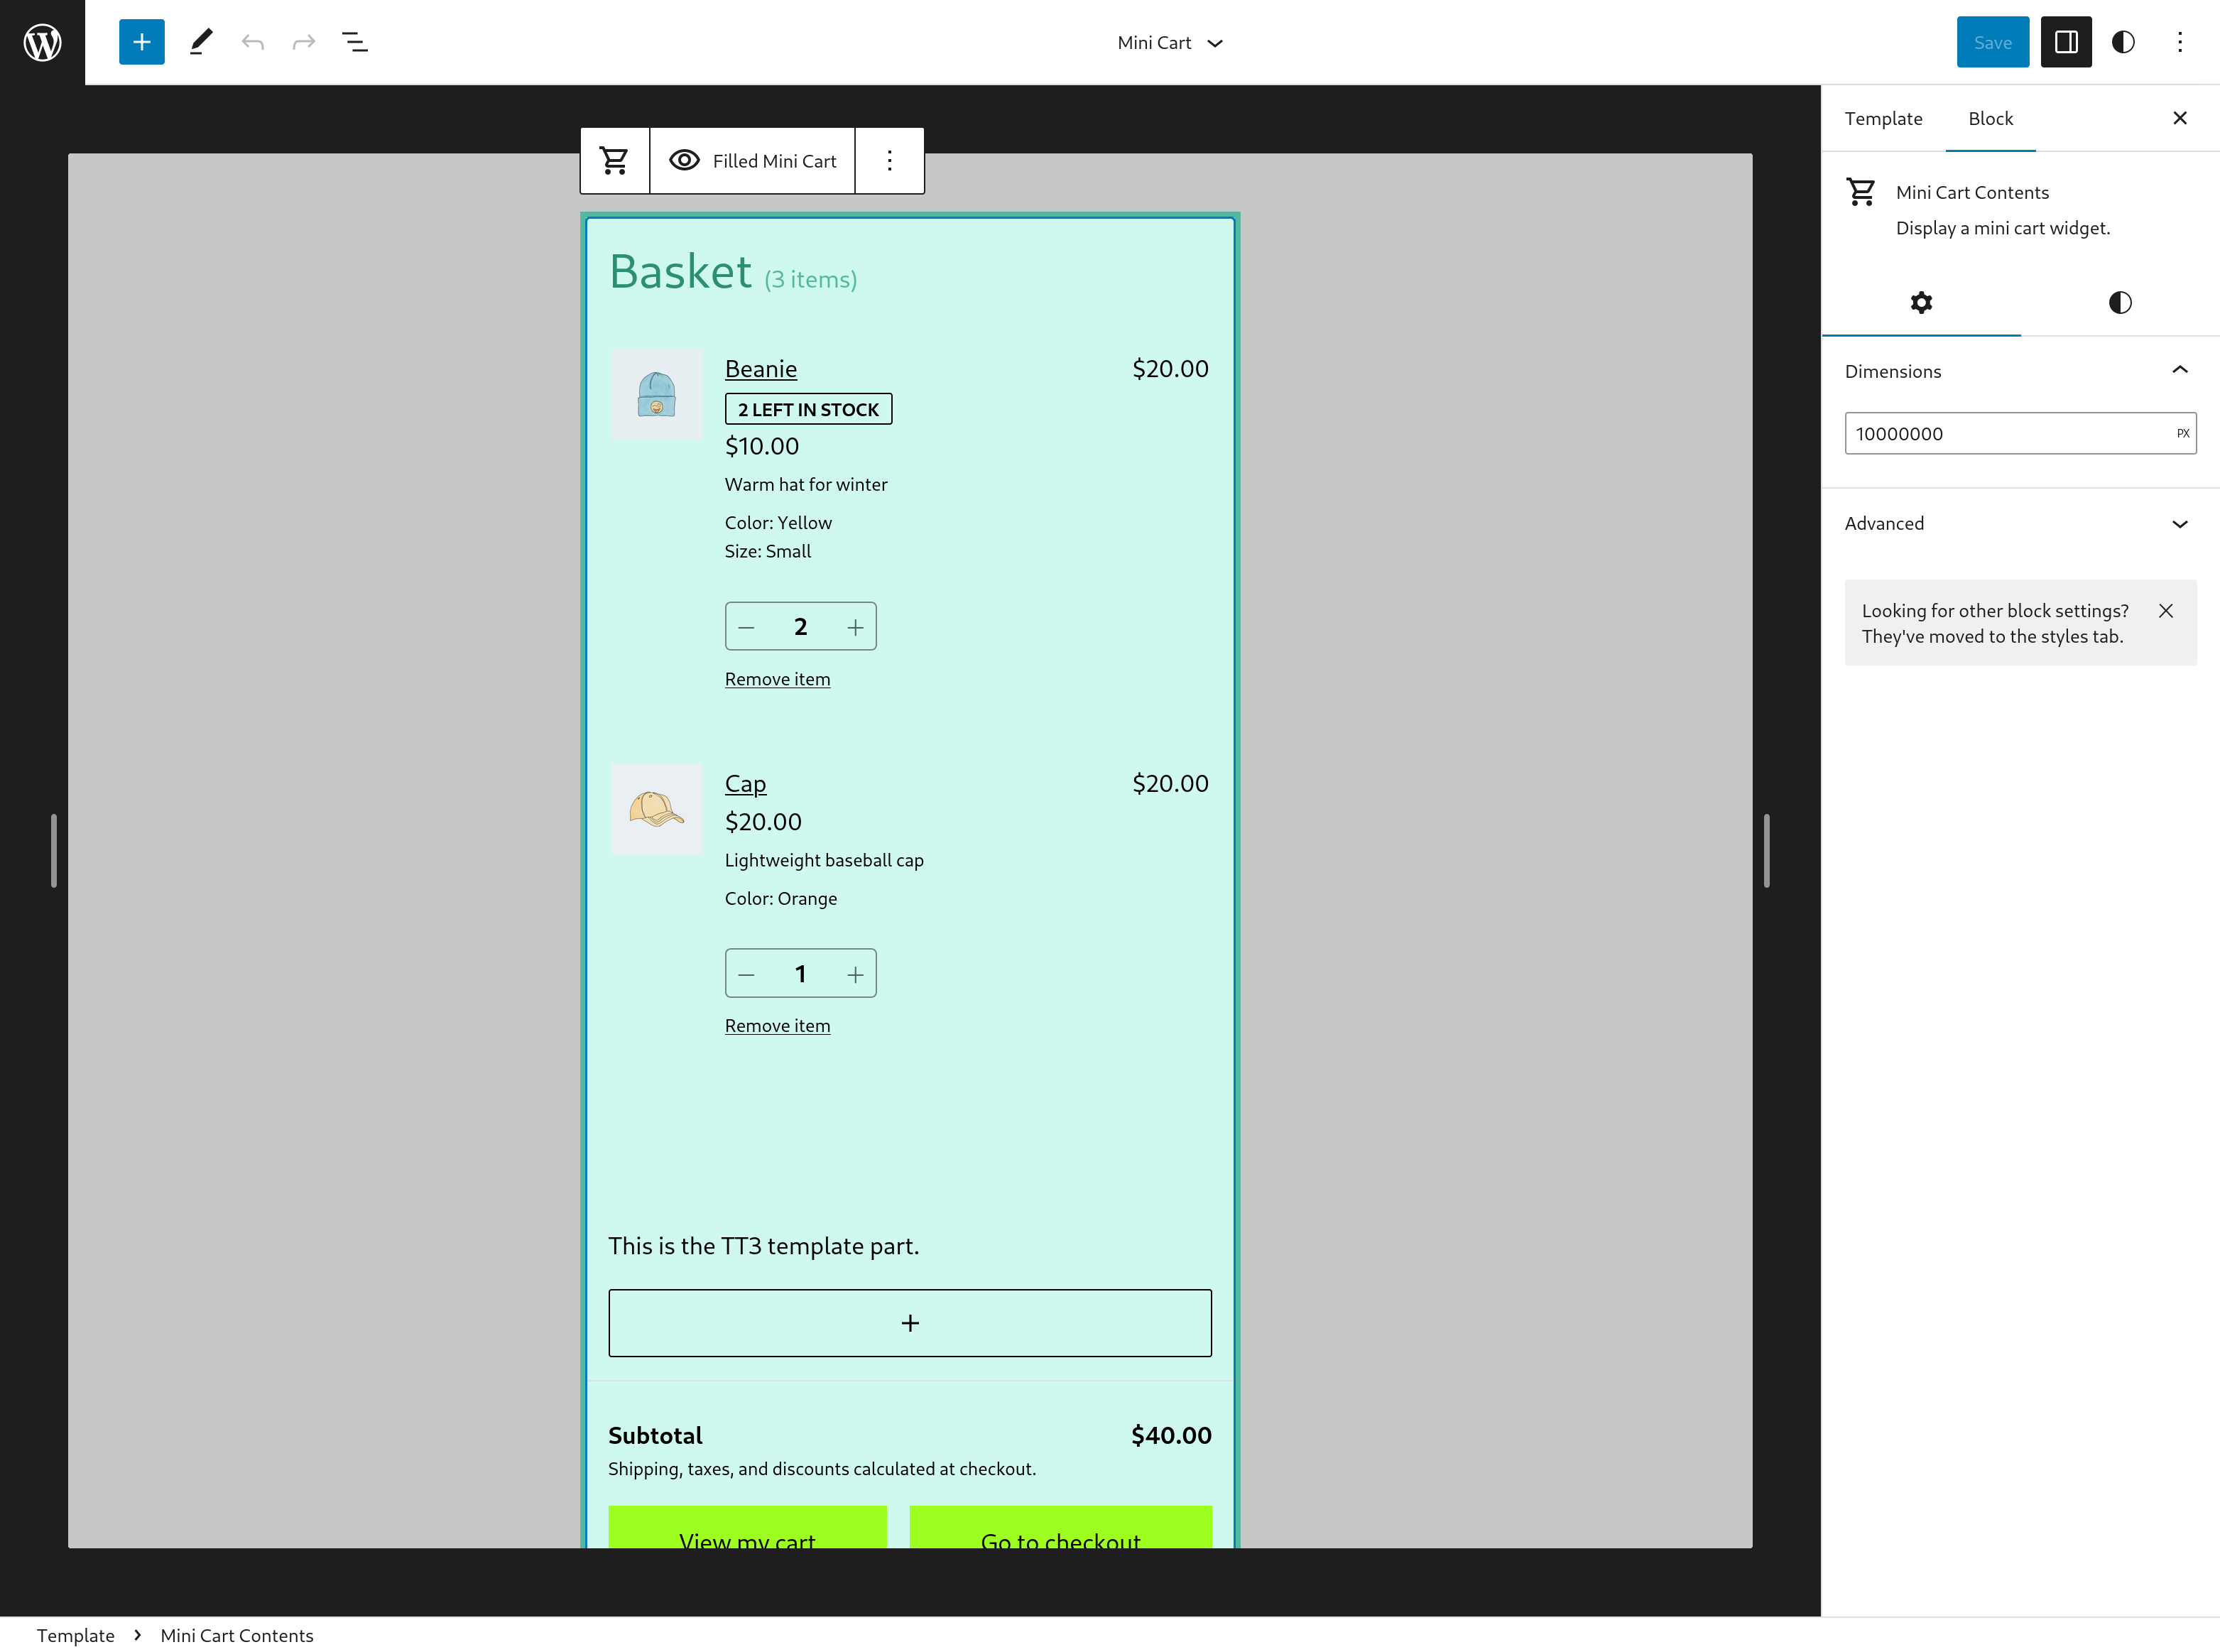
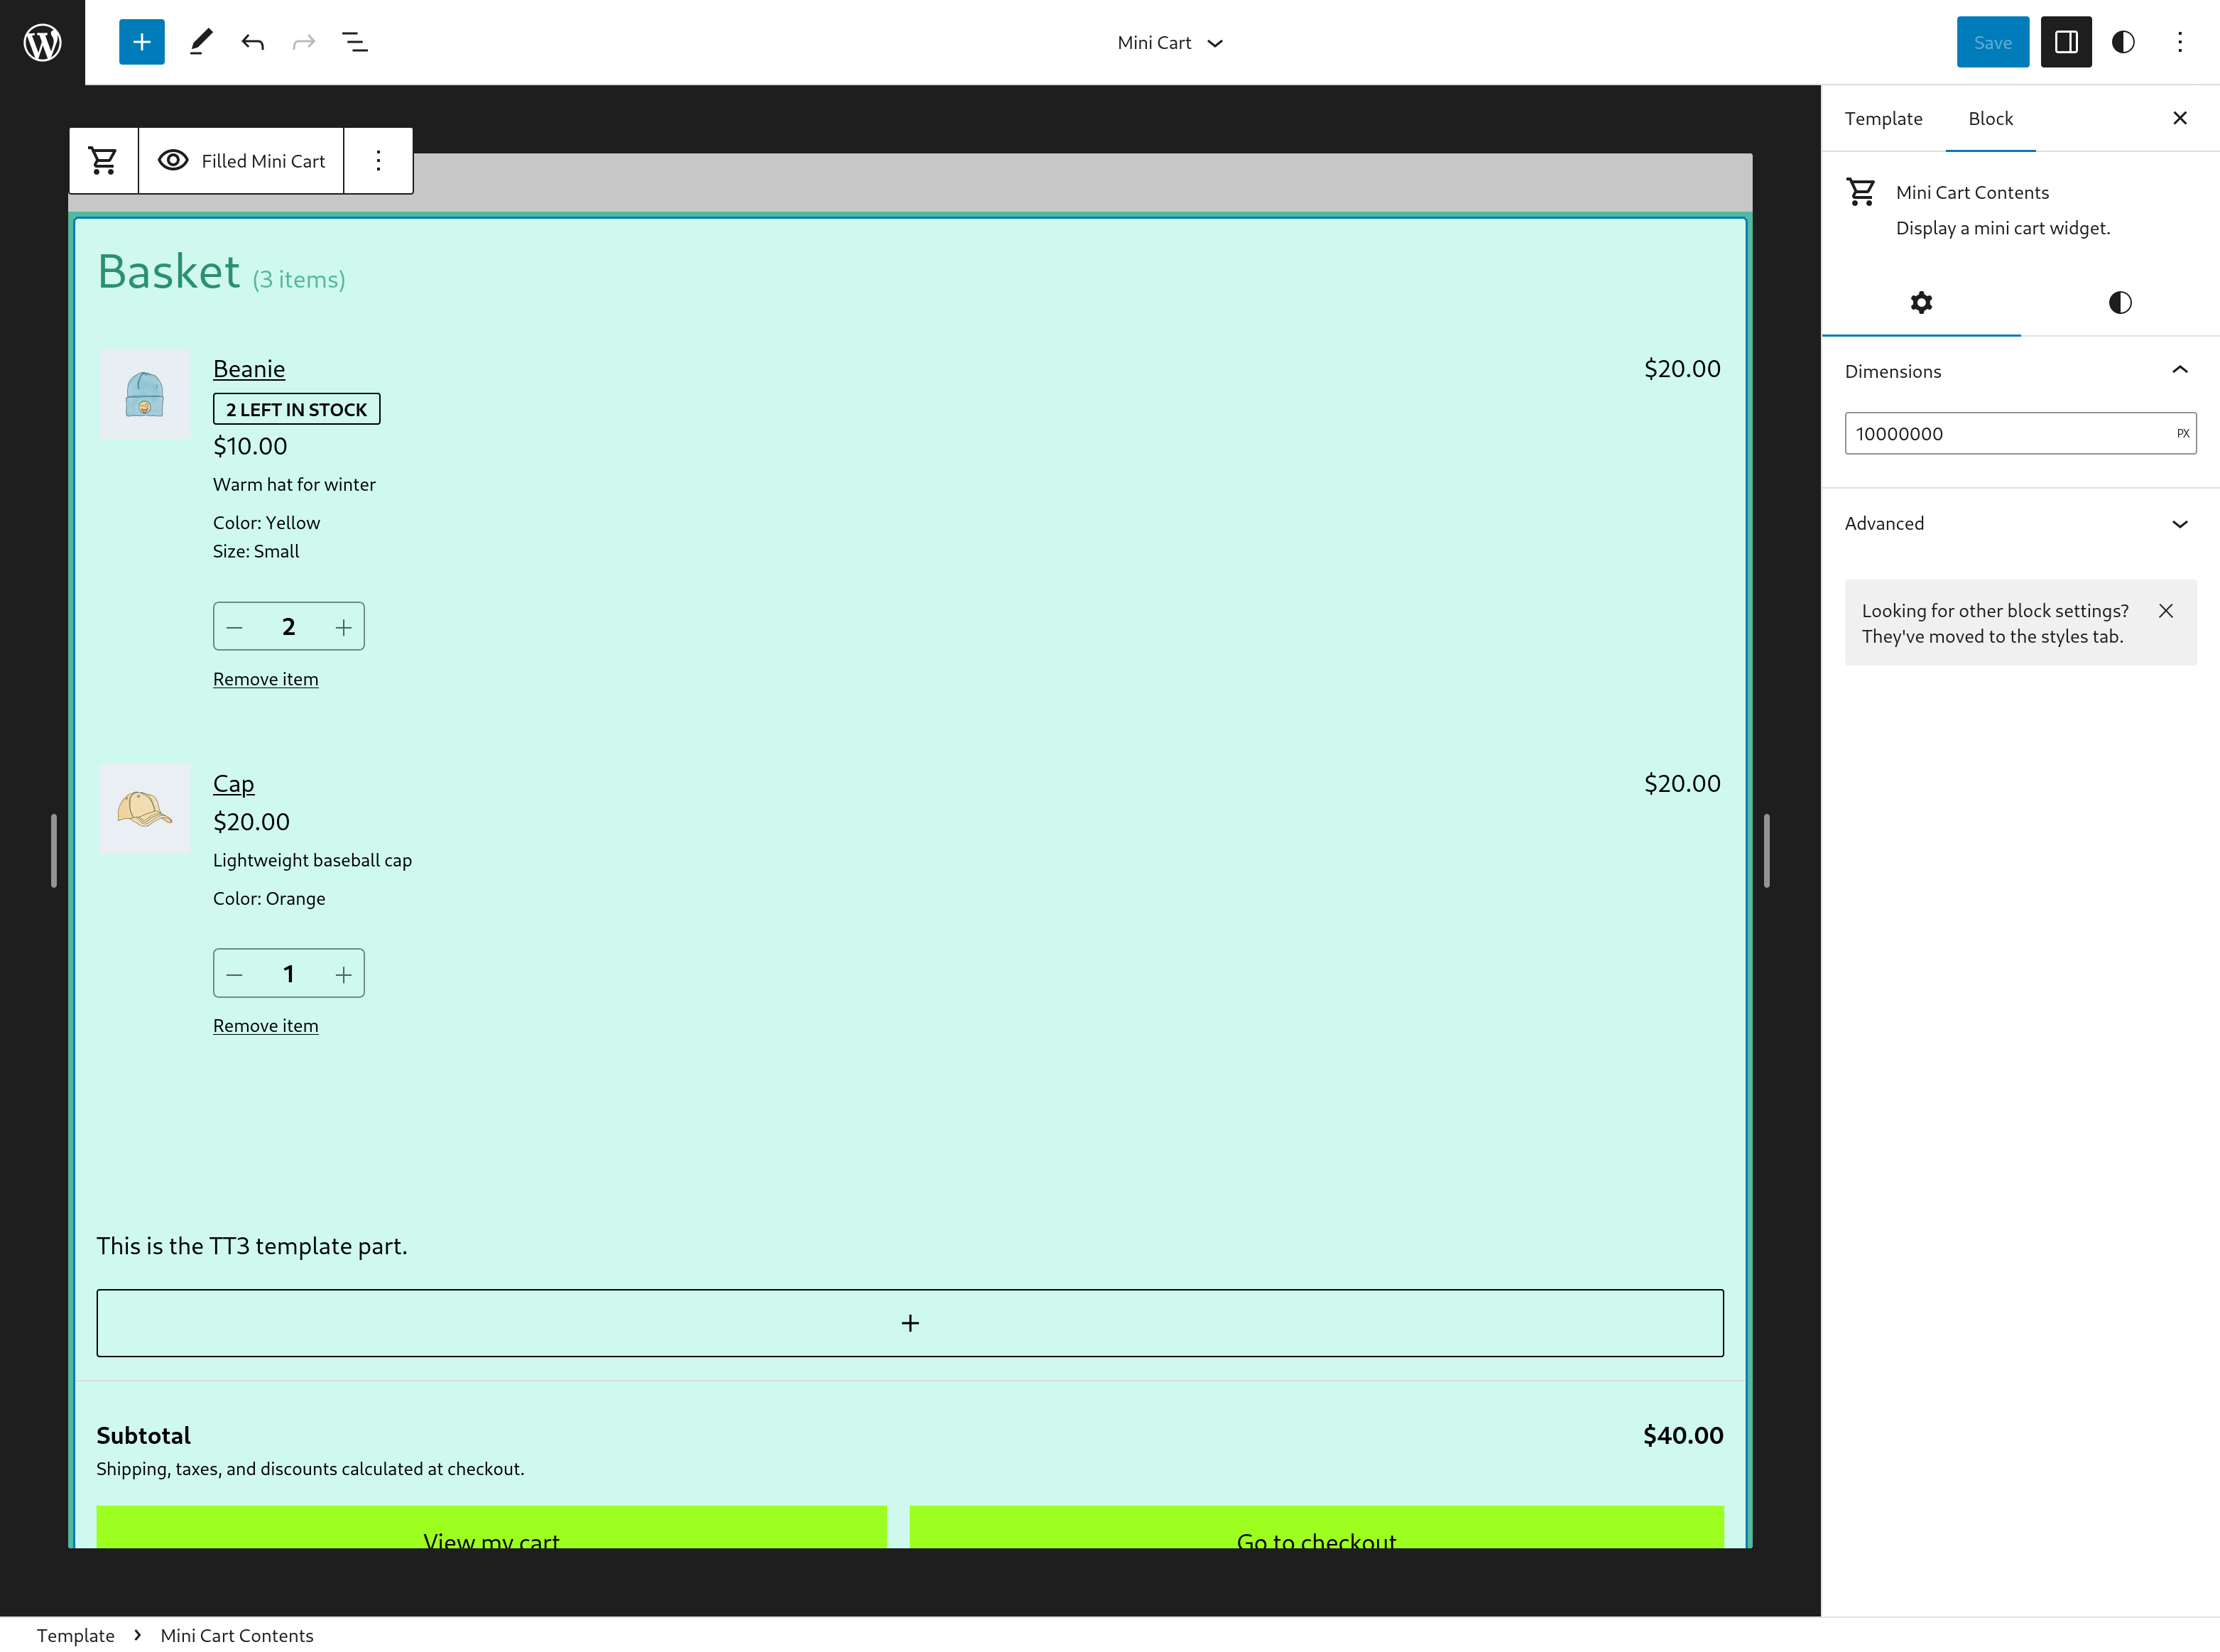
### Mini Cart Contents block: fix wide width not being applied in the editor [#9201](https://github.com/woocommerce/woocommerce-blocks/pull/9201)
|
|||
|
|
|
|||
|
|
1. Go to the `Editor`, open the `Header template`, and insert the `Mini Cart` block.
|
|||
|
|
2. Go to the `Editor` > `Template parts` and open the `Mini Cart` template.
|
|||
|
|
3. Open the `List View` and click on the `Mini Cart Contents` block.
|
|||
|
|
4. On the settings sidebar change the `Dimensions` to a wider size (like `9000`) and save.
|
|||
|
|
5. Verify that the change is applied and the Mini Cart Contents block occupies the entire available width.
|
|||
|
|
|
|||
|
|
Before | After
|
|||
|
|
--- | ---
|
|||
|
|
 | 
|