327 lines
17 KiB
Markdown
327 lines
17 KiB
Markdown
# Testing notes and ZIP for release 9.3.0
|
||
|
||
Zip file for testing: [woocommerce-gutenberg-products-block.zip](https://github.com/woocommerce/woocommerce-blocks/files/10336608/woocommerce-gutenberg-products-block.zip)
|
||
|
||
|
||
## load all JSON translation files correctly ([8034](https://github.com/woocommerce/woocommerce-blocks/pull/8034))
|
||
|
||
1. Switch to Dutch in your website.
|
||
2. Make sure all translation is working fine (in Shipping, summary items, and express payment).
|
||
|
||
## Disable Rate Limiting when editing Blocks in admin ([7934](https://github.com/woocommerce/woocommerce-blocks/pull/7934))
|
||
|
||
### Screenshots
|
||
|
||
<!-- If your change has a visual component, add a screenshot here. A "before" screenshot would also be helpful. -->
|
||
|
||
| Before | After |
|
||
| ------ | ----- |
|
||
| <img width="654" alt="image" src="https://user-images.githubusercontent.com/14235870/209948677-e2f2c68d-9397-4a4a-8597-491baa91221d.png"> | <img width="731" alt="image" src="https://user-images.githubusercontent.com/14235870/209966171-58b50d33-a814-44c6-b553-e198d07b89cc.png"> |
|
||
|
||
### Testing
|
||
|
||
1. Enable the [rate limiting filter for Store API](https://github.com/woocommerce/woocommerce-blocks/blob/trunk/src/StoreApi/docs/rate-limiting.md). You can use the [Code Snippets plugin](https://wordpress.org/plugins/code-snippets/) to add the following PHP script:
|
||
|
||
```PHP
|
||
add_filter( 'woocommerce_store_api_rate_limit_options', function() {
|
||
return [
|
||
'enabled' => true, // enables/disables Rate Limiting. Default: false
|
||
'proxy_support' => false, // enables/disables Proxy support. Default: false
|
||
'limit' => 1, // limit of request per timeframe. Default: 25
|
||
'seconds' => 500, // timeframe in seconds. Default: 10
|
||
];
|
||
} );
|
||
```
|
||
|
||
2. Create a product related page (e.g., Hand-picked Products)
|
||
3. Update the block to send some requests to the Store API. In the case of the `Hand-picked Products` block, clicking on `Edit selected products` should do the work:
|
||
|
||
<img width="654" alt="image" src="https://user-images.githubusercontent.com/14235870/209950192-33df0c22-f9ac-4be2-8dc6-886288c531fe.png">
|
||
|
||
4. Make sure the block is working as expected and you aren't getting any rate-limiting warnings.
|
||
5. Open your store in a new window using your browser's incognito mode. Add a product and go to the Cart Block page
|
||
6. Increase or decrease the product quantity couple of times. You can see failed rate limited request in the browser dev tools under `Network` tab, or you can reload the page to see the last saved product quantity value. See recording:
|
||
<https://user-images.githubusercontent.com/14235870/209964938-36018e19-5a0c-414a-8b8b-14683bf7617c.mov>
|
||
|
||
7. Repeat step 6 with a customer role account logged in. You should get the same result from step 6.
|
||
|
||
|
||
## Ensure filter blocks are not reloaded every time they are selected in the editor ([8002](https://github.com/woocommerce/woocommerce-blocks/pull/8002))
|
||
|
||
### Screenshots
|
||
|
||
<!-- If your change has a visual component, add a screenshot here. A "before" screenshot would also be helpful. -->
|
||
| Before | After |
|
||
| ------ | ----- |
|
||
| <img src="https://user-images.githubusercontent.com/15730971/208895281-abd1d784-11cd-497f-9a0d-a701e3dfd9f6.gif" width="380px"/> | <img src="https://user-images.githubusercontent.com/15730971/208894840-5fed09d6-2c5c-4da2-9ee3-370068709309.gif" width="380px"/> |
|
||
|
||
### Testing
|
||
|
||
1. Create a new post, add the following blocks: Filter by rating, filter by stock, filter by attribute, filter by price, Products (Beta), and publish it.
|
||
3. Access the post as a regular customer would. Ensure nothing has changed, and all filters are working as expected.
|
||
4. Now edit the post: ensure all components are normally loaded in the editor. When you click on them, ensure that you see the same behavior as demonstrated on [this gif](https://user-images.githubusercontent.com/15730971/208894840-5fed09d6-2c5c-4da2-9ee3-370068709309.gif) shared earlier on this PR (no preloaders should be displayed).
|
||
|
||
## Product Query: create variation of core/post-template as a Product Query inner block ([7838](https://github.com/woocommerce/woocommerce-blocks/pull/7838))
|
||
|
||
1. Add a Product Query block.
|
||
2. Ensure that the “Product Template” block shows up in the tree view instead of the “Post Template”.
|
||
|
||
## Highlight incompatible payment gateways ([7412](https://github.com/woocommerce/woocommerce-blocks/pull/7412))
|
||
|
||
### Screenshots
|
||
|
||
#### Highlight incompatible payment gateways using a sidebar notice
|
||
|
||
<table>
|
||
<tr>
|
||
<td>Before:
|
||
<br><br>
|
||
|
||
<img width="1294" alt="image" src="https://user-images.githubusercontent.com/14235870/208879962-334b7398-c942-4c7f-9dbb-7997c75ae68e.png">
|
||
</td>
|
||
<td>After:
|
||
<br><br>
|
||
|
||
<img width="1295" alt="image" src="https://user-images.githubusercontent.com/14235870/209318806-4d3b0e16-bb97-4a51-8818-3529b0559be4.png">
|
||
</td>
|
||
</tr>
|
||
</table>
|
||
|
||
#### Highlight incompatible payment gateways within the `Payment Options Block`
|
||
|
||
<table>
|
||
<tr>
|
||
<td>Before:
|
||
<br><br>
|
||
|
||
<img width="1295" alt="image" src="https://user-images.githubusercontent.com/14235870/208880696-905c1d6a-9332-4450-bce2-7835df2c8071.png">
|
||
</td>
|
||
<td>After:
|
||
<br><br>
|
||
|
||
<img width="1277" alt="image" src="https://user-images.githubusercontent.com/14235870/208877521-be381930-4933-445b-9aa8-a33c2290b749.png">
|
||
</td>
|
||
</tr>
|
||
</table>
|
||
|
||
### Testing
|
||
|
||
#### Highlight incompatible payment gateways using a sidebar notice
|
||
|
||
1. Add incompatible payment gateways with the C&C Blocks (e.g., Paypal, Klarna Payments). You will need to configure them to be detected and used by WooCommerce.
|
||
2. Create a new page and add the `Checkout Block`
|
||
3. Verify there is a notice in the sidebar displaying the list of incompatible gateways. The `make as default` & `sidebar compatibility` notices should be hidden while the `incompatible gateways` notice is displayed.
|
||
|
||
<img width="1295" alt="image" src="https://user-images.githubusercontent.com/14235870/209318806-4d3b0e16-bb97-4a51-8818-3529b0559be4.png">
|
||
|
||
4. Select each inner block in the Checkout Blocks' `List View` to ensure our notice is displayed for each one.
|
||
5. Dismiss the `incompatible gateways` notice by clicking the top right `X` button. The `make as default` & `sidebar compatibility` notices should be visible again.
|
||
|
||
<img width="1300" alt="image" src="https://user-images.githubusercontent.com/14235870/208722992-6d0237f2-5f6c-4514-83d5-66bbdb2333c0.png">
|
||
|
||
6. Do the same test from step 2 to 5 using the `Cart Block`
|
||
|
||
#### Highlight incompatible payment gateways within the `Payment Options Block`
|
||
|
||
1. If it's not done already, add incompatible payment gateways with the C&C Blocks (e.g., Paypal, Klarna Payments)
|
||
2. Create a new page and add the `Checkout Block`
|
||
3. Select the `Payment Options Block`, and check the list of available payment gateways under `Methods` in the sidebar. The incompatible payment gateways should be highlighted (i.e., `Incompatible with block-based checkout`)
|
||
|
||
<img width="1277" alt="image" src="https://user-images.githubusercontent.com/14235870/208877521-be381930-4933-445b-9aa8-a33c2290b749.png">
|
||
|
||
## Display "Add review" link if there's no product rating ([7929](https://github.com/woocommerce/woocommerce-blocks/pull/7929))
|
||
|
||
### Screenshots
|
||
|
||
| Case | Before | After |
|
||
| ------ | ----- |----- |
|
||
| Products (Editor) | <img width="592" alt="image" src="https://user-images.githubusercontent.com/20098064/207905785-d89dbc36-7c4f-4f28-819d-0f95b20ecf7d.png"> | <img width="598" alt="image" src="https://user-images.githubusercontent.com/20098064/207904856-f0aafd72-12f4-4e68-9f8a-ae5c967d3bcc.png"> |
|
||
| Products (Frontend) | <img width="705" alt="image" src="https://user-images.githubusercontent.com/20098064/207905847-e7493b7c-9544-4f77-92e6-f49a1ea21070.png"> | <img width="705" alt="image" src="https://user-images.githubusercontent.com/20098064/207905150-ae4ed20a-ac07-466f-a5e1-526b0a213e63.png"> |
|
||
| All Products (Editor) | <img width="611" alt="image" src="https://user-images.githubusercontent.com/20098064/207905913-b8a2c225-c554-4c52-bb65-e0f333d008be.png"> | <img width="601" alt="image" src="https://user-images.githubusercontent.com/20098064/207905315-c9588233-9ab0-48db-8a20-feea35a9816e.png"> |
|
||
| All Products (Frontend) | <img width="705" alt="image" src="https://user-images.githubusercontent.com/20098064/207905998-4d8c4481-278f-47ad-9f30-b8ac610e99cc.png"> | <img width="703" alt="image" src="https://user-images.githubusercontent.com/20098064/207905450-b5d8ad0d-1405-4fe8-a84c-5cc00de3b0bc.png"> |
|
||
|
||
### Testing
|
||
|
||
Prerequisites:
|
||
|
||
- make sure you have at least one product **with** and at least one product **without** rating
|
||
|
||
### All Products and Products blocks
|
||
|
||
Steps:
|
||
|
||
1. Go to Editor and add _All Products_ block
|
||
2. Make sure Rating is included in product layout (Pencil icon > Use inserter > Add "Product Rating" block)
|
||
3. Save the template
|
||
|
||
**Expected:**
|
||
|
||
- Both products, _with_ and _without_ rating, have the same layout.
|
||
- Products with no rating have "Add review" link
|
||
- Link is not clickable in Editor
|
||
|
||
4. Go to the Frontend
|
||
|
||
**Expected:**
|
||
|
||
- Both products, _with_ and _without_ rating, have the same layout.
|
||
- Products with no rating have "Add review" link
|
||
- Link is interactive and redirects to Review section of the product
|
||
|
||
**Repeat the same for the Products block!**
|
||
|
||
### Regression testing - Product view
|
||
|
||
1. Go to product page of the product without rating.
|
||
|
||
**Expected:**
|
||
|
||
- There's no "Add review" link instead or rating stars
|
||
|
||
### Regression testing - Rating alignment
|
||
|
||
1. Check the Alignment settings in both: _Products_ for both: stars and link!
|
||
<img width="300" alt="image" src="https://user-images.githubusercontent.com/20098064/208086484-3241f878-c550-454c-9749-425e4c54e32c.png">
|
||
|
||
**Expected:**
|
||
|
||
- Alignment is respected in Editor and Frontend for all: left, center and right alignment
|
||
|
||
### Regression testing - Filer by Rating
|
||
|
||
1. Add Filter by Rating block
|
||
2. Save and go to Frontend
|
||
|
||
**Expected:**
|
||
|
||
- There's no "loading" placeholder in place of stars in the Filter by Rating
|
||
|
||
## Don't check for validation on pushChange ([8029](https://github.com/woocommerce/woocommerce-blocks/pull/8029))
|
||
|
||
1. In Checkout, turn terms and condition block into a checkbox.
|
||
2. Go to Checkout, fill out your address, notice that shipping rates update fine and your request makes it to the server.
|
||
3. Check the terms and condition block.
|
||
4. Back to the form, you should see the same behavior.
|
||
|
||
## Use Woo Blocks instead Woo core translation within the Checkout order Summary block ([7995](https://github.com/woocommerce/woocommerce-blocks/pull/7995))
|
||
|
||
### Screenshots
|
||
|
||
<table>
|
||
<tr>
|
||
<td>Before:
|
||
<br><br>
|
||
|
||
<img width="461" alt="Screenshot 2022-12-20 at 19 41 01" src="https://user-images.githubusercontent.com/3323310/208670071-3c978be7-31bf-458c-9a38-2a82d4e1c1c8.png">
|
||
</td>
|
||
<td>After:
|
||
<br><br>
|
||
|
||
<img width="465" alt="Screenshot 2022-12-20 at 19 41 59" src="https://user-images.githubusercontent.com/3323310/208670082-9df5db6a-414b-4c26-89fb-39d869c35d0f.png">
|
||
</td>
|
||
</tr>
|
||
</table>
|
||
|
||
### Testing
|
||
|
||
1. Head over to `/wp-admin/options-general.php` and change the site language to Dutch.
|
||
2. Head over to `/wp-admin/update-core.php` and fetch the translations: `Vertalingen → Vertalingen updaten`
|
||
3. Create a test page and add the Checkout block to it.
|
||
4. Head over to the frontend and add a product to the cart.
|
||
5. Head over to the Checkout block and verify that the title of the shipping section shows `Verzending` instead of `Verzendmethoden`.
|
||
|
||
## Add Customer account to patterns ([7944](https://github.com/woocommerce/woocommerce-blocks/pull/7944))
|
||
|
||
1. Create a new page and add all the `WooCommerce Header` patterns in their two versions (light and dark).
|
||
2. Save the page and check the `Customer Account` block shows as expected on the designs:
|
||
CdRRBQ50zJiDvnY3AbDiXd-fi-76%3A9726
|
||
4. Repeat for all the `WooCommerce Footer` patterns (light and dark).
|
||
|
||
## Add 'Customer Account' block ([7876](https://github.com/woocommerce/woocommerce-blocks/pull/7876))
|
||
|
||
1. Create a new page and add the `Customer Account` block.
|
||
2. Click on the block to open the sidebar settings and make sure there's a link `Manage account settings` that goes to the `Accounts & Privacy` WC admin page.
|
||
3. Check that you see the `Display` section on the settings and that you can change the display style to `Icon-only`, `Text-only` and `Icon and text` and that you can choose between the two icon styles.
|
||
4. Change the display options, save the page, and make sure all these configurations are correctly rendered in the editor and front end.
|
||
|
||
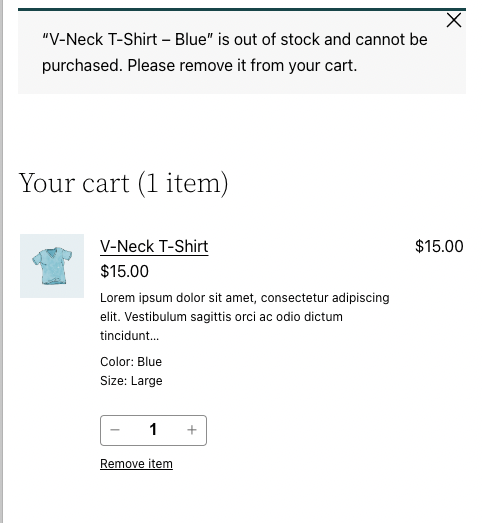
## Mini Cart block - added notice support ([7234](https://github.com/woocommerce/woocommerce-blocks/pull/7234))
|
||
|
||
### Screenshots
|
||
|
||
<!-- If your change has a visual component, add a screenshot here. A "before" screenshot would also be helpful. -->
|
||
|
||
|
||
|
||
### Testing
|
||
|
||
1. Open the FSE editor and add the Mini Cart Block in the header. Save.
|
||
2. Go to the frontend and add the product to the Cart. Be sure that on Mini Cart Block any "notice" is visible on top.
|
||
3. On the editor side, edit the product that you added and set it as out of stock. Save.
|
||
4. On the frontend side, refresh the page. Go to the Cart page and see the notice.
|
||
5. Open the Mini Cart block and be sure that the notice is visible.
|
||
|
||
## Refactor View Switcher to use Block Attributes ([8006](https://github.com/woocommerce/woocommerce-blocks/pull/8006))
|
||
|
||
1. Go to the page containing the Cart Block
|
||
2. Click the Cart Block/Inner Blocks within the Cart Block
|
||
3. Check that the view switcher is visible
|
||
4. Change to "empty cart" view
|
||
5. View should change and the parent cart block should be selected in the UI
|
||
6. Repeat to switch back to the filled cart view
|
||
|
||
After testing the cart block, repeat the above tests for the mini cart block. With a block-based theme go here:
|
||
|
||
```bash
|
||
wp-admin/site-editor.php?postType=wp_template_part&postId=woocommerce%2Fwoocommerce%2F%2Fmini-cart
|
||
```
|
||
|
||
## Remove opinionated styles from Button component on TT3 and Zaino themes ([7992](https://github.com/woocommerce/woocommerce-blocks/pull/7992))
|
||
|
||
### Screenshots
|
||
|
||
Screenshots are from the Mini Cart block, but these changes also impact the Cart and Checkout blocks.
|
||
Theme | Before | After
|
||
--- | --- | ---
|
||
Storefront |  | 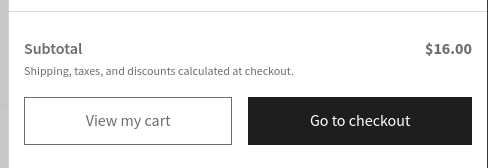
|
||
Twenty Twenty One | 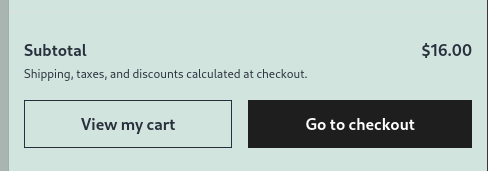 | 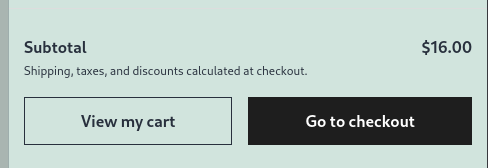
|
||
Twenty Twenty Two |  | 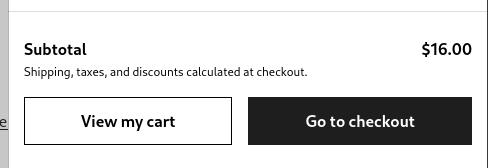
|
||
Twenty Twenty Three (Canary) | 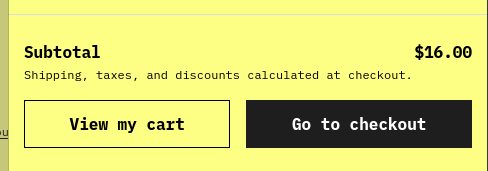 | 
|
||
Twenty Twenty Three (Pilgrimage) | 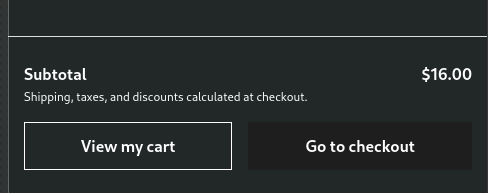| 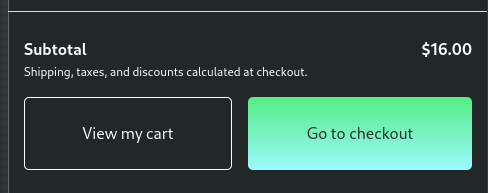
|
||
Twenty Twenty Three (Whisper) | 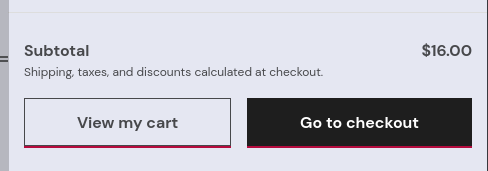 | 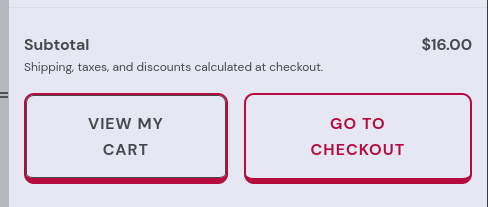
|
||
Zaino | 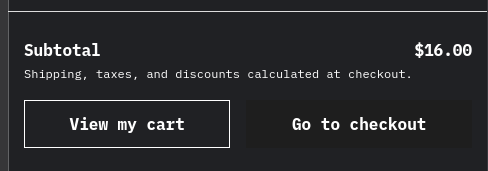| 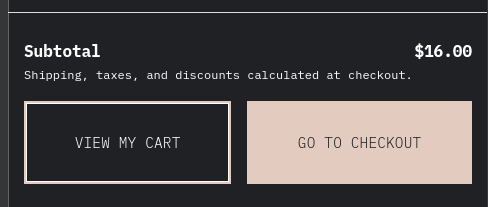
|
||
|
||
### Testing
|
||
|
||
**Preparation:**
|
||
|
||
Create three posts, one with the Mini Cart block, another one with the Cart block and the last one with the Checkout block.
|
||
|
||
**Test different themes:**
|
||
|
||
1. Twenty Twenty Three:
|
||
1.1. Install it from here: <https://wordpress.org/themes/twentytwentythree/>
|
||
1.2. Go to the pages created in step 1 and verify the Mini Cart, Cart and Checkout buttons **follow** the theme styles.
|
||
1.3. Go to Apperance > Editor > Styles > Browse Styles and change between style variations. Verify the buttons follow the styles in all of them.
|
||
|
||
2. Twenty Twenty Two (or another block theme):
|
||
2.1. Install it from here: <https://wordpress.org/themes/twentytwentytwo/>
|
||
2.2. Go to the pages created in step 1 and verify the Mini Cart, Cart and Checkout buttons **don't follow** the theme styles. Instead, they have opinionated styles.
|
||
|
||
3. Storefront (or another classic theme):
|
||
3.1. Install it from here: <https://wordpress.org/themes/storefront/>
|
||
3.2. Go to the pages created in step 1 and verify the Mini Cart, Cart and Checkout buttons **don't follow** the theme styles. Instead, they have opinionated styles.
|
||
|
||
## Cart Block > Ensure no console errors are displayed when an invalid coupon is applied ([7969](https://github.com/woocommerce/woocommerce-blocks/pull/7969))
|
||
|
||
### Screenshots
|
||
|
||
| Before | After |
|
||
| ------ | ----- |
|
||
|<img width="1758" alt="Screenshot 2022-12-16 at 14 43 16" src="https://user-images.githubusercontent.com/15730971/208111589-531648b0-4a2f-43e6-a645-3da2caaf9d9f.png"> | <img width="1750" alt="Screenshot 2022-12-16 at 14 41 17" src="https://user-images.githubusercontent.com/15730971/208111618-64e751b4-f583-4f6d-bfd0-bebb61584184.png"> |
|
||
|
||
### Testing
|
||
|
||
1. Add the Cart Block to a post/page and access it
|
||
2. Apply a non-existent coupon
|
||
3. Open the JS console on dev-tools and confirm no errors are listed.
|