42 KiB
Testing notes and ZIP for release 9.7.0
Zip file for testing: woocommerce-gutenberg-products-block.zip
WooCommerce Core
Set inherit default to true when products is inserted on archive product templates (8375)
- Make sure you are using a block theme.
- Go to the
Products by Categorytemplate on theSite Editor. - Insert the
Products (Beta)block. - Make sure the
Inherit query from templateis enabled by default. - Repeat for the
Products by Tag,Products by Attribute,Product Search Results, andProduct Catalogtemplates. - Go to any other template (like
Single ProductorPage), insert theProducts (Beta)block, and make sure theInherit query from templateis disabled by default. - Create a new page or post and make sure you can insert the
Products (Beta)block.
Fixes CSS spacing and availability issues for breadcrumb, catalog sort, and result count blocks. (8391)
The issues are primarily visible with the Twenty Twenty Two theme. However, testing should be done against some other themes to make sure this doesn't introduce significant issues with those themes. In theory, it shouldn't because the CSS for the blocks should appropriately inherit what the theme provides for default margins and spacing in the container around the blocks.
- Go to the "Product Catalog" Template in the Site Editor (
Appearance->Editor). - Paste the following after the header in the template:
<!-- wp:group {"layout":{"type":"flex","flexWrap":"nowrap"}} -->
<div class="wp-block-group"><!-- wp:woocommerce/breadcrumbs {"textColor":"pale-pink","style":{"elements":{"link":{"color":{"text":"var:preset|color|light-green-cyan"}}}}} /-->

<!-- wp:woocommerce/catalog-sorting /-->

<!-- wp:woocommerce/product-results-count {"textColor":"vivid-green-cyan"} /--></div>
<!-- /wp:group -->
- Make sure that in the editor view the alignment for the blocks appears as in the above screenshots.
- Make sure that the shop catalog on the frontend (default is
sitedomain.com/shopon most WP installs) shows all blocks aligned as in the above screenshots.
Store Breadcrumbs
Misaligned Margin
| Before | After |
|---|---|
 |
 |
Breadcrumbs not even displaying for shop page
While it appears okay when editing the Product Catalog template, it is not shown on the frontend for certain themes. It surfaced with Twenty Twenty Two (or derivatives of that theme) for me.
| Before | After |
|---|---|
 |
 |
Catalog Sorting Block
| Before | After |
|---|---|
 |
 |
Product Results Count
| Before | After |
|---|---|
 |
 |
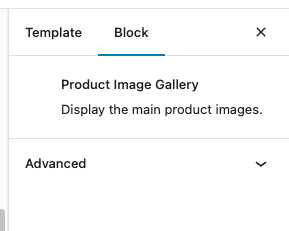
Add Product Image Gallery (8235)
- Via Site Editor, edit the Single Product Template.
- Add the
Product Image Gallery. Save it. - On the frontend side, open a product page, check that the Product Image Gallery is loaded, and show the right images.
- Check that the block can be added only on the Single Product Template
| Block Details | Preview Editor Side | Frontend |
|---|---|---|
 |
 |
 |
Add Single Product Details block (8225)
- Enable a blocked theme in your WordPress installation (go to Appearance > Themes, and select one of the blocked themes options, such as: Twenty-Twenty Three);
- Once the theme is enabled, go to Appearance > Editor (Beta);
- On the left side menu, click on Templates;
- Select the Single Product template, and click Edit;
- Select the WooCommerce Single Product Block that comes by default with the template, remove it, and Save;
- Using the Block Inserter, type: Single Product Details. Add it to the Editor and position the block as you want.
- Make sure the Single Product Details block is being displayed and contains the tabs: Description, Additional Information and Reviews;
- Save the changes. Access your website and click on a product;
- Make sure the Single Product Details block appears and contains the product description (Description tab), product attributes (Additional Information tab) and the product reviews (Reviews tab).
| Before | After |
|---|---|
 |
 |
Create the Add to Cart Form Block (8284)
- Make sure you are using a block theme.
- Make sure you have the following product types created in your store: Simple, Variable, Grouped and External.
- Edit the Single Product template on the Site Editor ( e.g. path > wp-admin/site-editor.php?postType=wp_template&postId=woocommerce%2Fwoocommerce%2F%2Fsingle-product&canvas=edit&sidebar=%2Ftemplates).
- Insert the new Add to Cart Form block and save.
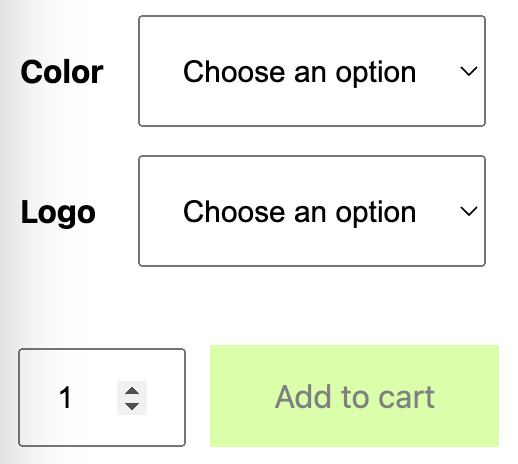
- Make sure in the editor you see a placeholder block and it matches the following:

- Access a single product page for a Simple product and ensure the content matches the one displayed on the screenshot shared here on this PR.
- Access a single product page for a Variable product and ensure the content matches the one displayed on the screenshot shared here on this PR.
- Access a single product page for a Grouped product and ensure the content matches the one displayed on the screenshot shared here on this PR.
- Access a single product page for an External product and ensure the content matches the one displayed on the screenshot shared here on this PR.
Editor Preview
The editor preview is just a placeholder in this initial moment: the style will change a bit later on as @vivialice and I had a convo today, and she is actively working on a design for it. Here's the current implementation:
We discussed adding placeholders (gray boxes) for the additional content that may or may not be visible depending on the product type last week. As this approach was implemented, the end result was a bit polluted, so I defaulted to relying exclusively on the notice instead.
Editor Sidebar
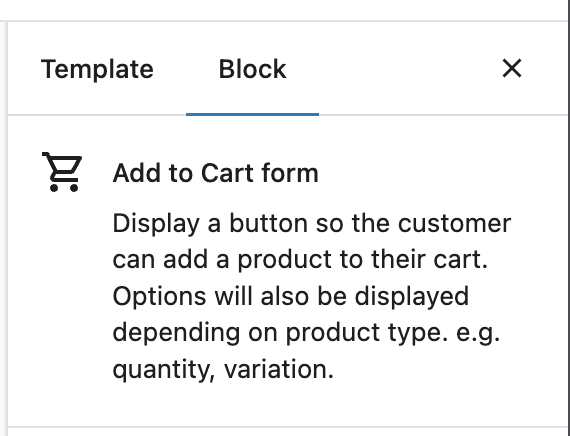
PS: The icon for this block also needs design review/approval cc: @vivialice .
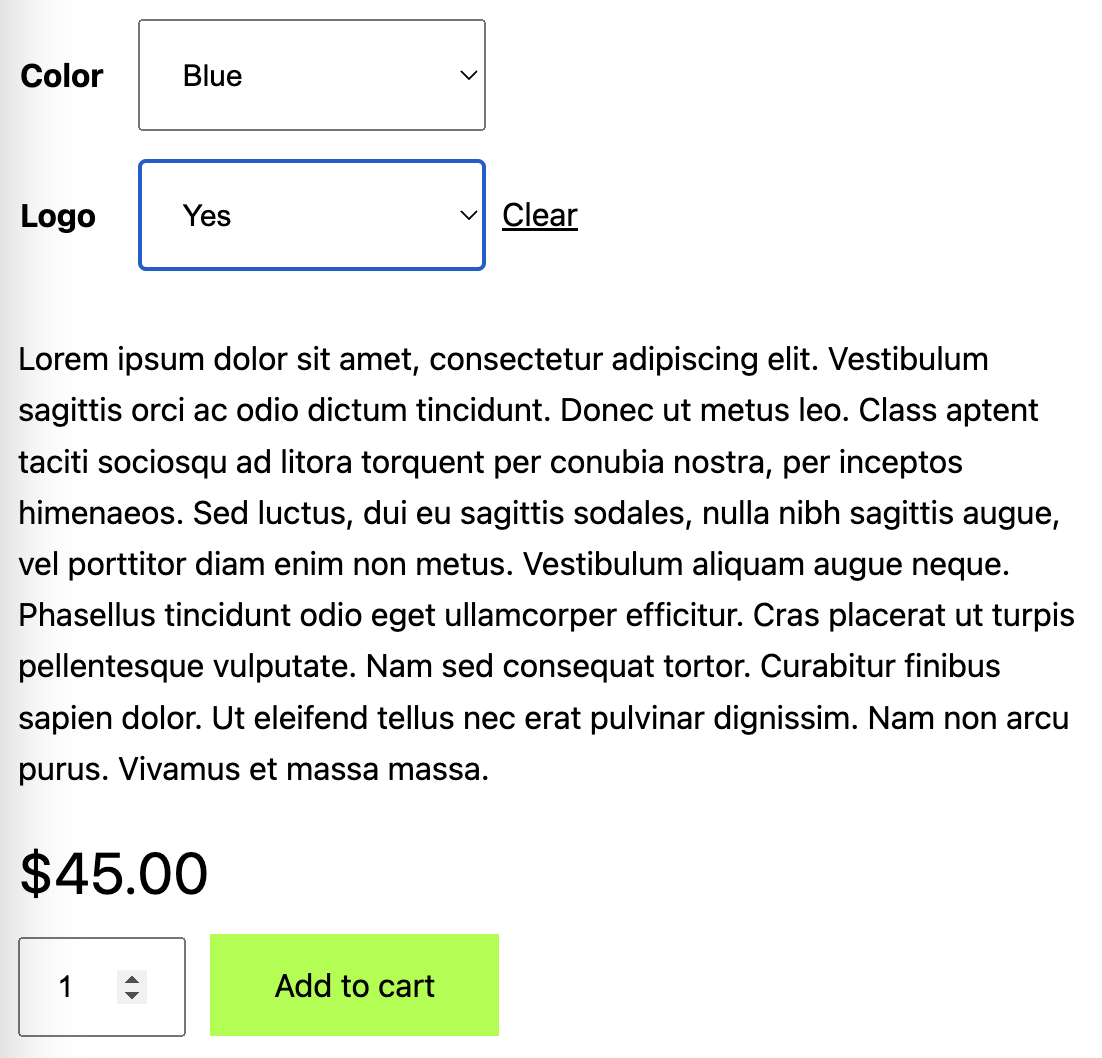
Frontend
The content displayed on the frontend is dynamically changed depending on the product type:
Simple Product

Grouped Product

Variable Product
External Product

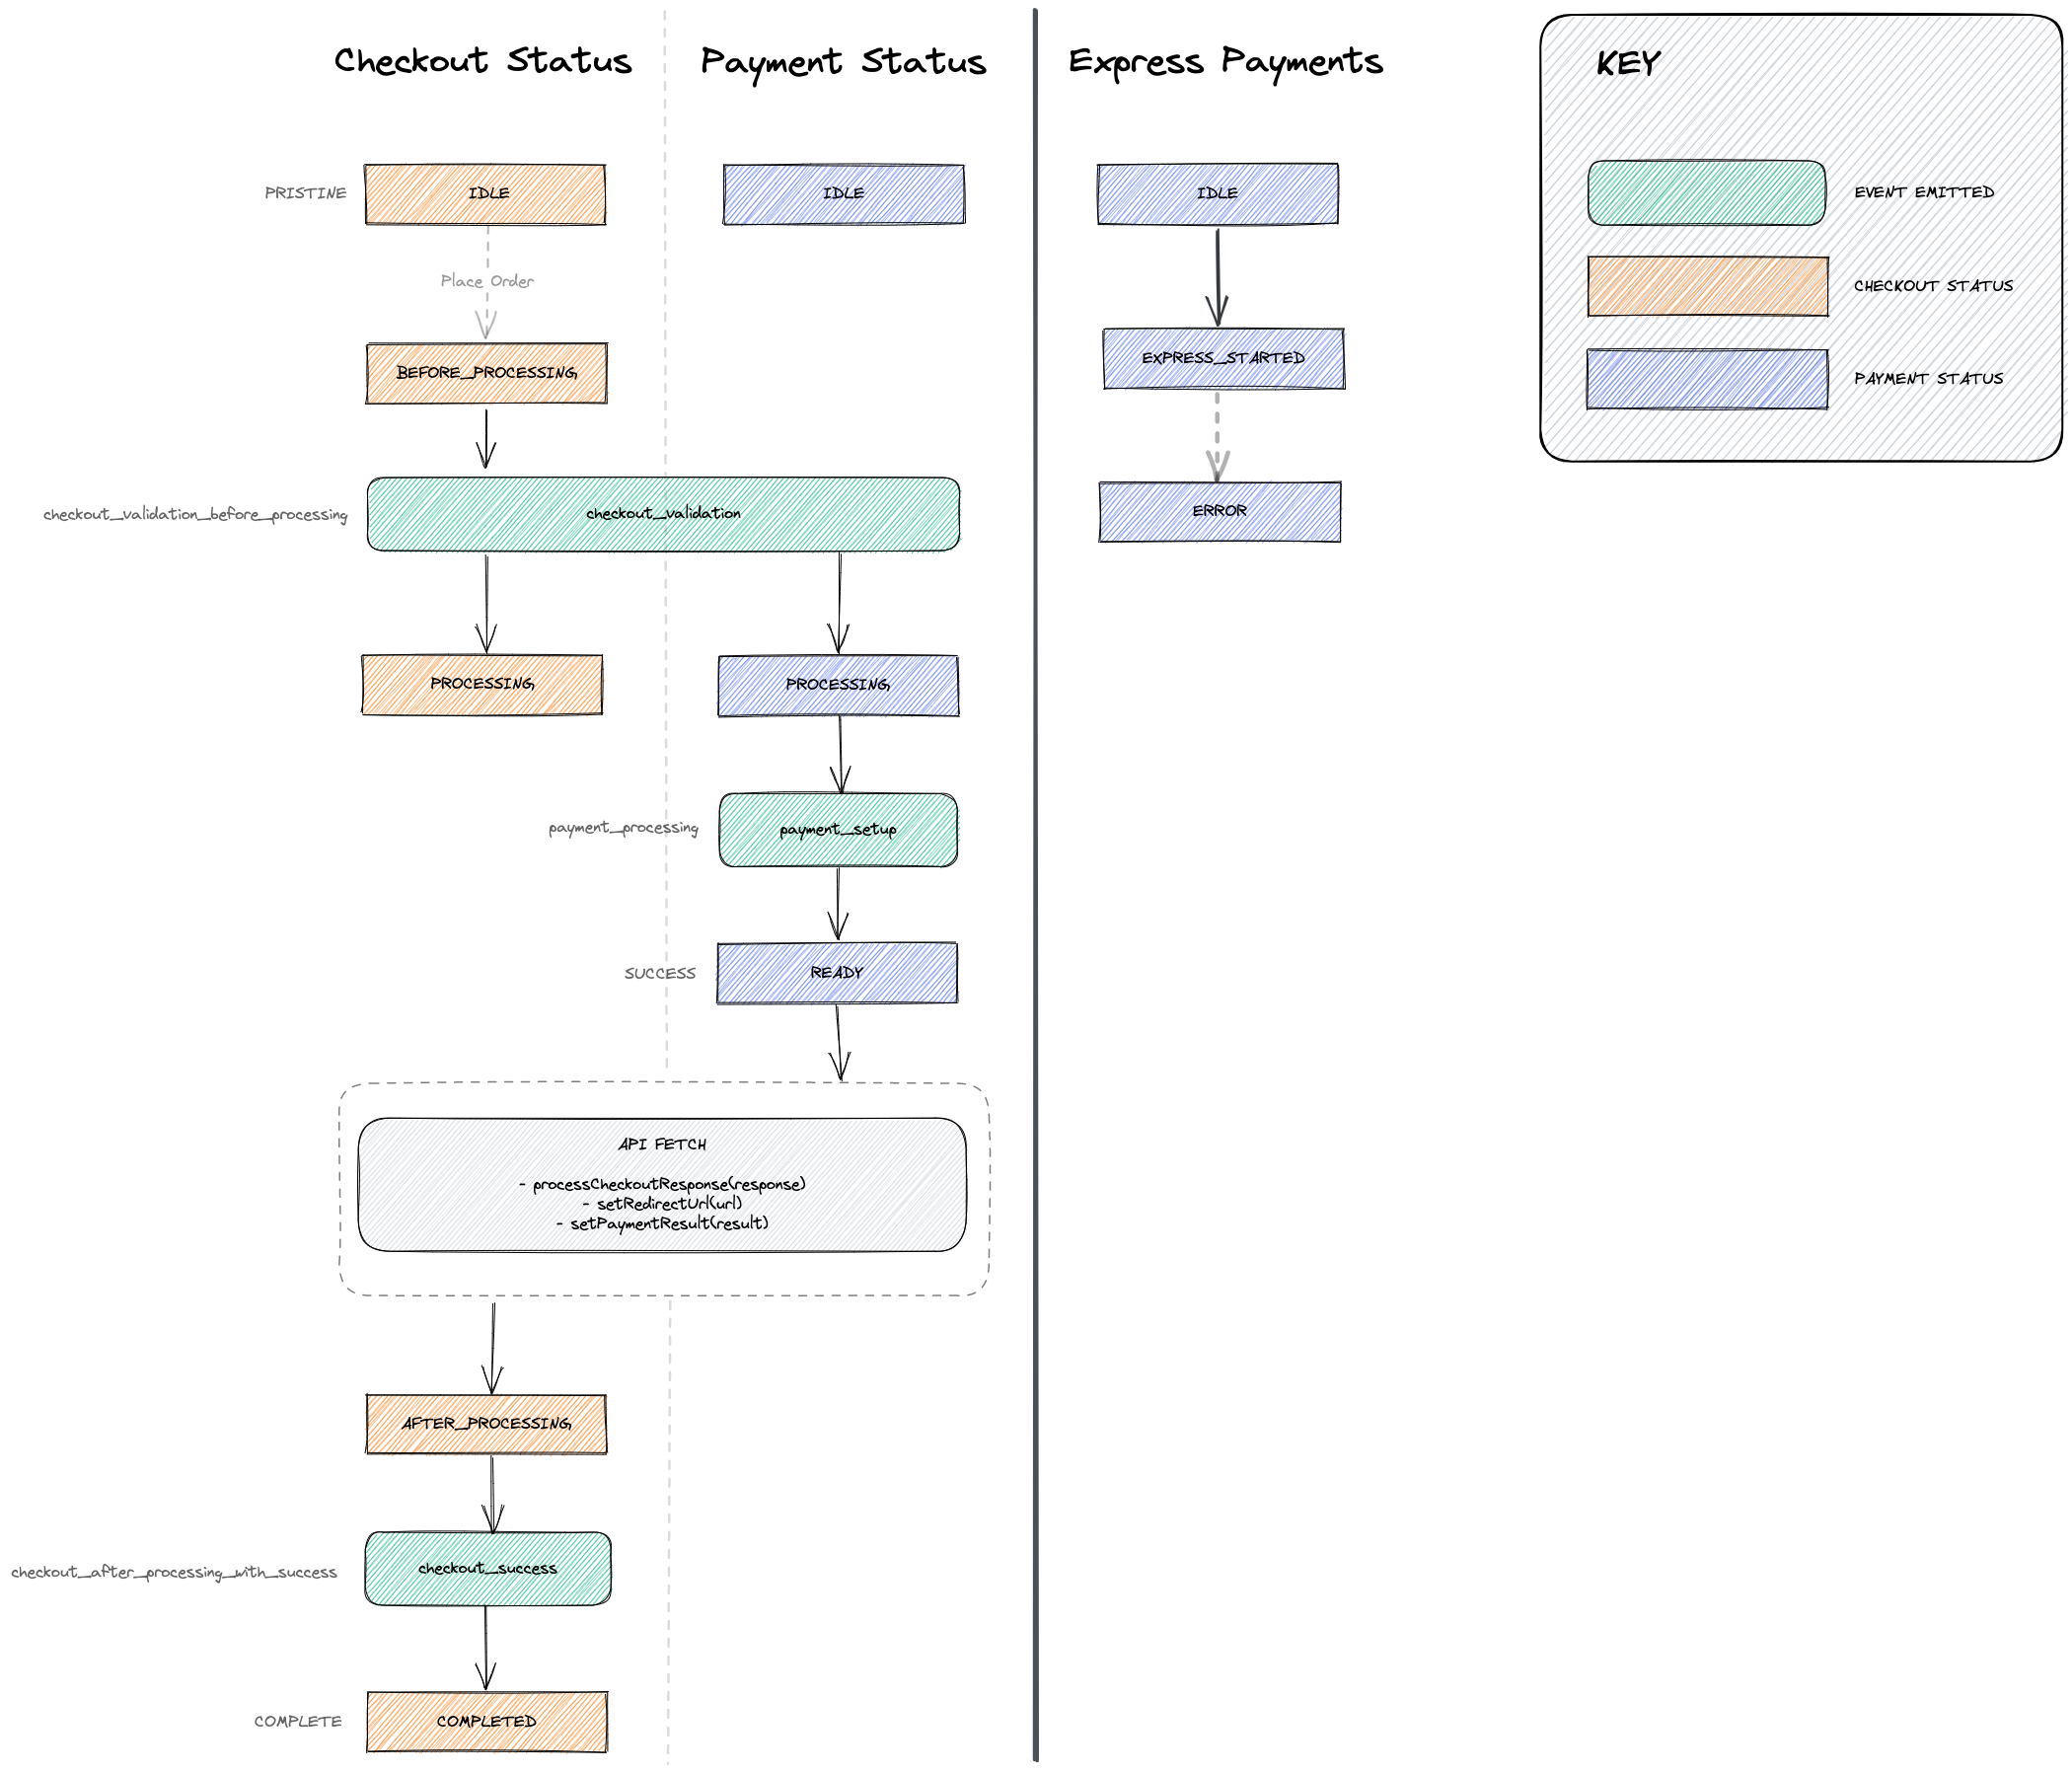
Rename the checkout events (8381)
- Install and activate the Stripe Payment Gateway plugin
- Add something to your cart and checkout with a bad card (4000 0000 0000 0002).
- You should see a "Your card was declined" message in the payment options section
- Add something to your cart again and checkout with a valid card (4242 4242 4242 4242)
- You should be redirected to the order summary page and you should see the order in wp-admin.
Use the @wordpress/components instead of wordpress-components while in editor (8432)
Prerequisites:
- Make sure you don't have any "Express Payment Methods".
- Create a new post
- Add Cart block
- Still in Editor - find an "Express Checkout" section. Expected:
- Icon, "Express Checkout" heading and Button looks like on a screenshots attached
- Click button - you should be redirected to
wp-admin/admin.php?page=wc-settings&tab=checkoutpage.
| Case | Before | After |
|---|---|---|
| Cart Express Payment |  |
 |
| Checkout Express Payment |  |
 |
Check for wc-blocks script registration before checking payment method script dependencies (8428)
- Install WooCommerce 7.1+ and Elementor 3.9.0+
- Navigate to the WordPress Admin > Posts > Add New
- Open the JS console and on the post page, click the "Edit With Elementor" button. Ensure no errors relating to payment method script dependencies appear in the console.
- Ensure payment methods work in the Checkout block correctly.
Move the usage of Notices from @wordpress/components from frontend to editor (Filter by Attribute) (8457)
- Go to Editor and create new post
- Add a Filter by Attribute block.
- Don't choose any attribute and click "Done"
Expected: Notice is displayed

- Save the post and go to frontend
Expected: There's no Filter by Attribute and no Notice.
- Create an attribute that no product is assigned to (Go to:
/wp-admin/edit.php?post_type=product&page=product_attributesand create an attribute) - Go to Editor and create new post
- Add a Filter by Attribute block.
- Choose the attribute that has no products assigned to
Expected: Notice is displayed

- Save the post and go to frontend
Expected: There's no Filter by Attribute and no Notice (although filter may be displayed for a glance while loading)
Add parsed border props to featured items (8472)
- Add a Featured Item (Featured Category or Featured Product) block to a page or post.
- Select the border controls and add a border style. Add a color and give it some width.
- You should see the border you set dynamically display on the featured item.
- Now click on the
Unlinkbutton on the border controls and try setting different values for color and width for each of the border sides (top,right,bottom,left). - Ensure this is working by visually seeing the changes to the featured item.
- Save and make sure this is also displaying correctly on the frontend.
- Test both
Featured CategoryandFeatured Productblocks.
Fix Product categories, Product Tags & Keyword filter not working in Products block (8377)
- Create a new post
- Add Products block inside Editor
- Add Product categories and/or Product Tags and/or Keyword to Filters(see screenshot below)

- Check the front-end. Only products with added categories, tags, or keywords are showing.
Move the usage of Notices from @wordpress/components from frontend to editor (Filter by Rating) (8444)
- Make sure you have no products with ratings. You can achieve that by going to
wp-admin/edit.php?post_type=product&page=product-reviews, mark all the reviews and Bulk Actions -> Move to Trash -> Apply (it can be reverted*) - Go to Editor and create new post
- Add a Filter by Rating block. See the notice is displayed

- Save the post and go to frontend. Confirm there's no Filter by Rating and no Notice.
Note: to revert moving the reviews to trash go to http://store.local/wp-admin/edit.php?post_type=product&page=product-reviews&comment_status=trash&paged=1, mark all the reviews and Bulk Actions -> Restore -> Apply
Fix Catalog Sorting default color in dark backgrounds (8483)
- Install a theme with a dark background (ie: theme TT3 with Auberginie style).
- Go to Appearance > Editor and edit the Product Catalog template.
- Add the
Catalog Sortingblock and save the template. - Make sure it's legible in the editor and the frontend.
- Change the text color of the
Catalog Sortingblock. - Verify the color is correctly set in the editor and the frontend.
| Before | After |
|---|---|
 |
 |
Remove opinionated styles from Button component on block themes that define button styles (8478)
- Create three posts, one with the Mini Cart block, another one with the Cart block and the last one with the Checkout block.
Test different themes
-
Twenty Twenty Three:
1.1. Install it from here.
1.2. Go to the pages created in step 0 and verify the Mini Cart, Cart and Checkout buttons follow the theme styles.
1.3. Go to Appearance > Editor > Styles > Browse Styles and change between style variations. Verify the buttons follow the styles in all of them.
-
Pixl or another block theme with custom button styles but which is not TT3 or Zaino:
2.1. Install it from here.
2.2. Go to the pages created in step 0 and verify the Mini Cart, Cart and Checkout buttons follow the theme styles.
| Before | After |
|---|---|
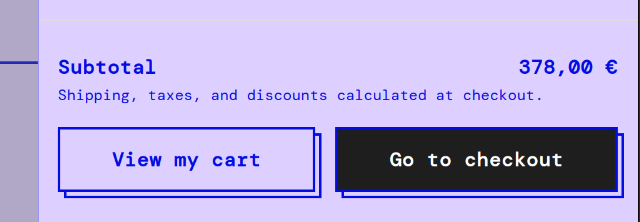 |
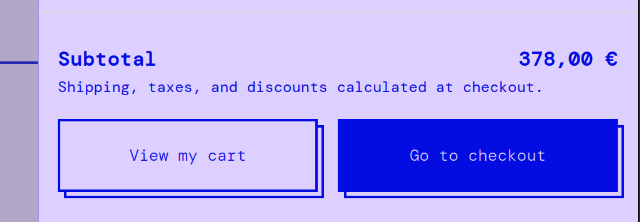 |
- Storefront or another classic theme (test that this PR doesn't introduce any regression): 3.1. Install it from here. 3.2. Go to the pages created in step 0 and verify the Mini Cart, Cart and Checkout buttons don't follow the theme styles. Instead, they have opinionated styles.
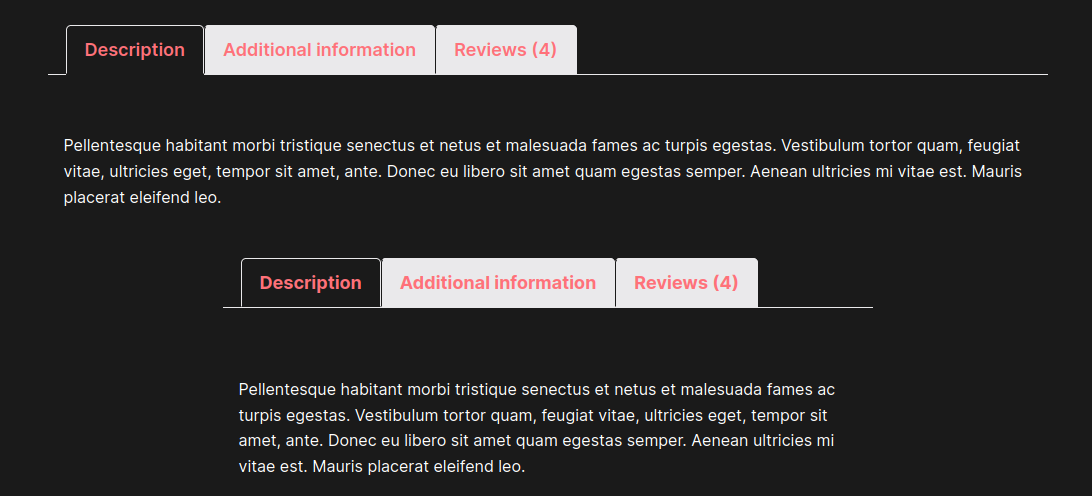
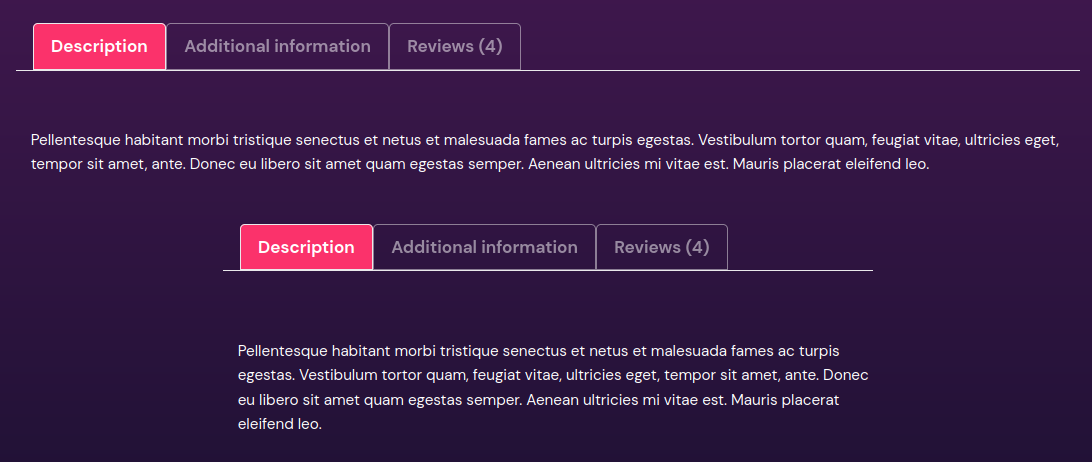
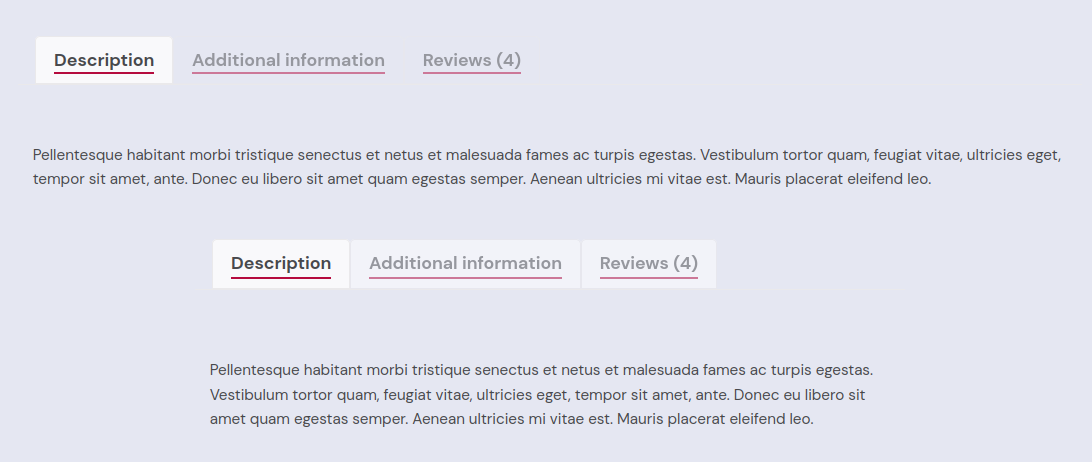
Update Product Details block so it inherits more styles from the theme (8494)
Repeat these testing steps with at least three themes: TT2, TT3 and any other block theme which is not a child theme of TT2/TT3 (ie, Pixl).
- Open the Single Product template in the frontend, look at how the Description, Reviews, etc. tabs are rendered.
- Go to Appearance > Editor and edit the Single Product template.
- Add the Product Details block and remove the Classic Template block.
- Go to the frontend and verify the styling of the tabs of the Product Details block looks the same as the ones of the Classic Template block in Step 1.
- Go back to the editor and clear the template customizations so the Classic Template block is added back.
Note: the screenshots below display the Product Details block in the same template as the Classic Template block. Because of a recent change, adding both to the same template will cause different styling, so you will need to test with only one of them in the same template at the same time.
| Theme | Before | After |
|---|---|---|
| TT2 | 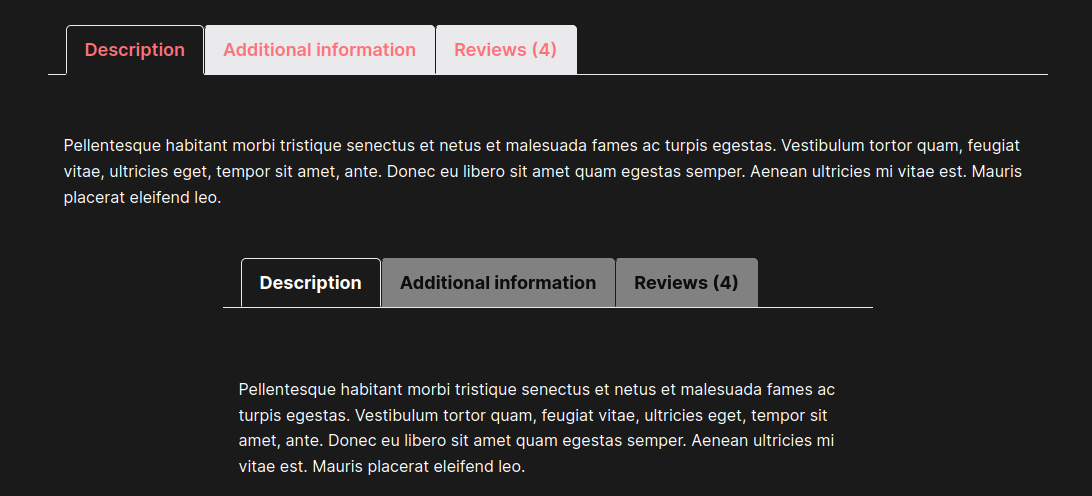 |
 |
| TT3 (Auberginie) |  |
 |
| TT3 (Whisper) | 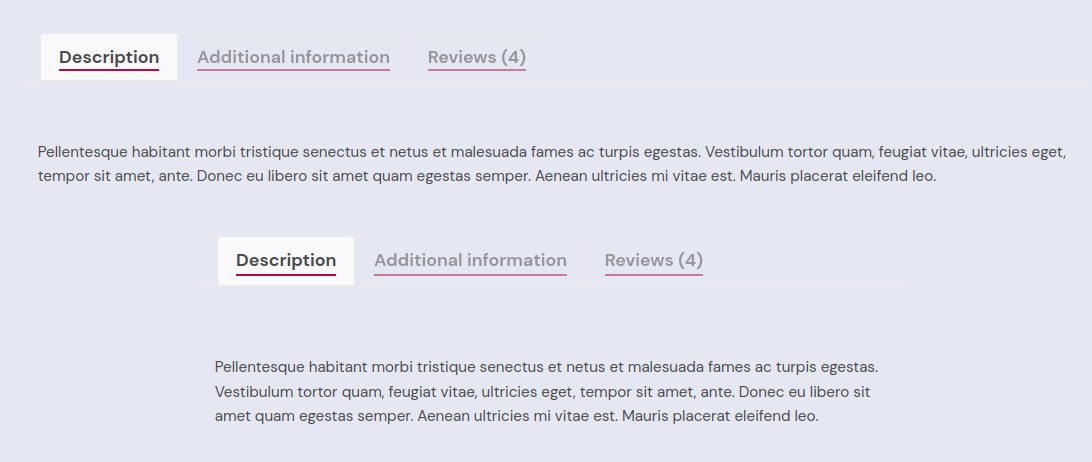 |
 |
| Pixl | 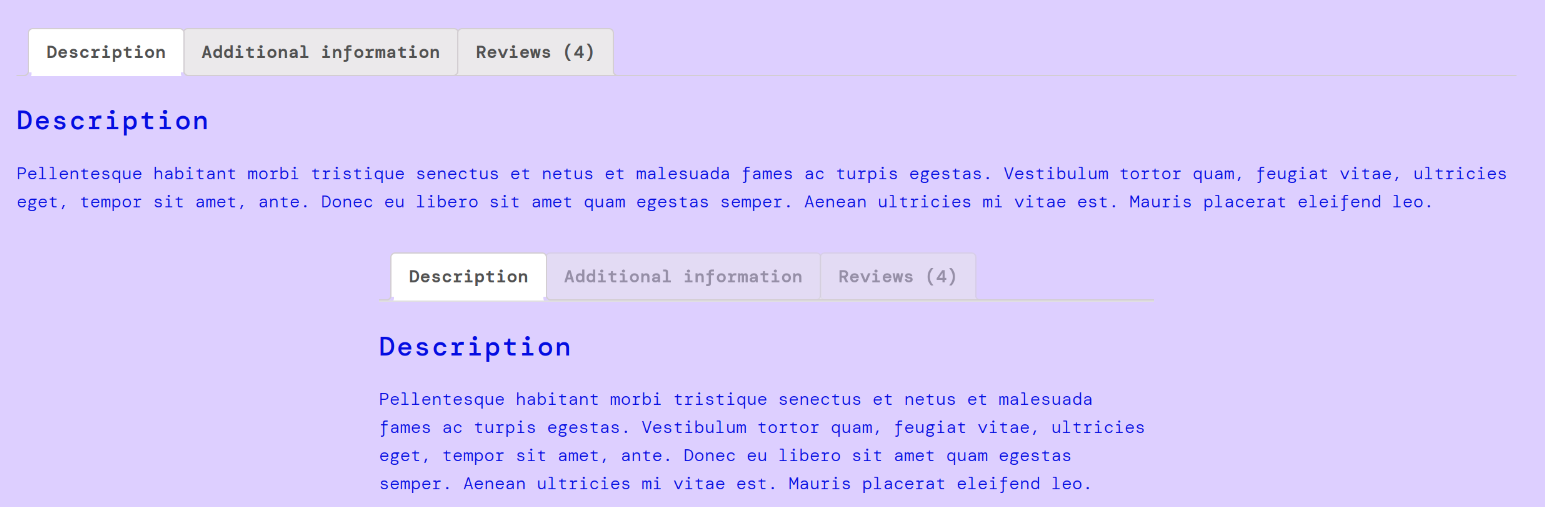 |
 |
Testing the editor view:
- Go to Appearance > Editor and edit the Single Product template.
- Add the Product Details block after the Classic Template block.
- Verify the styling of the tabs of the Classic Template and Single Product block look the same in the editor.
Show Cart and Checkout blocks in Style Book (8489)
- Ensure that a block theme is installed, e.g. TT3 and install Gutenberg v15.1.0
- Go to
WP Admin » Appearance » Editor. - Click the blue
Editbutton and then click theStylesicon in the upper-right corner.
- Click on the the
Open Style Bookicon (the one that looks like an eye)
- Verify that both the Cart and the Checkout blocks are visible.
Kindly note that the Cart and the Checkout blocks will not appear in the blocks sidebar, as they do not support Global Styles yet:

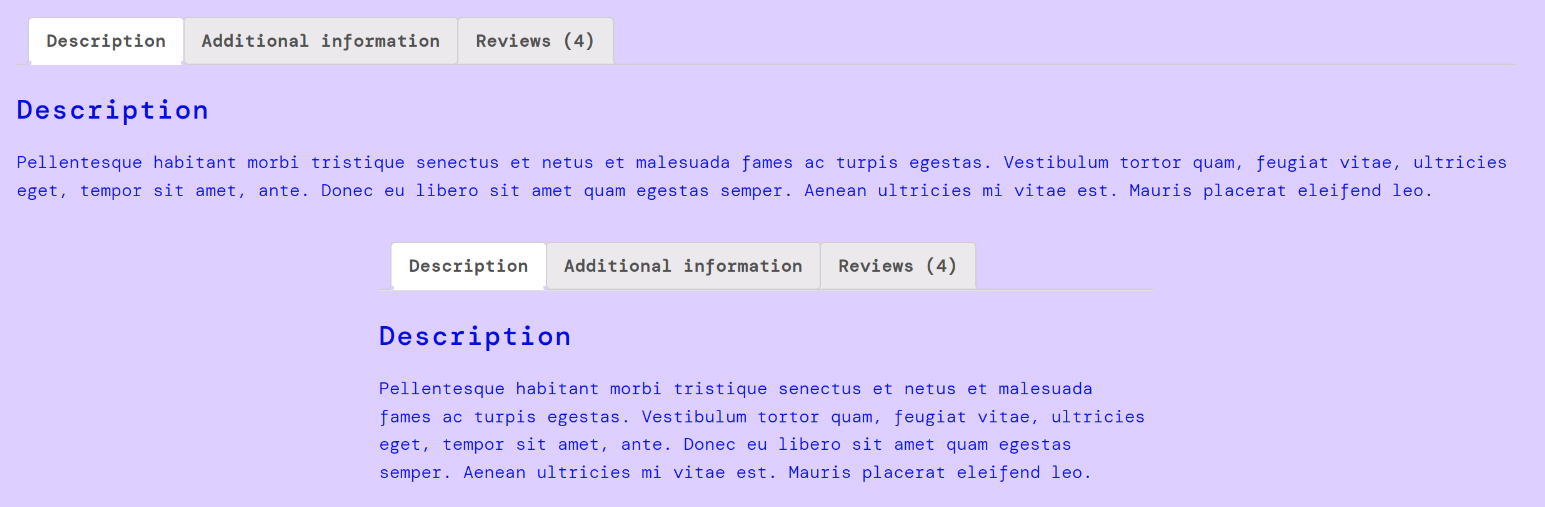
Make a product titles in Products block a link (8519)
- Go to the Editor
- Add a Products block
- Focus on the Product Title block
Expected: "Make title a link" in Link Settings is enabled by default
| Before | After |
|---|---|
 |
|
Fix noticeContext declaration in the Shipping calculator (8495)
1.Add a product to the cart. 2. Go to the Cart block page. 3. Open the shipping calculator. 4. Enter any address with an invalid zip code. 5. Confirm the error notice is getting displayed in the calculator. 6. Confirm there are no errors in the browser console.
| Before | After |
|---|---|
 |
 |
Fix Product Price and Product Rating alignment (8526)
- Create a post or page.
- Add a Products block.
- Confirm the Product Price is centered by default in the editor.
- Save and go to the frontend.
- Confirm the Product Price is centered there.
- Go back to the editor and add another Product Price and a Product Rating block.
- Toggle their alignment (left, center, right) and verify whatever setting you choose is applied in the editor and the frontend.
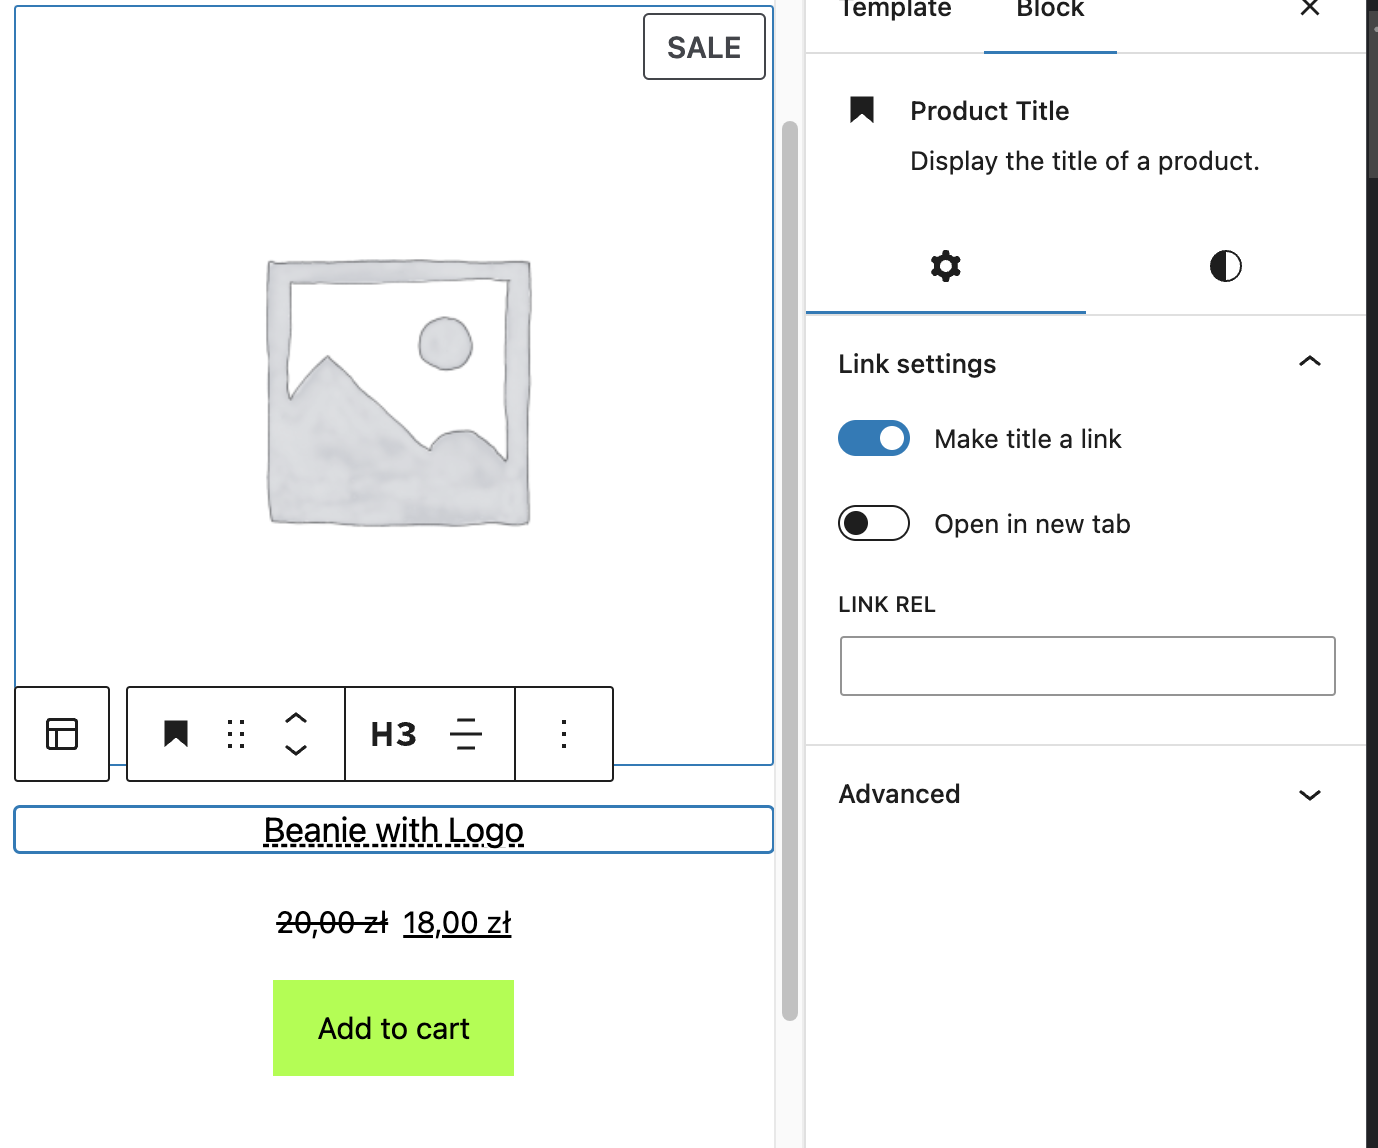
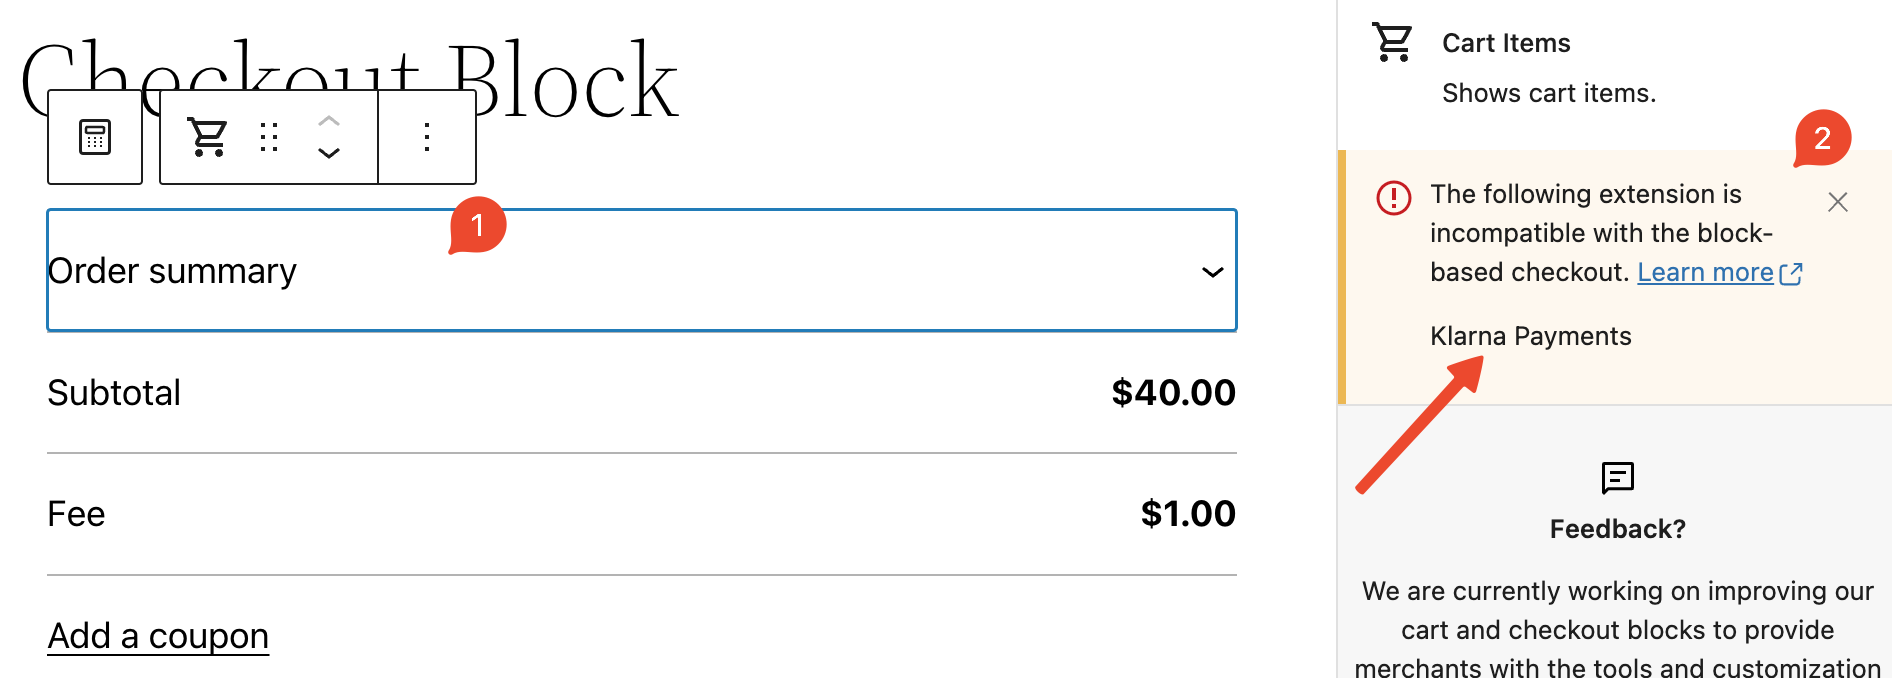
Improve the dismissal behavior of the incompatible gateways notice (8299)
- Add at least two incompatible payment gateways with the C&C Blocks. You can find them in our list of incompatible plugins with the Cart & Checkout Blocks (e.g., Paypal). You will need to configure them to be detected and used by WooCommerce. Klarna Payments is compatible with the Cart & Checkout Block since v3.0.0. To use it in this test you can rollback to a previous version (e.g. Klarna v2.12.1)
- Create a new page and add the
CheckoutBlock - Select any element of the
CheckoutBlock. You should see a notice with the list of incompatible gateways in the right sidebar of the editor (i.e.,Settings -> Block)
- Dismiss the
incompatible gatewaysnotice by clicking on theXbutton on its right top side:
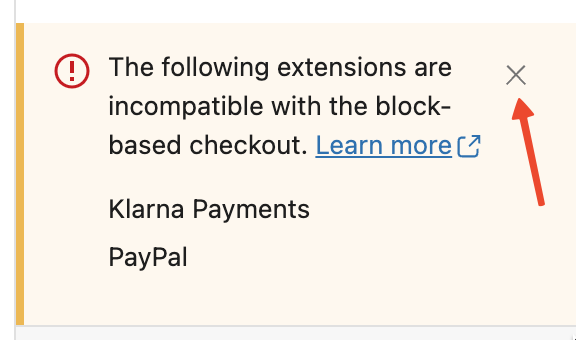
- The notice should be removed, and The
make as default&sidebar compatibility noticesshould be visible instead. Select another Checkout Inner Block. Make sure theincompatible gatewaysnotice is still dismissed. - Refresh the page. Make sure the
incompatible gatewaysnotice is still dismissed. - Do the same test from step 2 to 6 using the
CartBlock - Disable an incompatible payment gateway (
Plugins -> [Plugin_name] -> DeactivateorWooCommerce -> Settings -> Payments, find the payment gateway and toggle it off) - Go to
CheckoutBlock page, and select any element of it. You should see the notice again with the list of only the enabled incompatible gateways in the right sidebar of the editor (i.e.,Settings -> Block)
- Dismiss the notice (see step 4). Go through the steps 5 & 6 again.
- Do the same test in step 9 & 10 in the
CartBlock page - Enable the previously disabled incompatible payment gateway from step 8. Ensure we have the correct behavior when going through the steps 9 to 11.
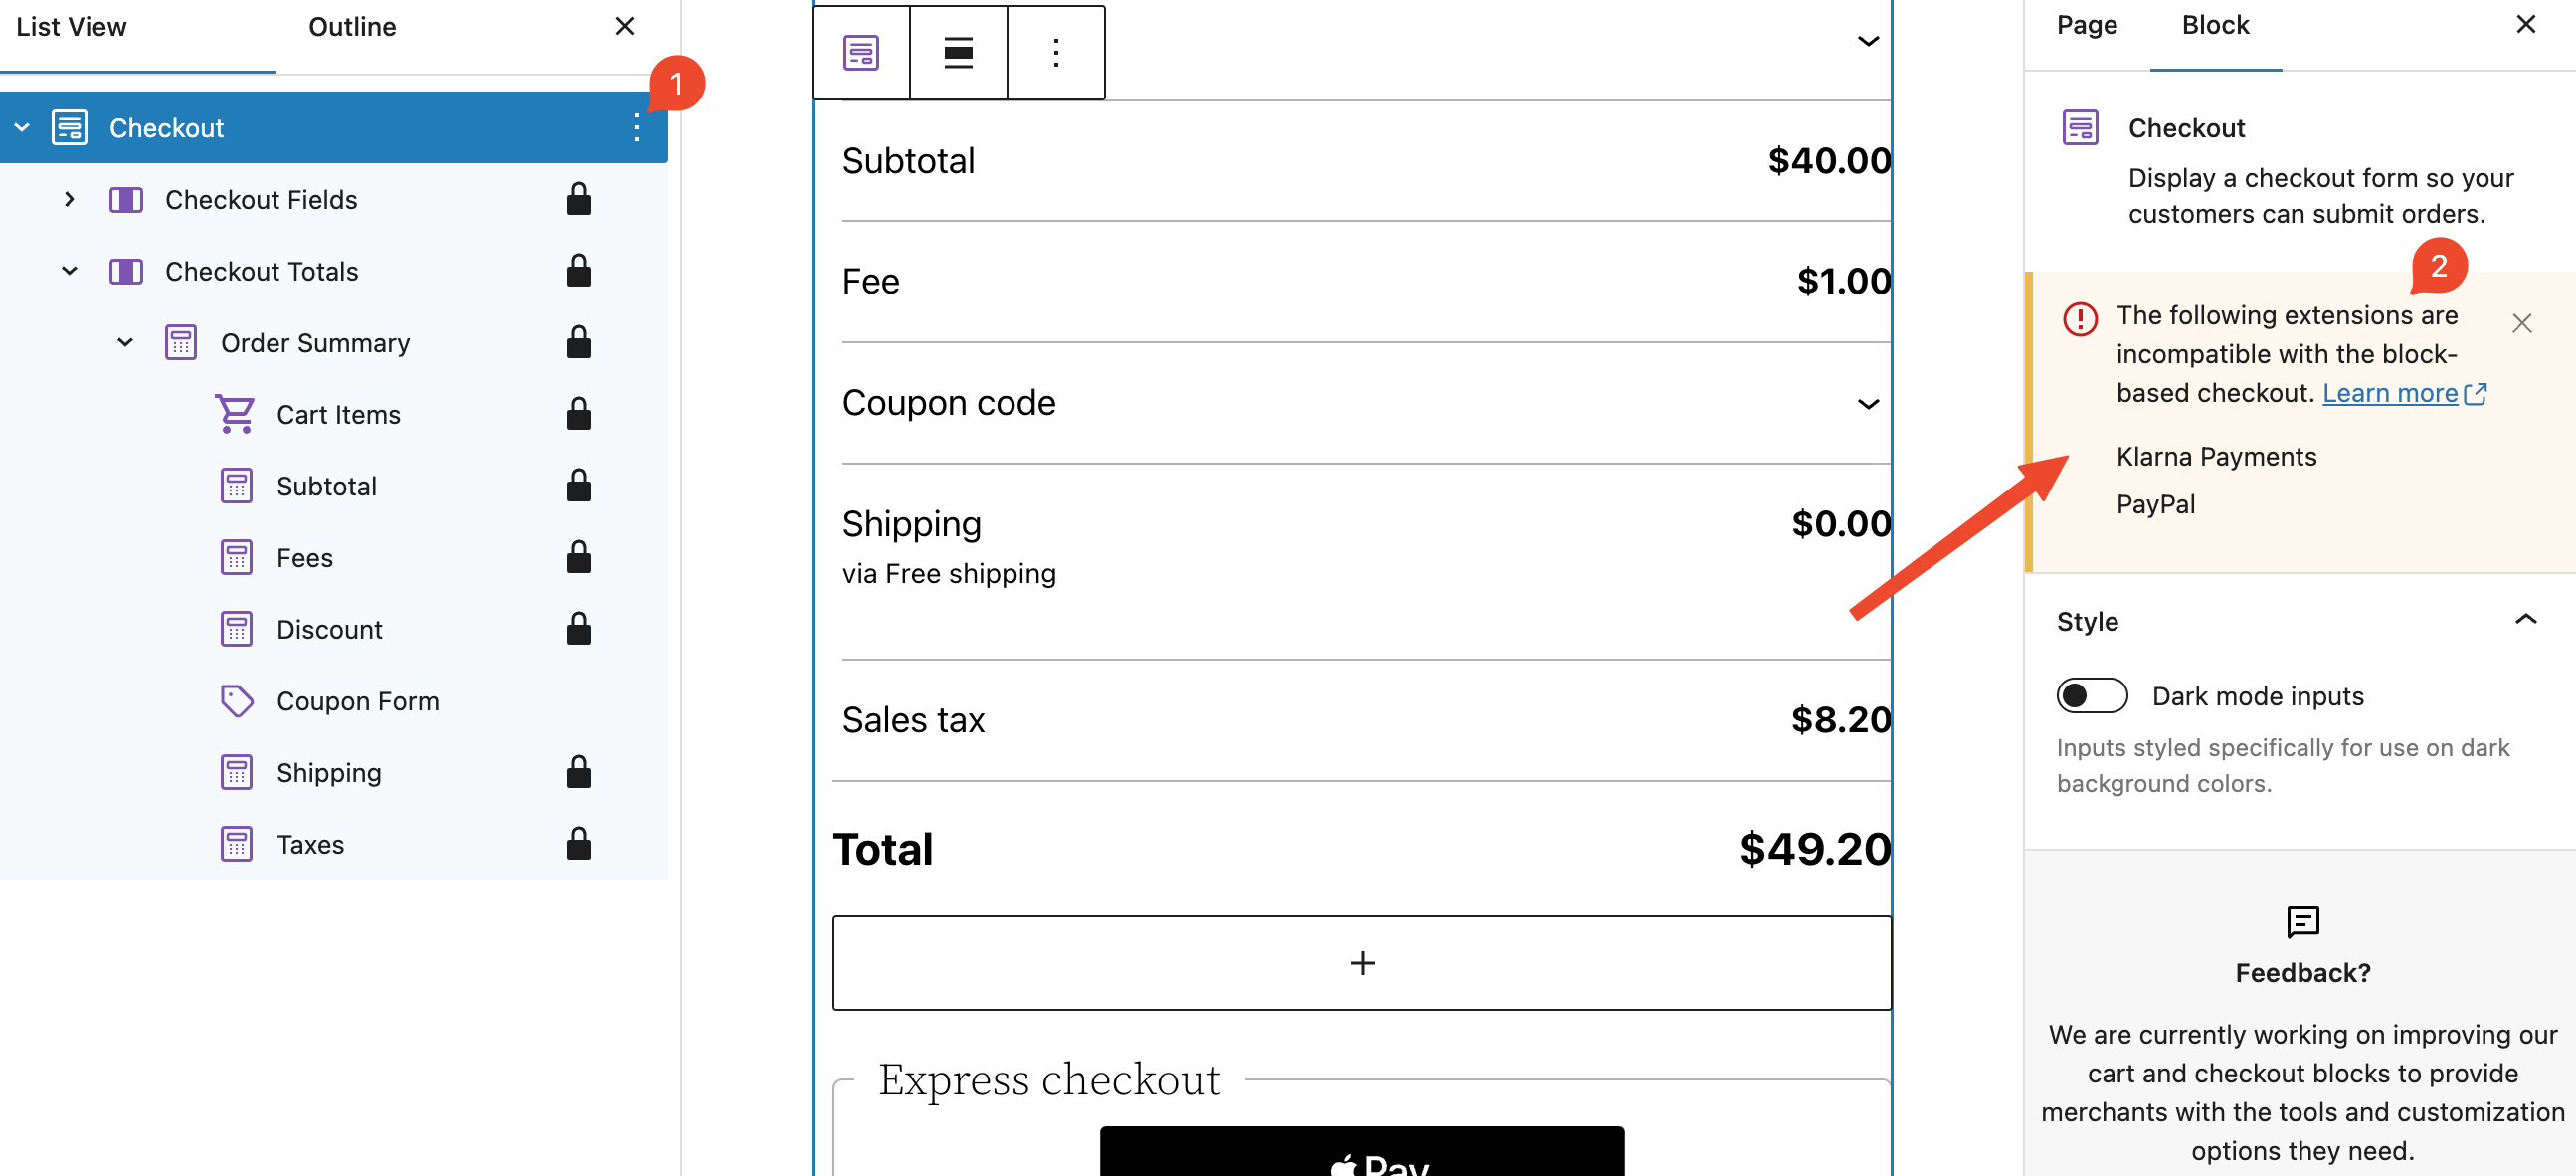
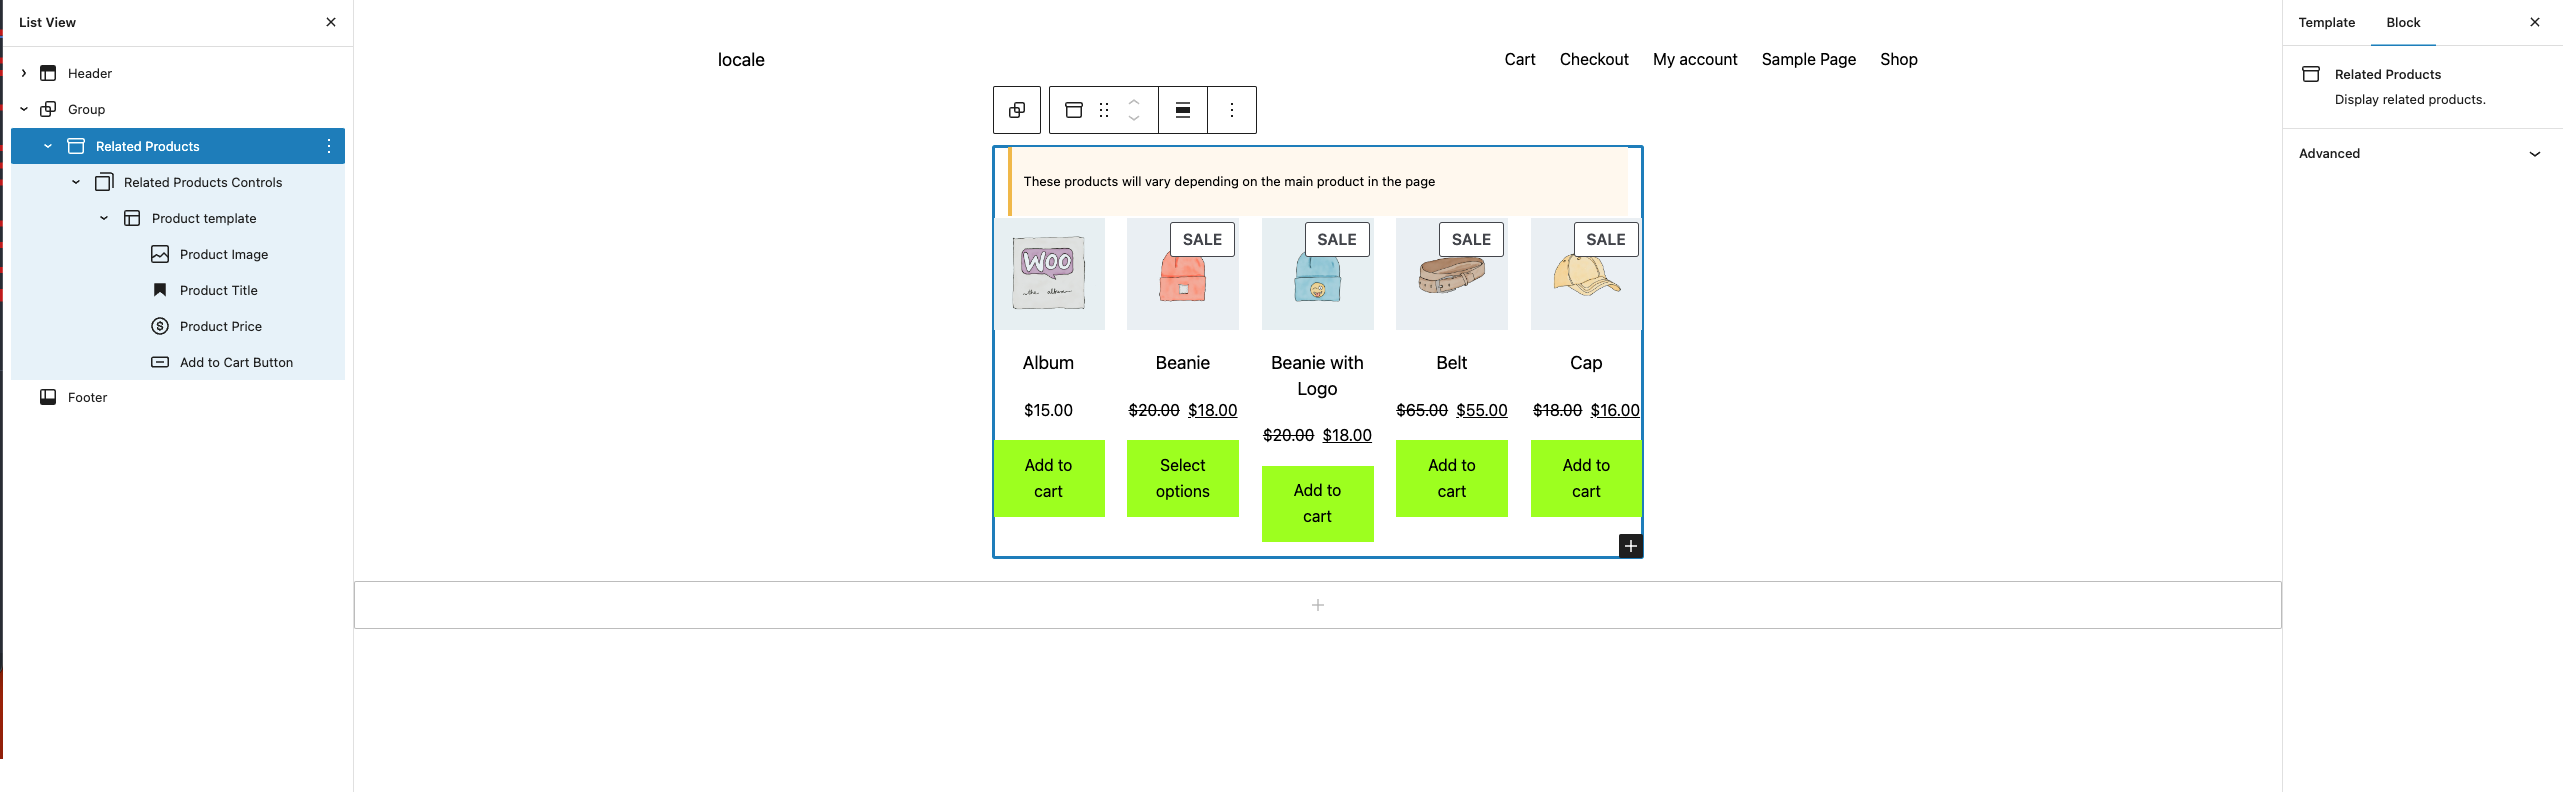
Add Related Products block (8522)
- Edit the Single Product Template.
- Below the
WooCommerce Single Product Block, add theRelated Products block. - Be sure that above the block, you see a notice (like the image below).
- Check that the hierarchy in the list view is the same as the image below.
- Save the template.
- On the frontend side, click on a product.
- Be sure that the products inside the
Related Products blockare the same as the row generated by theWooCommerce Single Product Block.
Move usage of wordpress-components to editor and replace with @wordpr… (8463)
- Make sure you didn't setup any shipping methods. It can be checked in here:
wp-admin/admin.php?page=wc-settings&tab=shipping§ion - Create new post
- Add a Checkout block.
Expected: Placeholder is displayed in a Shipping Options section

- Save the post and go to frontend
Expected: Shipping options are not displayed
- Add a shipping option (
wp-admin/admin.php?page=wc-settings&tab=shipping§ion, Add Shipping Zone -> Go through the form) - Go back to the post in editor
Expected: There's no Placeholder in Shipping Options

- Go to the frontend
Expected: Shipping options are there
Prevent double triggering select shipping on the same rate (8497)
- Set your default country to something like US/CA
- Enable Local Pickup and add 2 locations to it.
- In your Shipping zones, set shipping for Greece
- Open Checkout, it should load on Local Pickup selected.
- Change to regular shipping
- Change country to Greece and set a city
- Your City value should persist
- Switch back to local pickup, it should be selected.
- Switch back to regular shipping, it should work.
Do not mount the coupon form until toggled visible (8525)
- Add something to your cart and visit the cart block page.
- Click the "add a coupon" link
- The input should focus
Filter out saved payment methods for payment gateways that are not enabled (8461)
- Install Stripe, enable it, and checkout (save your card to the account)
- Checkout another order but this time confirm the method you saved in step 1 is displayed as an option.
- Go to Payment settings and uncheck the "enabled" checkbox for stripe. Do not disable the actual plugin.
- Checkout again. Confirm the saved card is not visible.
Disable compatibility layer via hook (8550)
- With the Twenty Twenty-Three theme installed, go to
Appearance » Editor. - Edit the Product Catalog template, adding the Products block above the WooCommerce Product Grid Block.
- Save.
- Go to the front end and verify that the
WooCommerce Product Grid Blockis visible.
[Blockifying Product Archive Templates]: Implement the blockified template conversion for the Classic Template Block. (8248)
Conversion is not yet possible (hidden behind feature flag)
Prerequisites
- WordPress: >=6.1
- Make sure Single Product template is cleared out to the default state. To achieve that:
- Go to (
/wp-admin/site-editor.php?postType=wp_template) - Click three dots next to template and click "Clear customizations"
- Go to (
Steps
- Enter the Single Product template
- Check that placeholder description says "This block serves as a placeholder for your WooCommerce Single Product Block. It will display the actual product image, title, price in your store. You can move this placeholder around and add more blocks around to customize the template."
- "Upgrade to Products block" button is not visible.
Repeat for Product Catalog, Products by Category and Product Search Results templates. The placeholder description may vary slightly.
Feature plugin
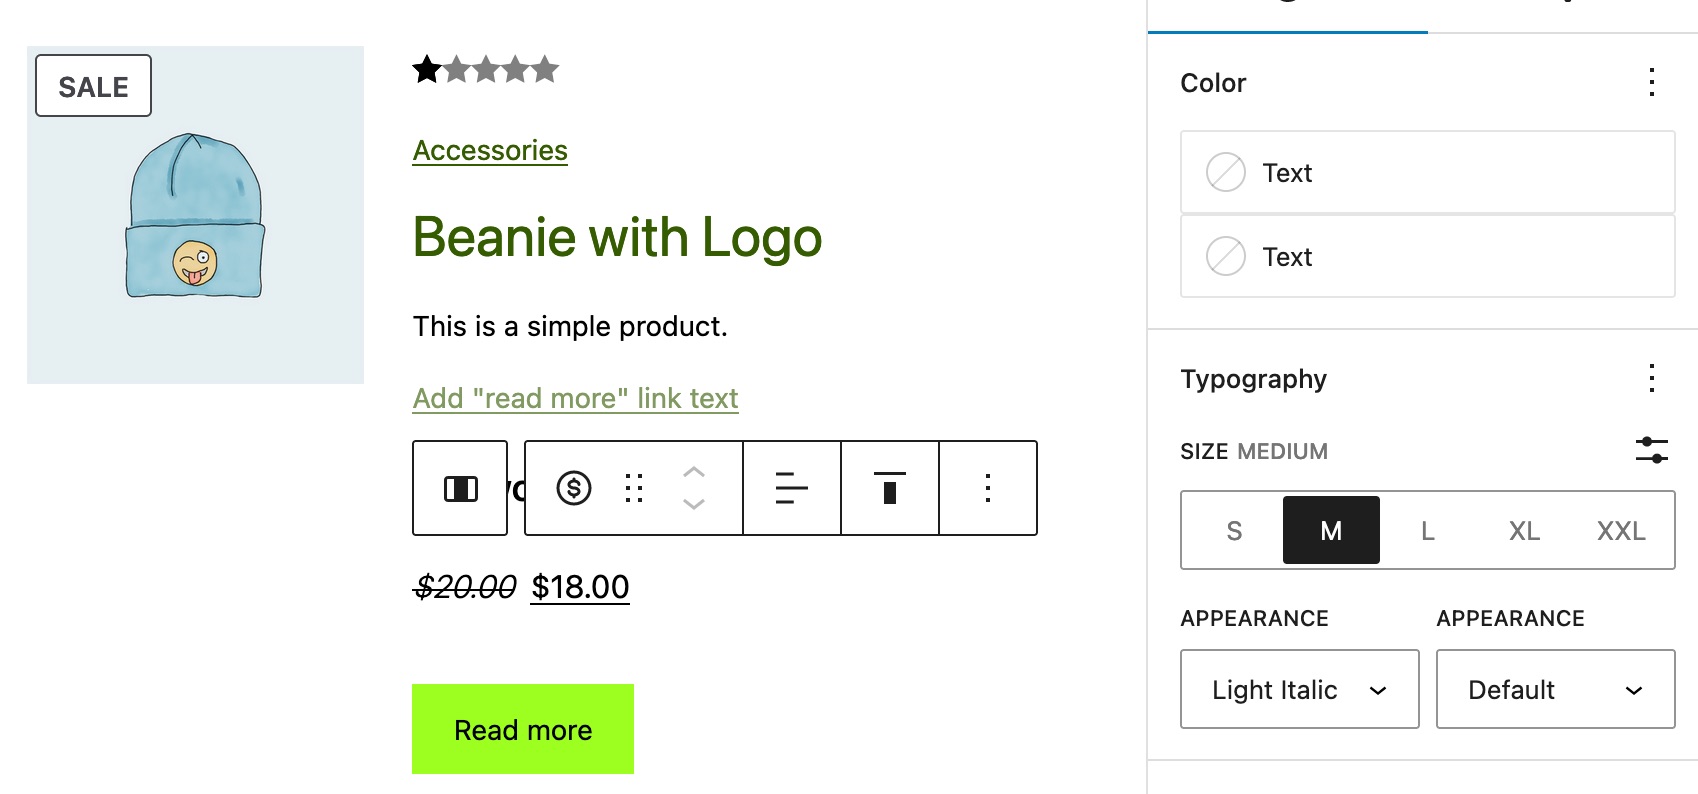
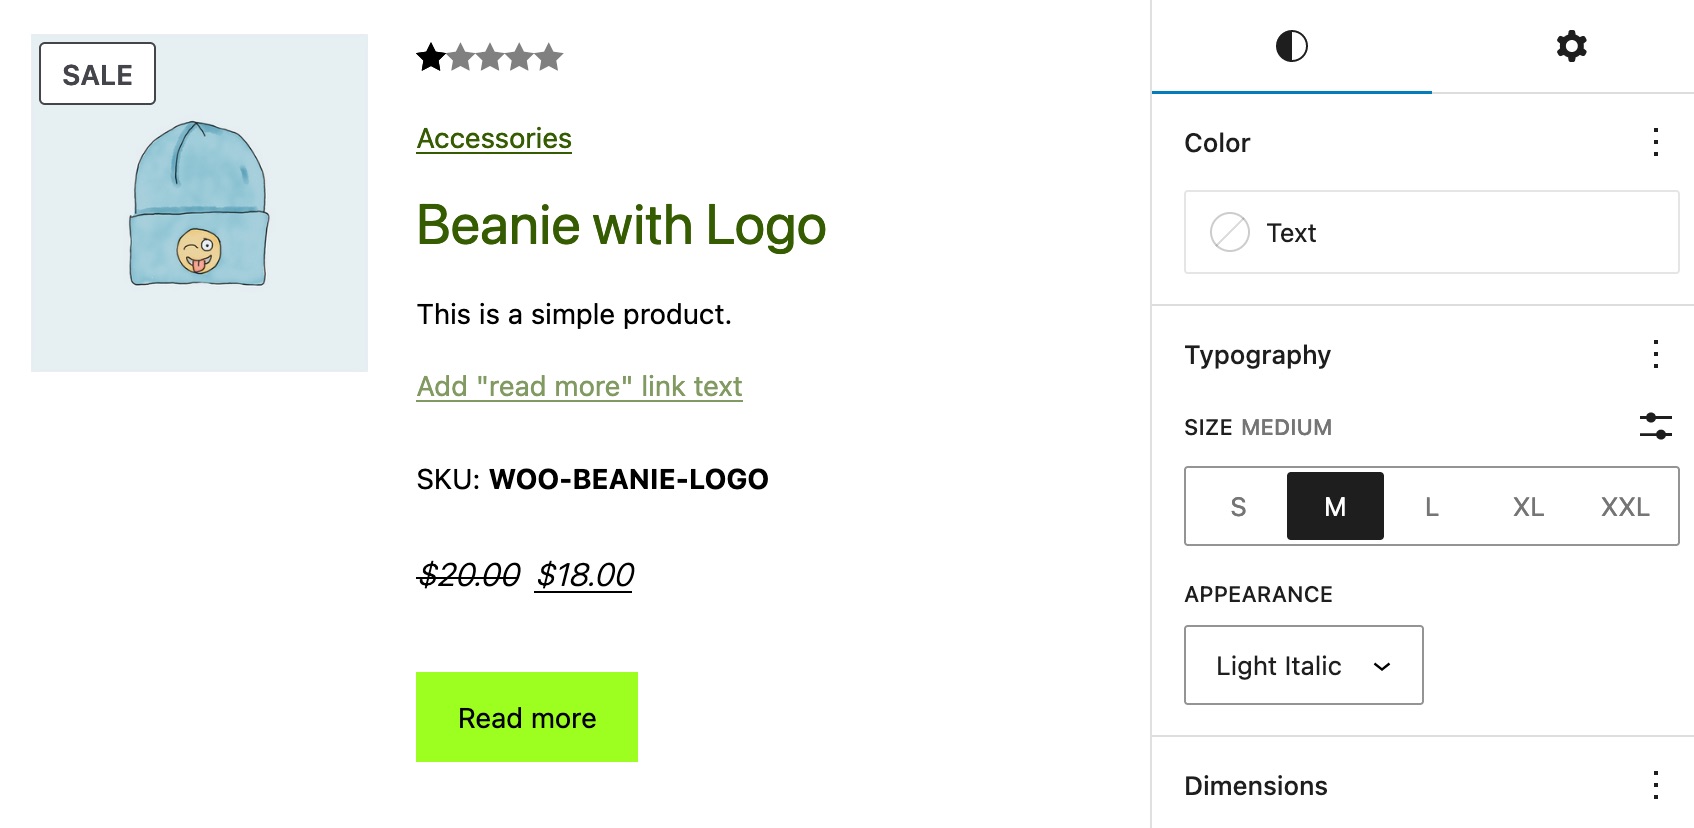
Product Price: Fix typography styles in the editor (8398)
- Add a new page with the Products block.
- Make sure you have a product with a regular and sale price.
- Set a custom
SizeandAppearancefor the Product Price block. - Notice that the change displays fine in the editor and frontend both for regular and sale prices.
| Before | After |
|---|---|
 |
 |
Experimental
[Blockifying Product Archive Templates]: Implement the blockified template conversion for the Classic Template Block. (8248)
Conversion is not possible on WP lower than 6.1
Prerequisites
WordPress: <6.1 Make sure Product Catalog and Products by Category templates are cleared out to the default state. To achieve that:
- Go to (
/wp-admin/site-editor.php?postType=wp_template) - Click three dots next to template and click "Clear customizations"
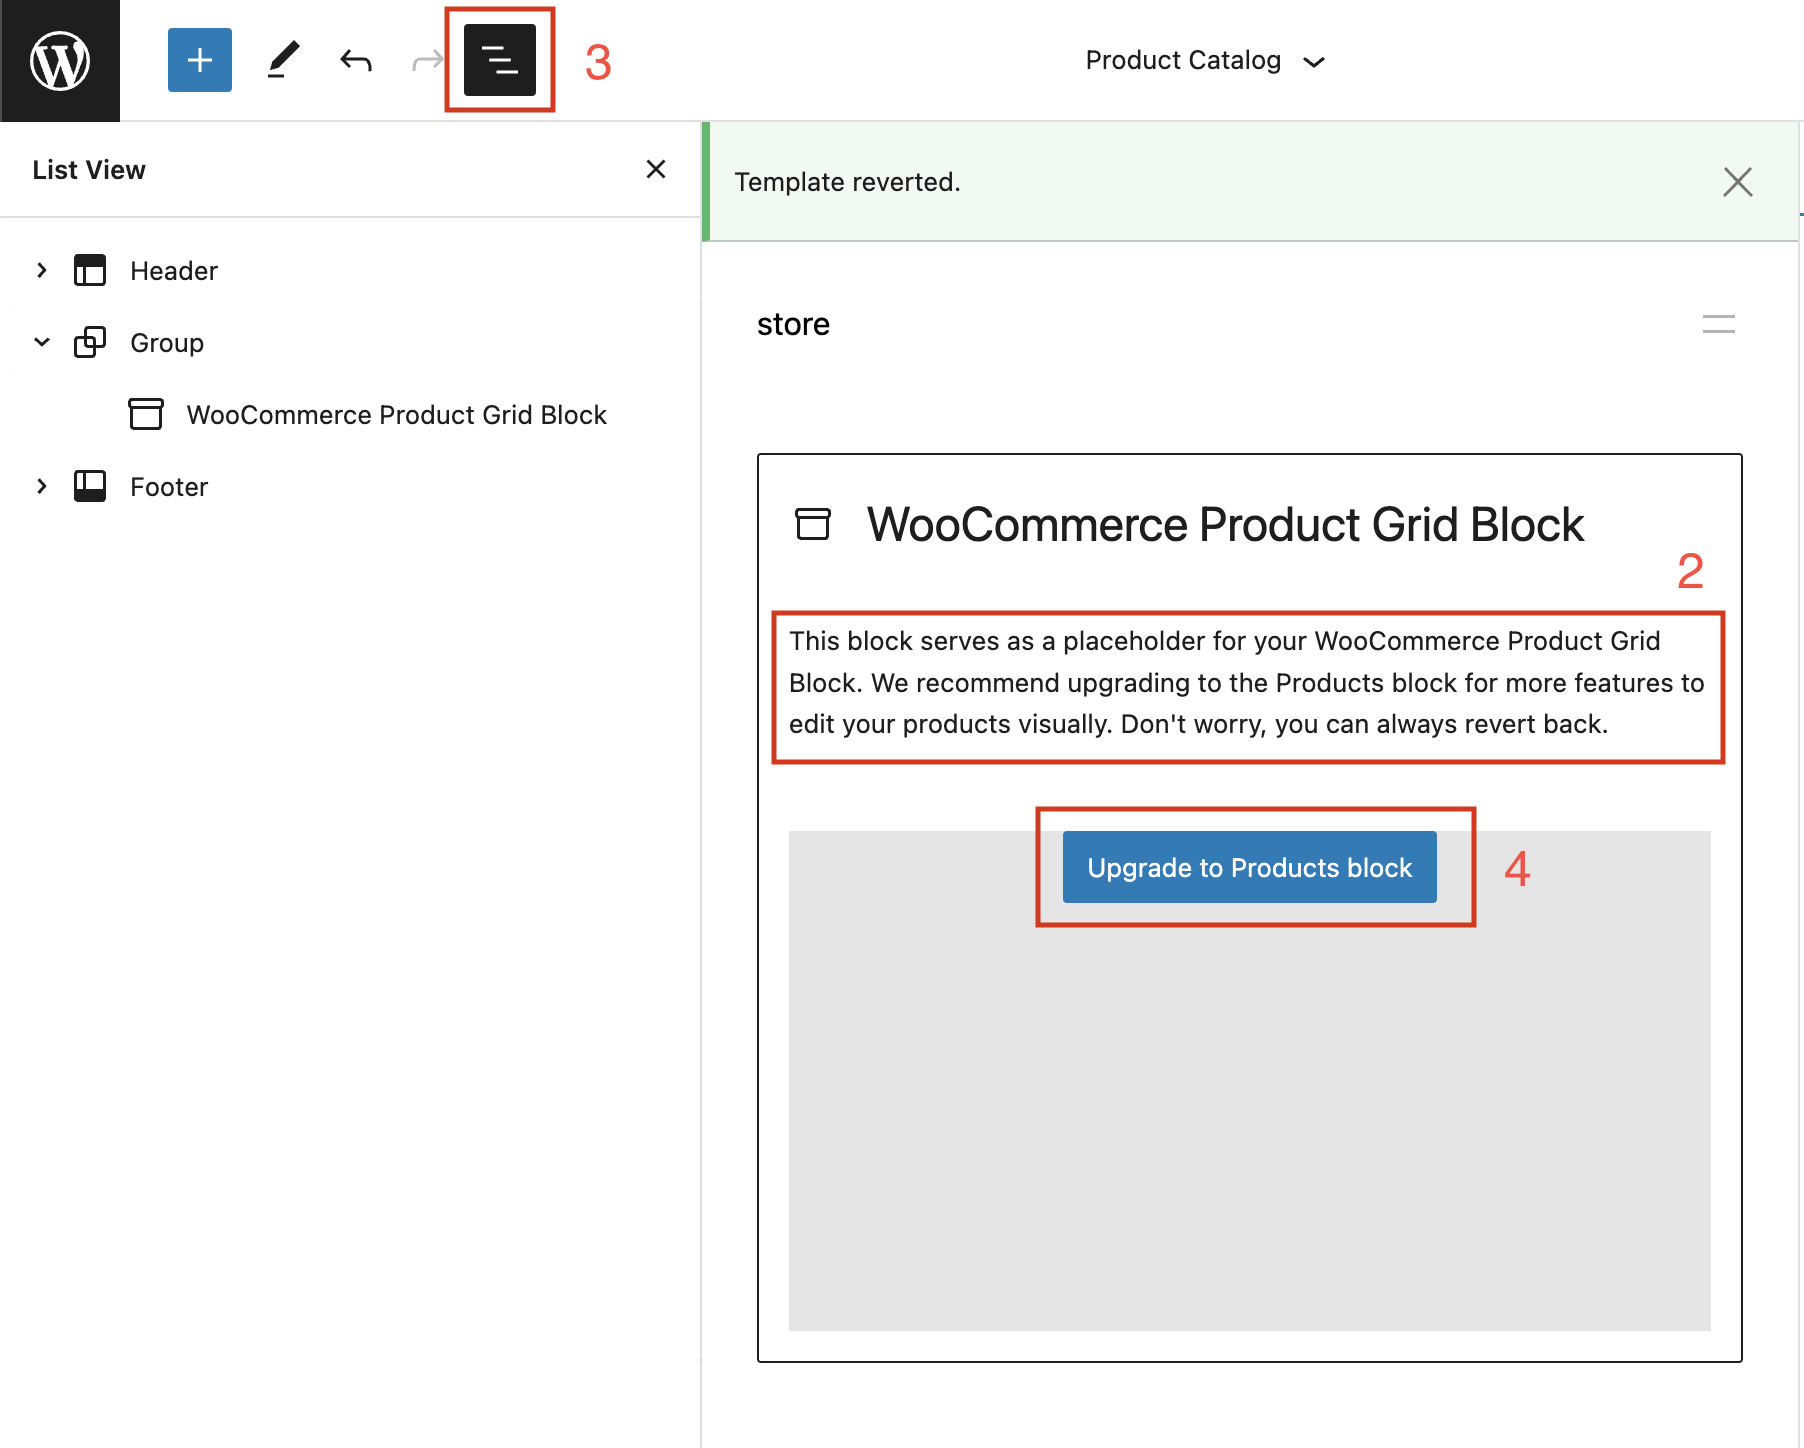
Steps
- Edit the Product Catalog template
- Check that placeholder description says "This block serves as a placeholder for your WooCommerce Product Grid Block. It will display the actual product image, title, price in your store. You can move this placeholder around and add more blocks around to customize the template. Don't worry, you can always revert back."
- "Upgrade to Products block" button is not visible.
Convert classic templates on Product Archive templates
Prerequisites
- WordPress: >=6.1
- Make sure Product Catalog/Products by Category/Products by Attribute/Products by Tag/Product Search Results templates are cleared out to the default state. To achieve that:
- Go to (
/wp-admin/site-editor.php?postType=wp_template) - Click three dots next to template and click "Clear customizations"
- Go to (
Steps
- Enter the Product Catalog template
- Check that placeholder description says "This block serves as a placeholder for your WooCommerce Product Grid Block. We recommend upgrading to the Products block for more features to edit your products visually. Don't worry, you can always revert back."
- Open List View of the blocks
- Click "Upgrade to Products block" button
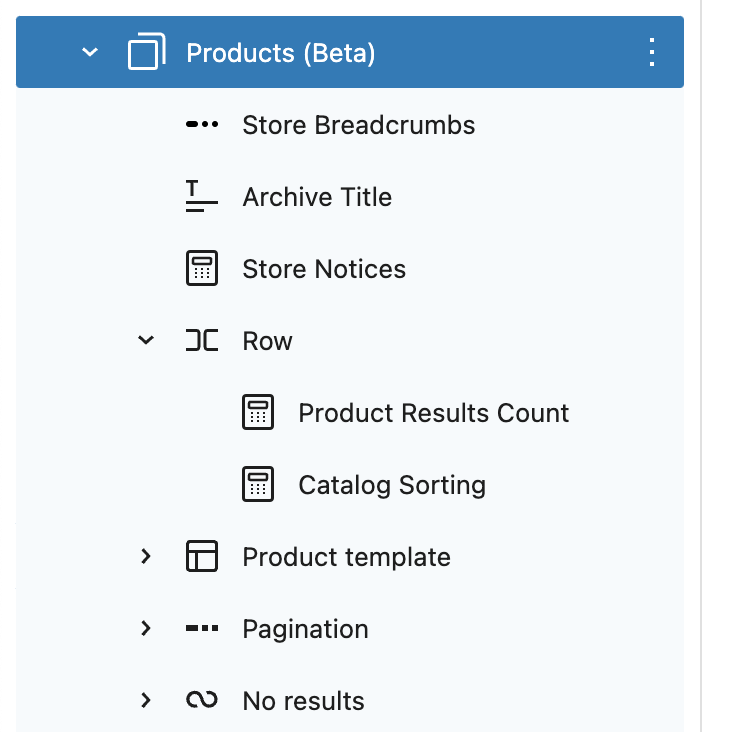
WooCommerce Product Grid Block is replaced with blocks:
- Products (Beta)
- Store Breadcrumbs (video was recorded before Breadcrumbs were added)
- Archive Title
- Term Description (only in Products By * templates)
- Store Notices
- Row
- Product Results Count
- Catalog Sorting
- Product Template
- Pagination
- No Results
- Go to "Products (beta)" block settings
- Make sure "Inherit query from template" is ENABLED! It should be by default.
- Save the template
- Go to frontend (
/shop) and check it the blocks are displayed correctly. You should expect the view like this:
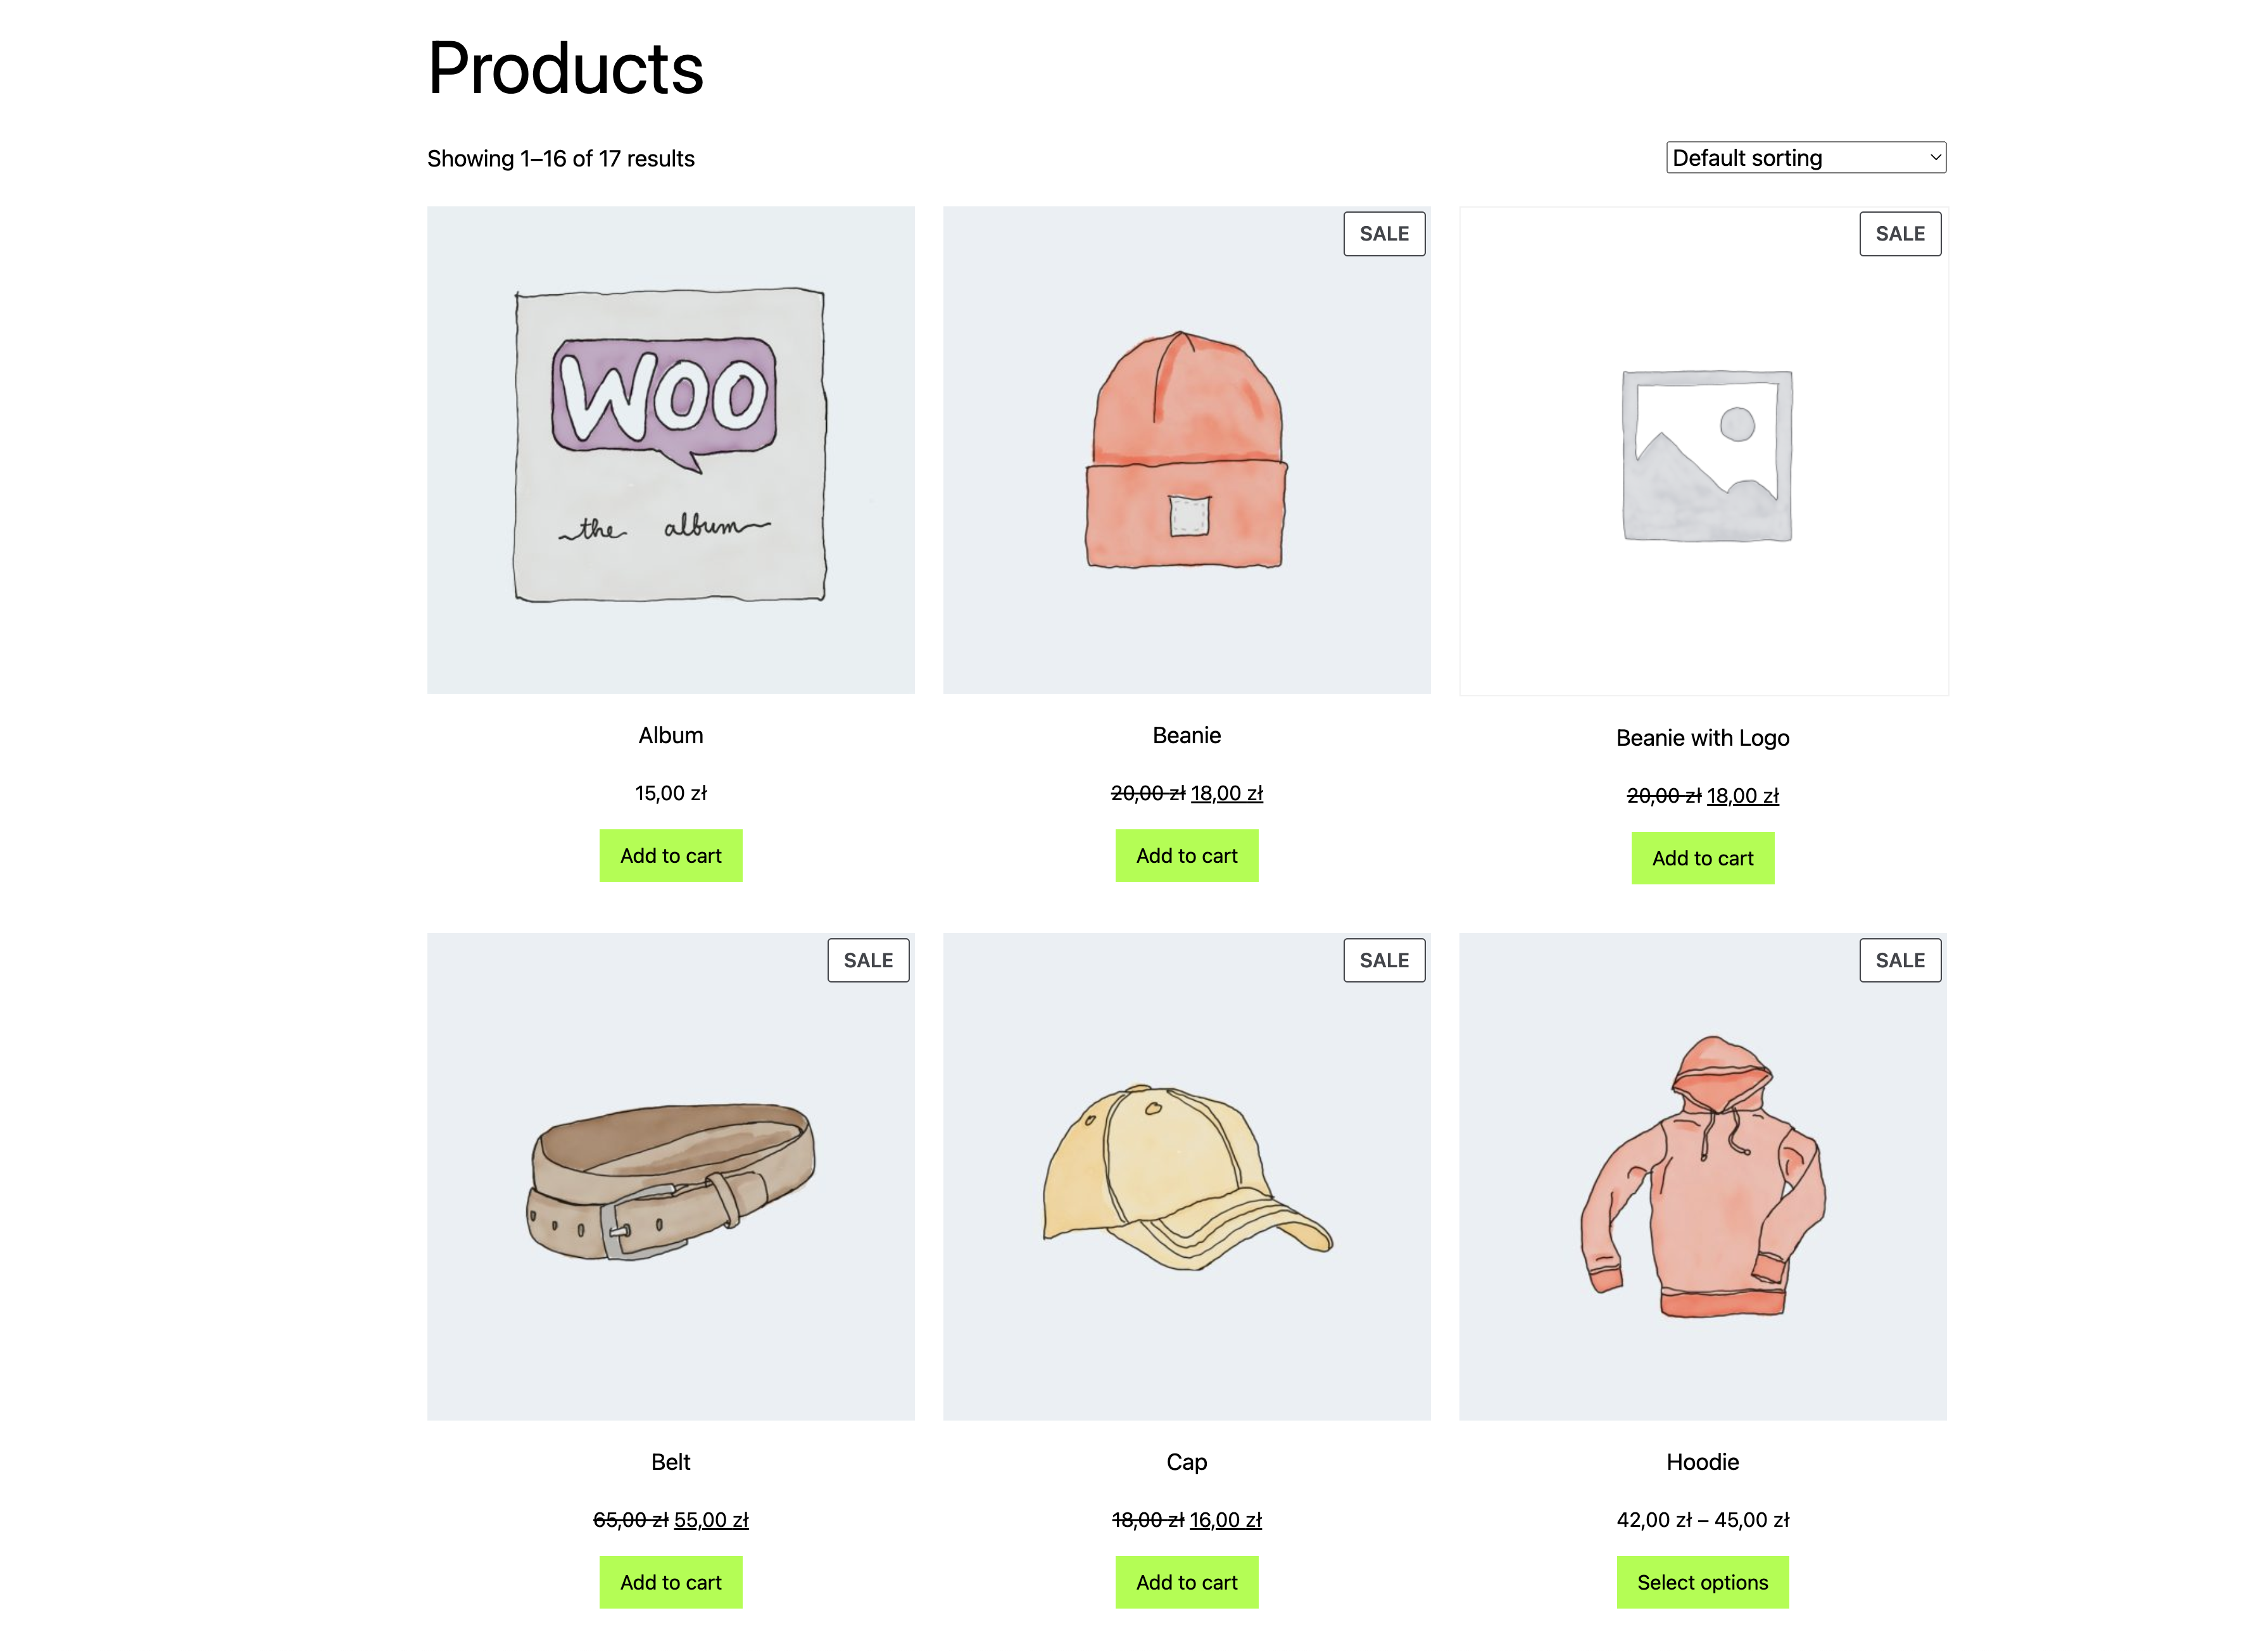
- Check the Product Results Count displays proper numbers, e.g. go to the page 2 (it should say "Showing 17–17 of 17 results" if you're using "standard" products set).
- Check the Catalog Sorting sorts the products correctly, e.g. by price.
Repeat the steps above for:
- Products by Category (to check frontend, go to
/product-category/clothing/) - Expected view contains Breadcrums

Convert classic templates on Product Search Results
Prerequisites
- WordPress: >=6.1
- Make sure Product Search Results template is cleared out to the default state. To achieve that:
- Go to (
/wp-admin/site-editor.php?postType=wp_template) - Click three dots next to template and click "Clear customizations"
- Go to (
Steps
- Enter the Product Search Results template
- Check that placeholder description says "This block serves as a placeholder for your WooCommerce Product Search Results Block. We recommend upgrading to the Products block for more features to edit your products visually. Don't worry, you can always revert back."
- Open List View of the blocks
- Click "Upgrade to Products block" button
WooCommerce Product Grid Block is replaced with blocks:
- Products (Beta)
- Search Results Title
- Store Notices
- Row
- Product Results Count
- Catalog Sorting
- Product Template
- Pagination
- No Results
- Paragraph (content: "No products were found matching your selection.")
- Product Search

- Go to "Products (beta)" block settings
- Make sure "Inherit query from template" is ENABLED! It should be by default.
- Add a Product Search block to the Header template
- Save the template
- Go to frontend (e.g.
/shop) - Use Product Search in the template
- Enter a phrase that would cover some product names like:
t shirtorbeanie. You should expect the product list
- Enter a random phrase like
blah blahorcars. You should expect the "No results" page with information and Product Search bar:
Align attribute is preserved
Prerequisites
WordPress: >=6.1 Make sure Product Catalog template is cleared out to the default state. To achieve that:
- Go to (
/wp-admin/site-editor.php?postType=wp_template) - Click three dots next to template and click "Clear customizations"
Steps
- Enter the Product Catalog template
- Change the
alignsetting of the Classic Template block to either "None" or "Full width"
- Click "Upgrade to Products block" button: Blocks keeps the same
alignsetting in Editor:- Store Breadcrumbs
- Archive Title
- Store Notices
- Row
- Products
- Save the template
- Go to frontend (
/shop): Blocks keeps the same width (expected to be 650px wide in case of "None" and full available width in case of "Full width" option)
Product Archive - side by side comparison (editor)
| Classic Template | Blockified Template |
|---|---|
.  |
 |
Product Archive - side by side comparison (frontend)
| Classic Template | Blockified Template |
|---|---|
.  |
 |
Product Archive - copy update (editor)
| Before | After |
|---|---|
. |
 |
Single product - copy update (editor)
| Before | After |
|---|---|
. |
 |
Video presents the replacement of a Classic Template on two templates: Product Catalog and Products by Category
Simplify unused Add to Cart button form placeholder for grouped product (8438)
-
Go to Editor
-
Edit the Product Catalog template
-
Add All Products block
-
Enter the "edit" mode of All Products block by clicking a pencil button
-
Remove "Add to Cart Button" block
-
Add "Add to Cart" block - THESE ARE TWO SEPARATE BLOCKS. IT'S ABOUT "ADD TO CART" BLOCK!
-
By default the "Display form elements" toggle should be disabled Expected: Button looks like on a pictures above
-
Save the changes and check the frontend as well
-
Enter the edit mode of "Add to Cart" button (there's a bug that block cannot be clicked. To enter the edit mode, please open a "list view" of blocks and choose "Add to Cart" from there)
-
Enable "Display form elements" toggle Expected: Button looks like on a pictures above (while it changes to form for other types of products: simple, variable)
-
Save the changes and check the frontend as well
Editor - Grouped product is the middle one on each image. Other products are included for comparison
| Case | Before | After |
|---|---|---|
| Display form elements: disabled |  |
 |
| Display form elements: enabled |  |
 |
Frontend - Grouped product is the middle one on each image. Other products are included for comparison
| Case | Before | After |
|---|---|---|
| Display form elements: disabled |  |
 |
| Display form elements: enabled |  |
 |