269 lines
13 KiB
Markdown
269 lines
13 KiB
Markdown
# Testing notes and ZIP for release 9.1.0
|
||
|
||
Zip file for testing: [woocommerce-gutenberg-products-block.zip](https://github.com/woocommerce/woocommerce-blocks/files/10165999/woocommerce-gutenberg-products-block.zip)
|
||
|
||
## Feature plugin and package inclusion in WooCommerce
|
||
|
||
### Add "Store Info Alternating Image and Text" commerce adjacent pattern ([7827](https://github.com/woocommerce/woocommerce-blocks/pull/7827))
|
||
|
||
1. Create a new page and edit it.
|
||
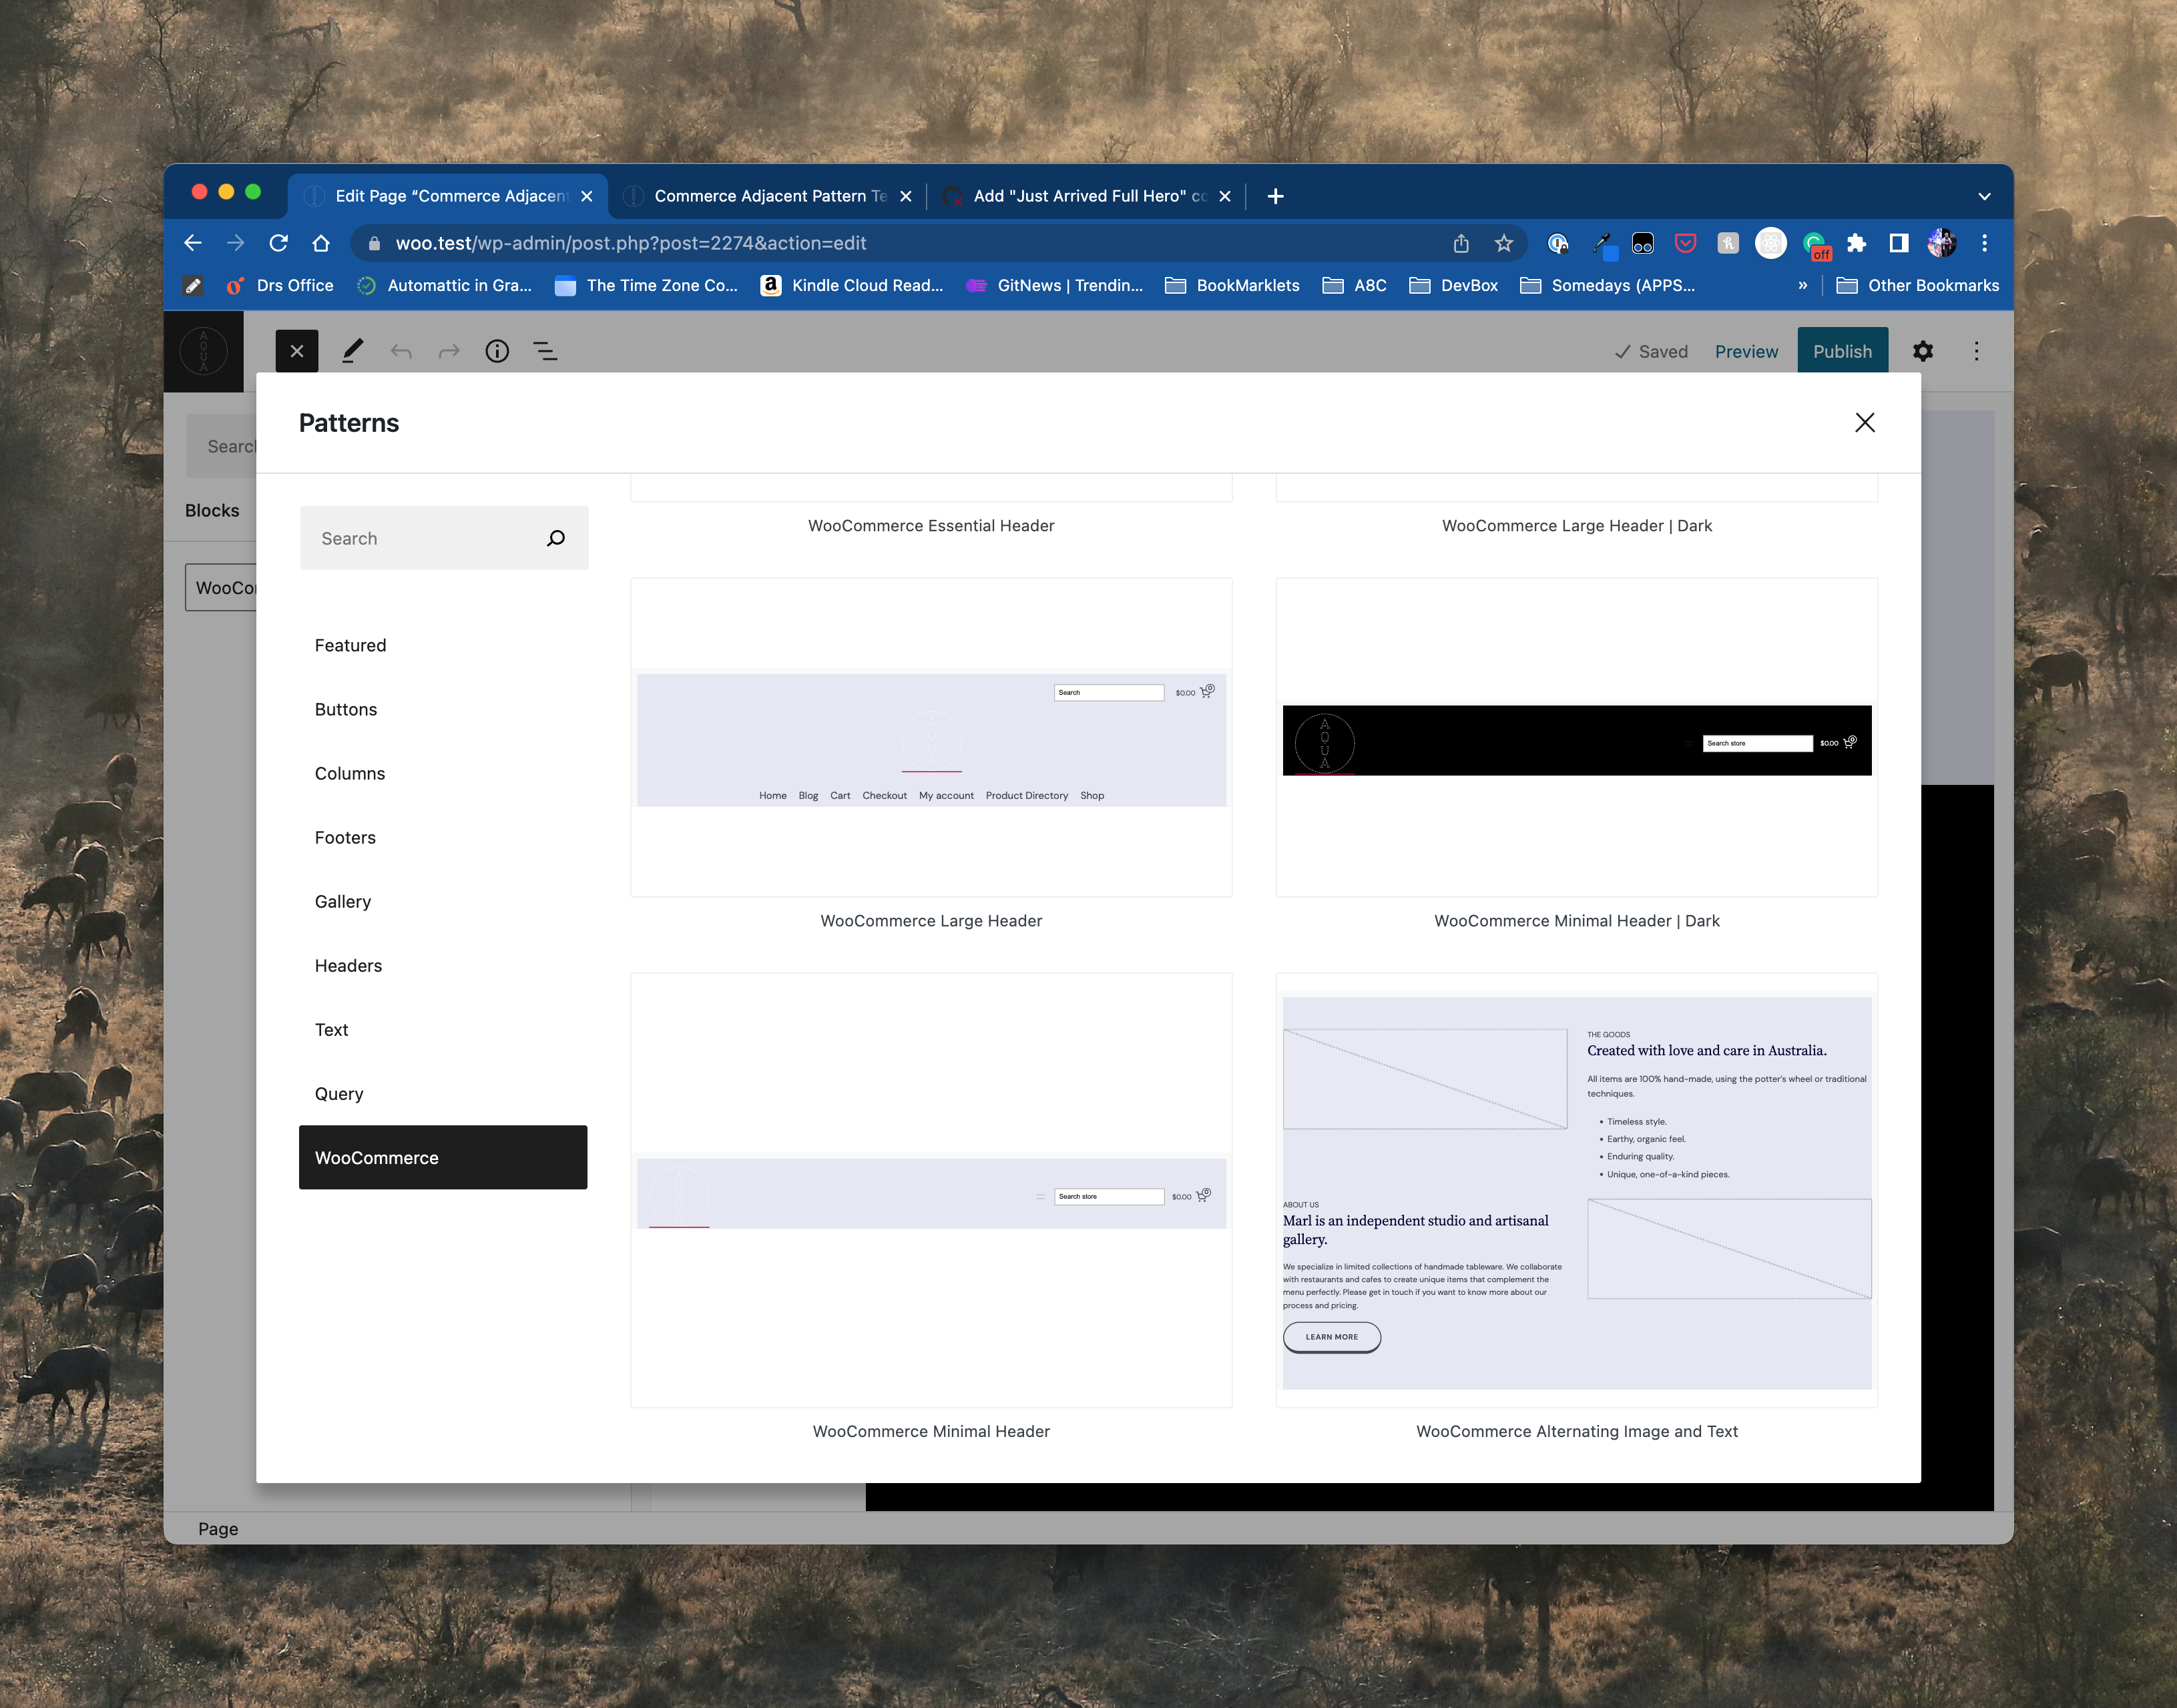
2. Browse to the WooCommerce category for Block patterns and look for the "WooCommerce Alternating Image and Text" pattern in the "Explore All Patterns" dialog. Click to insert.
|
||
|
||
3. Verify the pattern inserted on the page. It may look different depending on the theme being used with testing.
|
||
|
||
|
||
### Add to Cart Button: Add support for the alignment setting. ([7816](https://github.com/woocommerce/woocommerce-blocks/pull/7816))
|
||
|
||
1. Add the Product (Beta) block to a page.
|
||
2. Add the Add to Cart Button block.
|
||
3. Make sure that you can set the alignment to left, center and right.
|
||
4. Make sure all options work both in the editor and on the page.
|
||
|
||
### Products block: Make the block available to the users of the feature plugin. ([7815](https://github.com/woocommerce/woocommerce-blocks/pull/7815))
|
||
|
||
1. Open the inserter in the editor.
|
||
2. Make sure the block appears as “Products (Beta)“ instead of “Product Query” and has a “Stacks” icon instead of “Sparkles” icon. Icon should still be purple.
|
||
3. Add the block and select it.
|
||
4. Make sure the description says: “A block that displays a selection of products in your store.”
|
||
5. Make sure there is a Feedback prompt at the bottom of the inspector with a link going [here](https://href.li/?https://airtable.com/shrFX5FAqmCY6hVYI).
|
||
6. Make sure the default inner blocks are as follows:
|
||
|
||
- Product Image
|
||
- Post Title
|
||
- Product Price
|
||
- Add to Cart Button
|
||
|
||
|
||
### Add "Product Hero 2 Column 2 Row" commerce adjacent pattern. ([7814](https://github.com/woocommerce/woocommerce-blocks/pull/7814))
|
||
|
||
1. Create a new page and edit it.
|
||
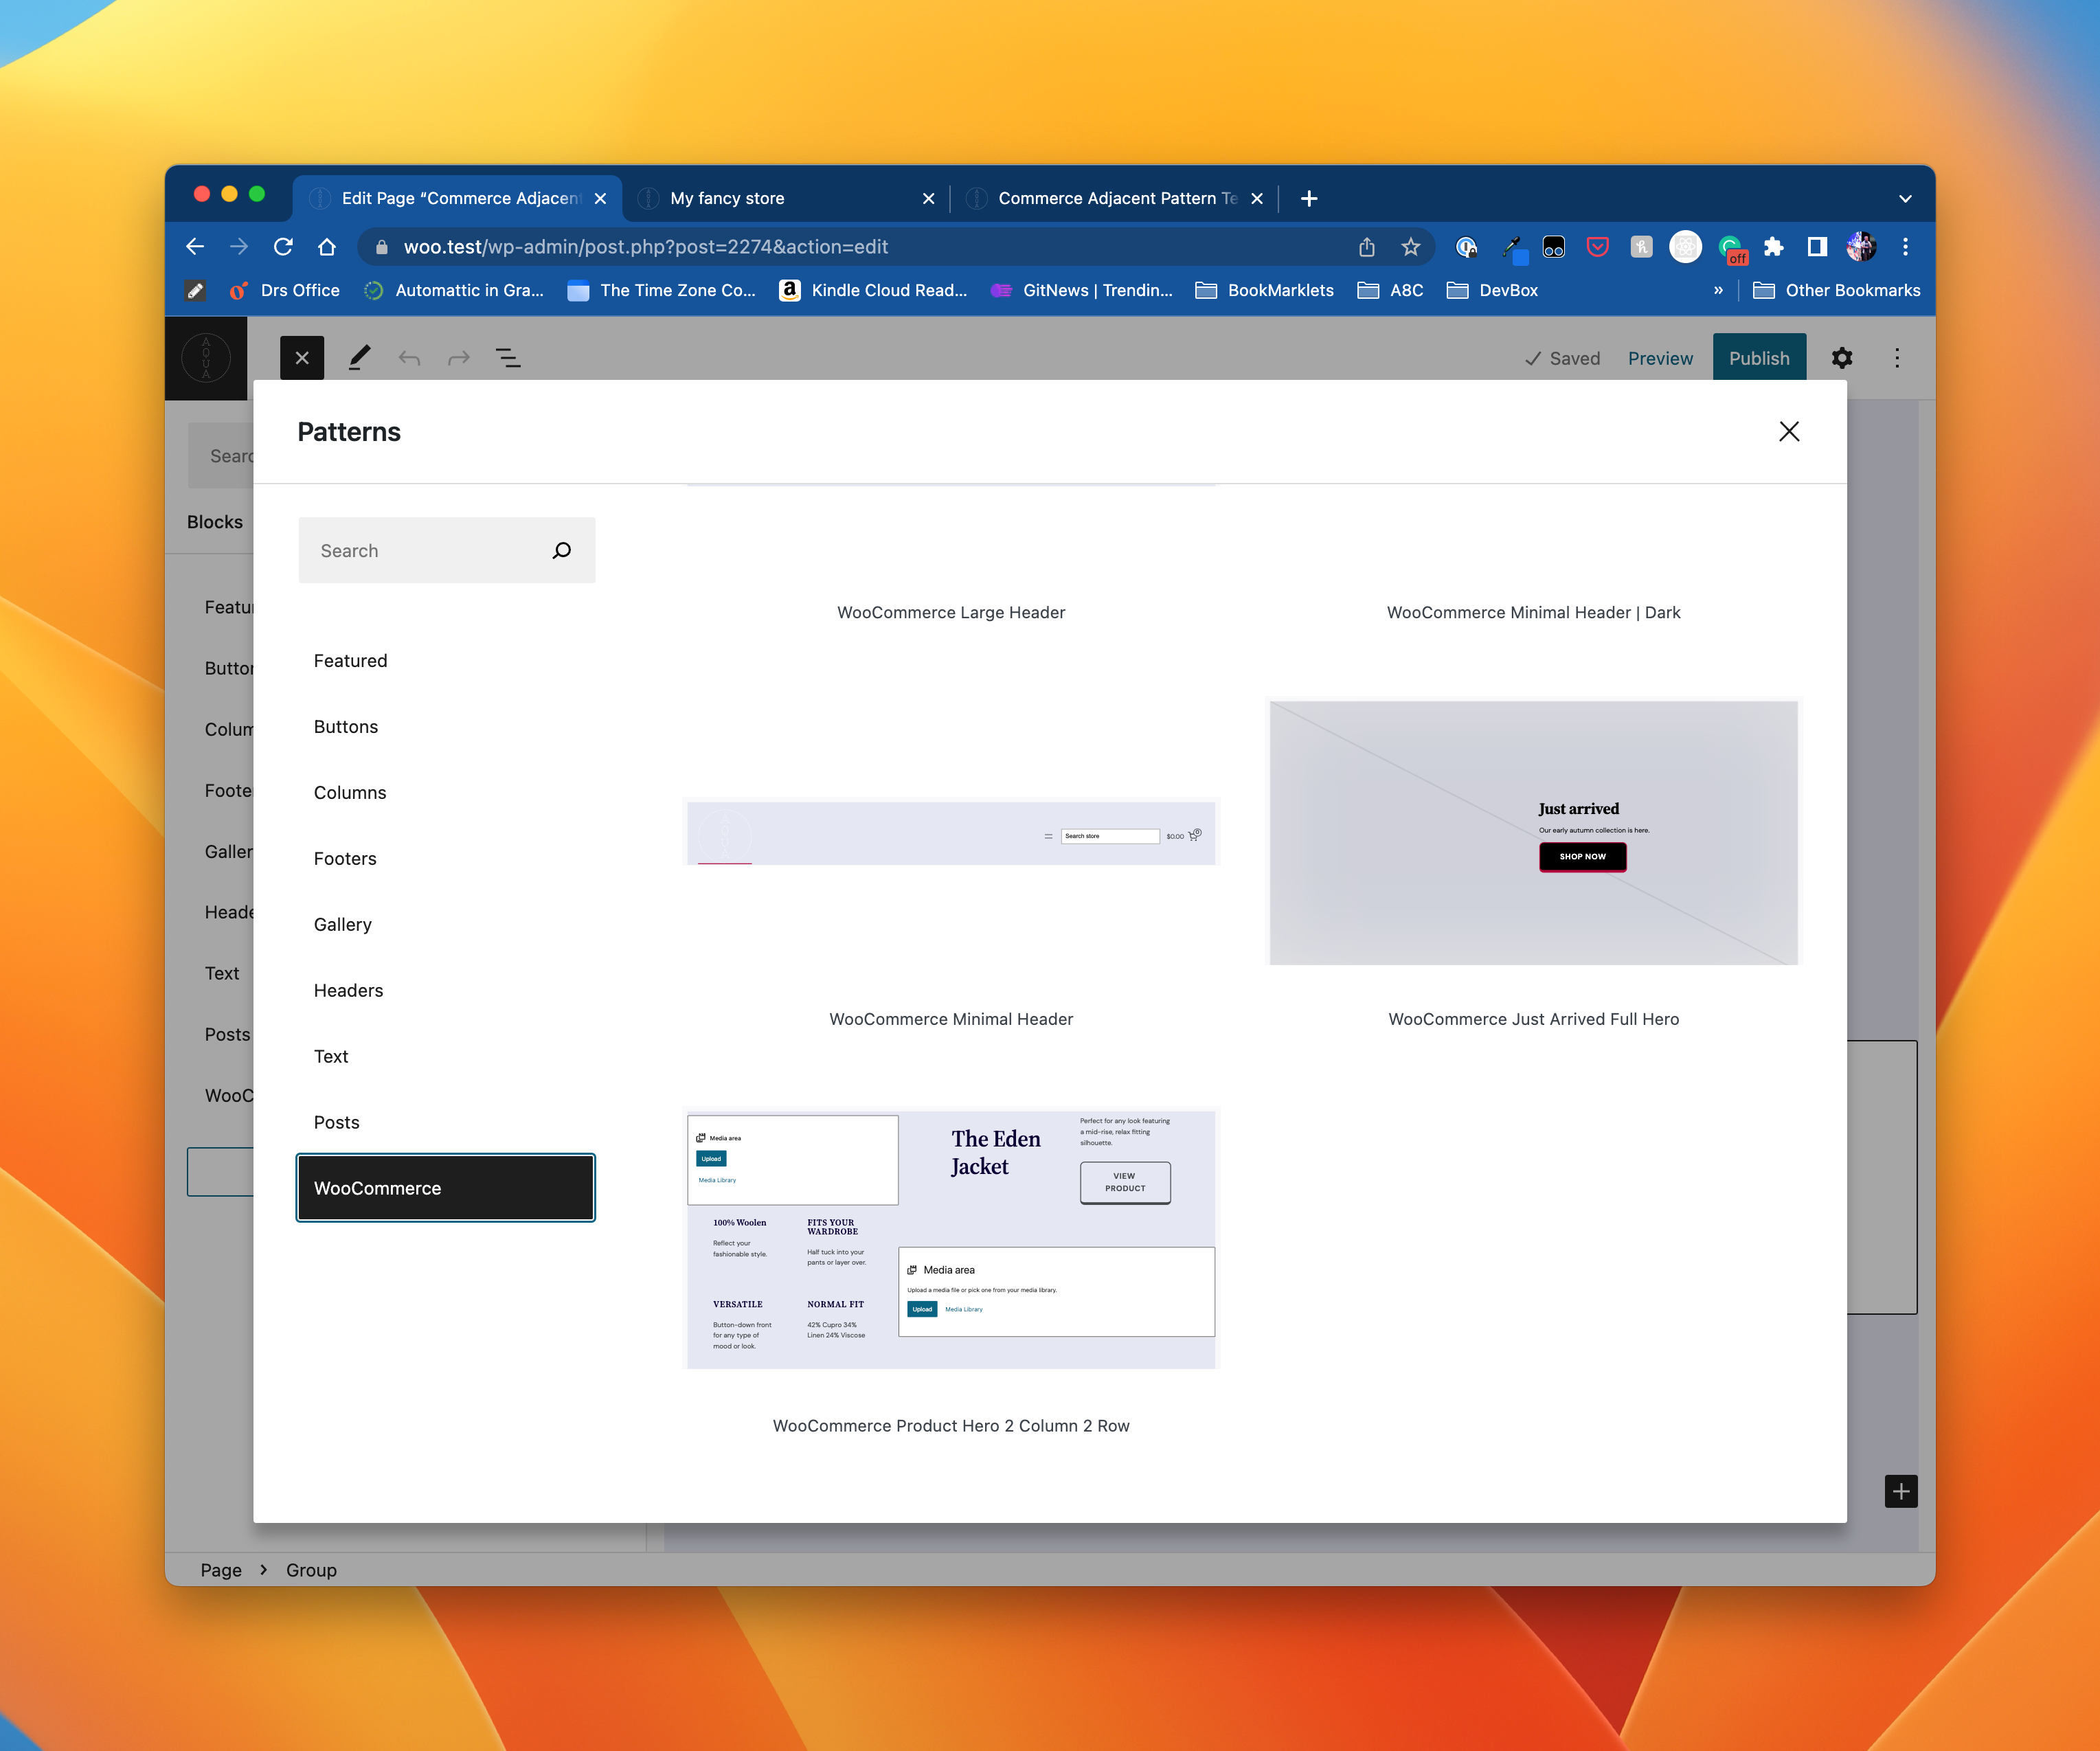
2. Browse to the WooCommerce category for Block patterns and look for the "WooCommerce Product Hero 2 Column 2 Row" pattern in the "Explore All Patterns" dialog. Click to insert.
|
||
|
||
3. Verify the pattern inserted on the page. It may look different depending on the theme being used with testing.
|
||
|
||
|
||
### Add "Just Arrived Full Hero" commerce adjacent pattern. ([7812](https://github.com/woocommerce/woocommerce-blocks/pull/7812))
|
||
|
||
1. Create a new page and edit it.
|
||
2. Browse to the WooCommerce category for Block patterns and look for the WooCommerce Just Arrived Full Hero pattern in the "Explore All Patterns" dialog. Click to insert.
|
||
<img width="1229" alt="CleanShot 2022-12-01 at 11 58 25@2x" src="https://user-images.githubusercontent.com/1429108/205113567-04310b49-ea2d-40d6-8e73-ed276e81d15c.png">
|
||
3. Verify the pattern inserted on the page. It may look different depending on the theme
|
||
|
||
### Product Rating: Add support for the alignment setting. ([7790](https://github.com/woocommerce/woocommerce-blocks/pull/7790))
|
||
|
||
1. Add the Products (Beta) block to a page.
|
||
2. Add the Product Rating block.
|
||
3. Make sure that you can set the alignment to left, center and right.
|
||
4. Make sure all options work both in the editor and on the page.
|
||
|
||
### Rename Active Product Filters block to Active Filters. ([7753](https://github.com/woocommerce/woocommerce-blocks/pull/7753))
|
||
|
||
1. Create a post or page and open the block inserter.
|
||
2. Search for active.
|
||
3. Verify there is a block named Active Filters (and there isn't one named Active Product Filters).
|
||
|
||
### Product Query: Add support for filtering by attributes within the block. ([7743](https://github.com/woocommerce/woocommerce-blocks/pull/7743))
|
||
|
||
1. Go to the editor and add a “Product (Beta) block.
|
||
2. Ensure a new “Product Attributes” input is accessible via the “Advanced Filters” panel in the inspector controls.
|
||
3. Ensure that the input autocompletes with all the available terms for your store in the format `${Taxonomy}: ${Term}`.
|
||
4. Ensure that when selecting the attributes, the products filter in the editor.
|
||
5. Ensure that when you remove an attribute, the editor preview also gets updated.
|
||
6. Save the post.
|
||
7. Ensure that the block displays correctly in the front-end.
|
||
|
||
### Align the font-sizes in filters. ([7707](https://github.com/woocommerce/woocommerce-blocks/pull/7707))
|
||
|
||
1. Enter Site Editor
|
||
2. Insert WooCommerce Product Filters pattern
|
||
3. Check the font-sizes in both, **Editor and the Frontend**, of the following elements in following combinations
|
||
|
||
- Active filters: list and chips
|
||
- Active filters: "Clear All" button
|
||
- Filter by Price: editable and text
|
||
- Filter by Attribute: list and dropdown (check placeholder, dropdown options and chips)
|
||
- Filter by Rating
|
||
- Filter by Stock
|
||
- For each of the above enable "Apply" button - check it too
|
||
|
||
4. On the frontend:
|
||
|
||
- Check "Apply" button
|
||
- Provide any change to filters without applying - check "Reset" button
|
||
|
||
**Expected:** All of the above have the same font-size:
|
||
|
||
- Twenty Twenty-Two: 15.75px
|
||
- Twenty Twenty-Three: 14 - 15.75px (depends on the screen width, narrower the screen, smaller the font)
|
||
|
||
Note: headings are not expected to change!
|
||
|
||
Check at least briefly other blocks of a WooCommerce that could be influenced by the changes (there may be something I might've missed).
|
||
|
||
### Mini Cart block: Load `wc-blocks-registry` package at the page's load instead of lazy load it. ([7813](https://github.com/woocommerce/woocommerce-blocks/pull/7813))
|
||
|
||
1. Install Page Optimize and Product Bundles.
|
||
2. Enable a block theme.
|
||
3. Customize the block theme and add the Mini Cart block in the header via Site Editor.
|
||
4. Save the changes.
|
||
5. In the frontend, lick on the Mini Cart. The drawer should open and show the "empty cart" message.
|
||
6. Go to the shop page and add a product to your cart.
|
||
7. Click on the Mini Cart. The drawer should open and show the product you just added.
|
||
|
||
### Hide the shipping address form from Checkout Block in Editor and rename the Billing Address label when "Force shipping to the customer billing address" is enabled. ([7800](https://github.com/woocommerce/woocommerce-blocks/pull/7800))
|
||
|
||
1. Go to `wp-admin/admin.php?page=wc-settings&tab=shipping§ion=options` page.
|
||
2. Enable the `Force shipping to the customer billing address` option and save the changes.
|
||
3. Go to Checkout block Editor, and confirm Shipping Address form is not visible.
|
||
4. Confirm Billing Address form label is `Billing and shipping address` and the description is `Enter the billing and shipping address that matches your payment method.`
|
||
5. Go to the Checkout block front-end, and confirm Shipping Address form is not visible.
|
||
6. Confirm Billing Address form label is `Billing and shipping address` and the description is `Enter the billing and shipping address that matches your payment method.`
|
||
7. Change the billing address, confirm the shipping address in the order summary gets changed, and shipping methods are updated.
|
||
8. Disable the `Force shipping to the customer billing address` option and save the changes.
|
||
9. Confirm Shipping Address form is visible in both the frontend and Editor.
|
||
10. Please test around this issue with multiple use cases.
|
||
|
||
### Product Price: Fix the alignment setting. ([7795](https://github.com/woocommerce/woocommerce-blocks/pull/7795))
|
||
|
||
1. Add the Product (Beta) block to a page.
|
||
2. Add the Product Price block.
|
||
3. Make sure that you can set the alignment to left, center and right.
|
||
4. Make sure all options work both in the editor and on the page.
|
||
|
||
### Fix: Show tax label in Cart and Checkout block. ([7785](https://github.com/woocommerce/woocommerce-blocks/pull/7785))
|
||
|
||
#### Multiple tax names / Itemized
|
||
|
||
1. Go to `wp-admin/admin.php?page=wc-settings&tab=tax`.
|
||
2. Ensure the additional tax class `Reduced` exists.
|
||
3. Ensure that `Display prices during cart and checkout` is set to `Including tax`.
|
||
4. Ensure that `Display tax totals` is set to `Itemized`.
|
||
5. Go to `wp-admin/admin.php?page=wc-settings&tab=tax§ion=standard` and add the following tax rate:
|
||
- `Rate %`: `10.000`
|
||
- `Tax name`: `10% Vat`
|
||
6. Go to `wp-admin/admin.php?page=wc-settings&tab=tax§ion=reduced` and add the following tax rate:
|
||
- `Rate %`: `5.000`
|
||
- `Tax name`: `5% Vat`
|
||
7. Create two test products and assign the test products to the tax classes `Standard` and `Reduced`.
|
||
8. Add the test products to the cart.
|
||
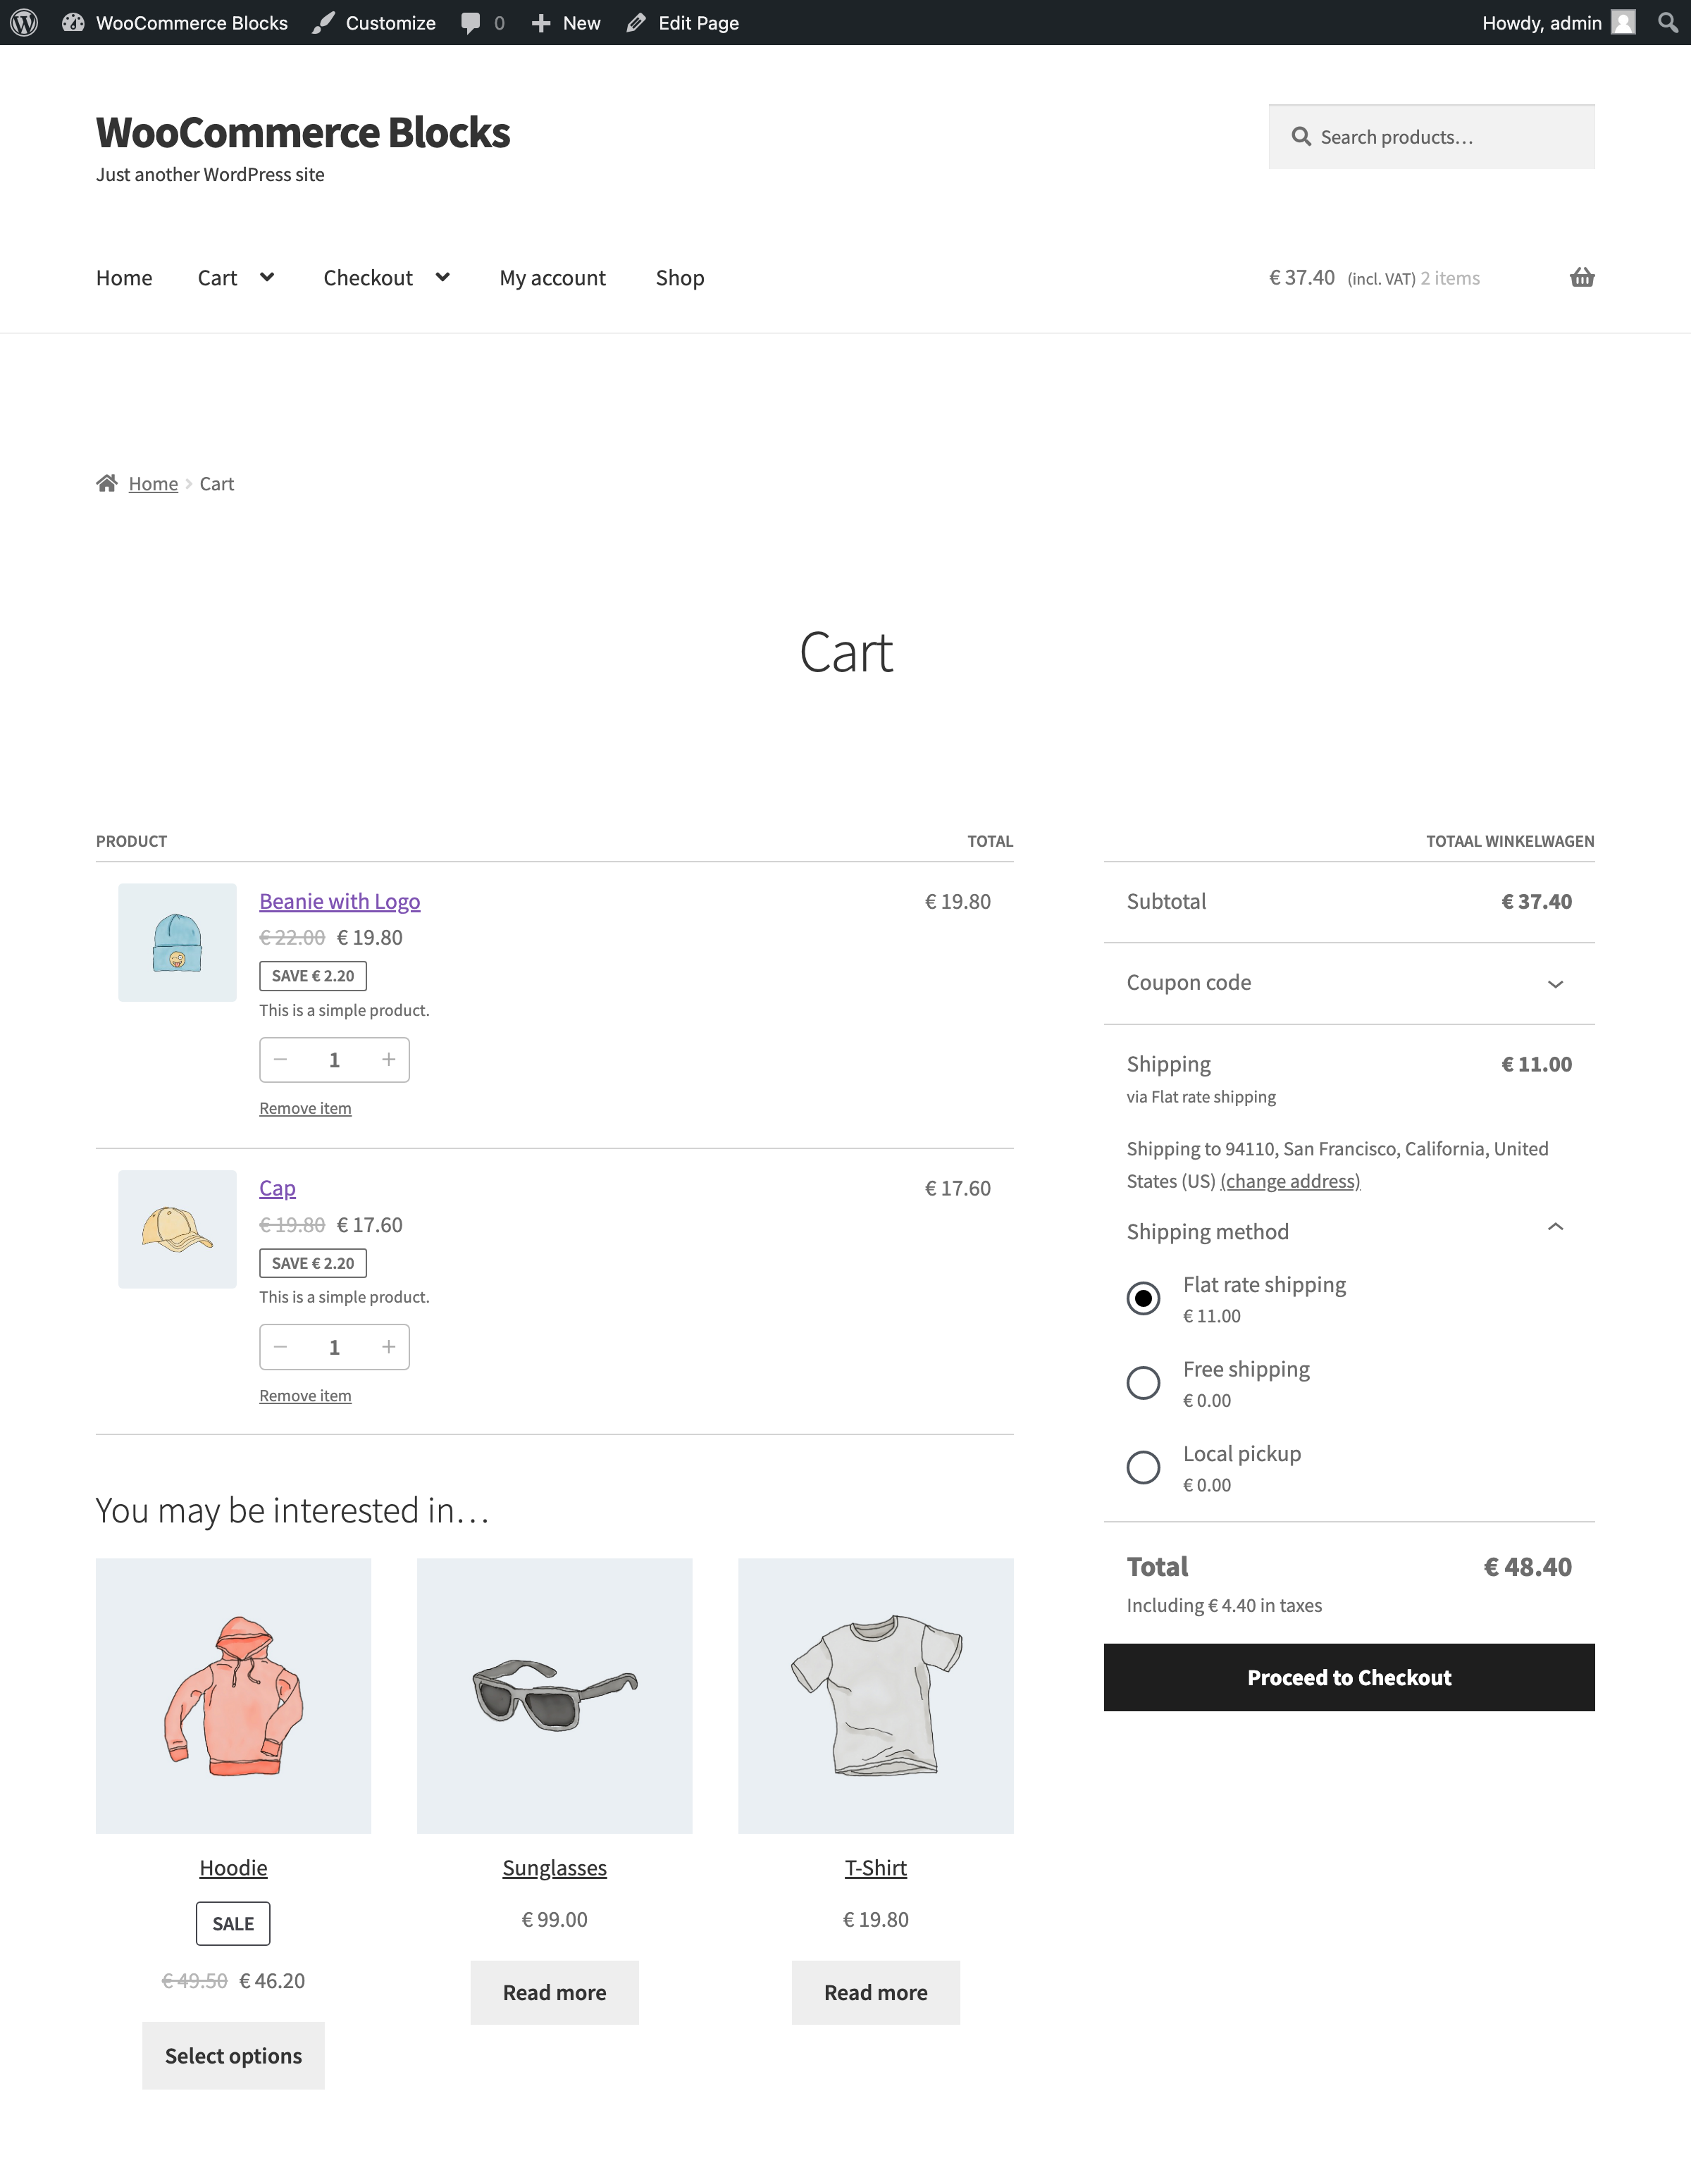
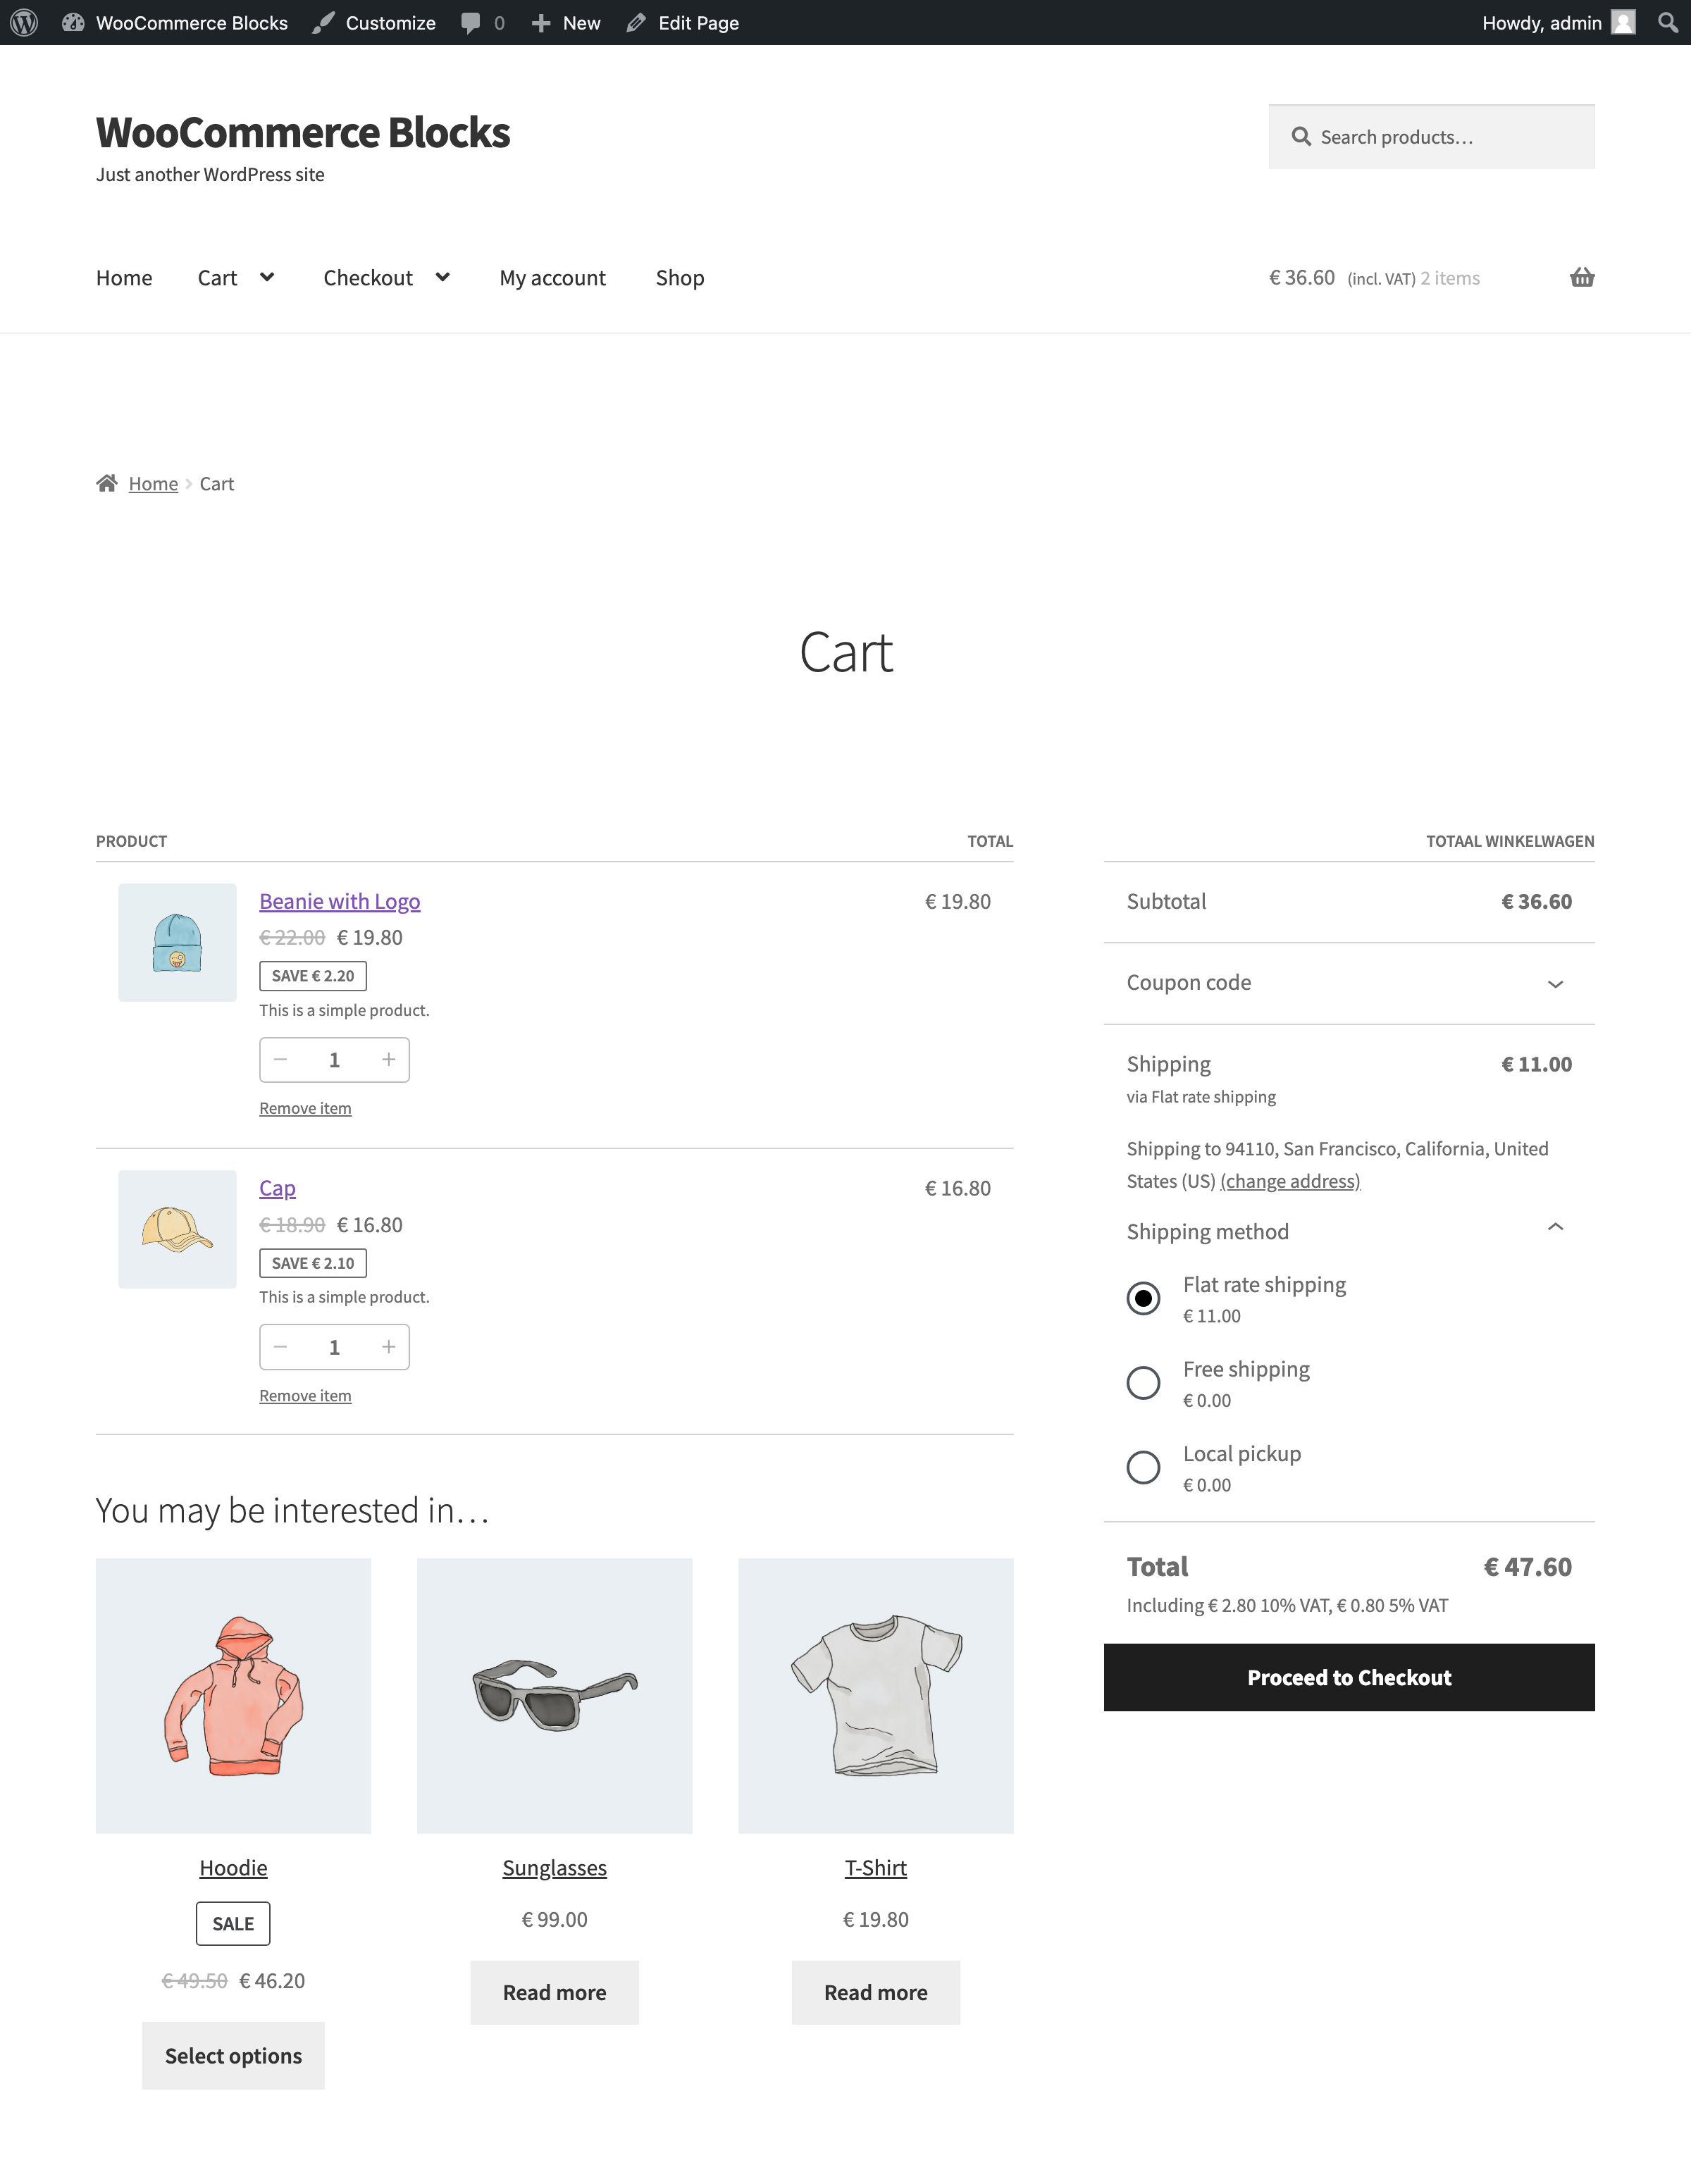
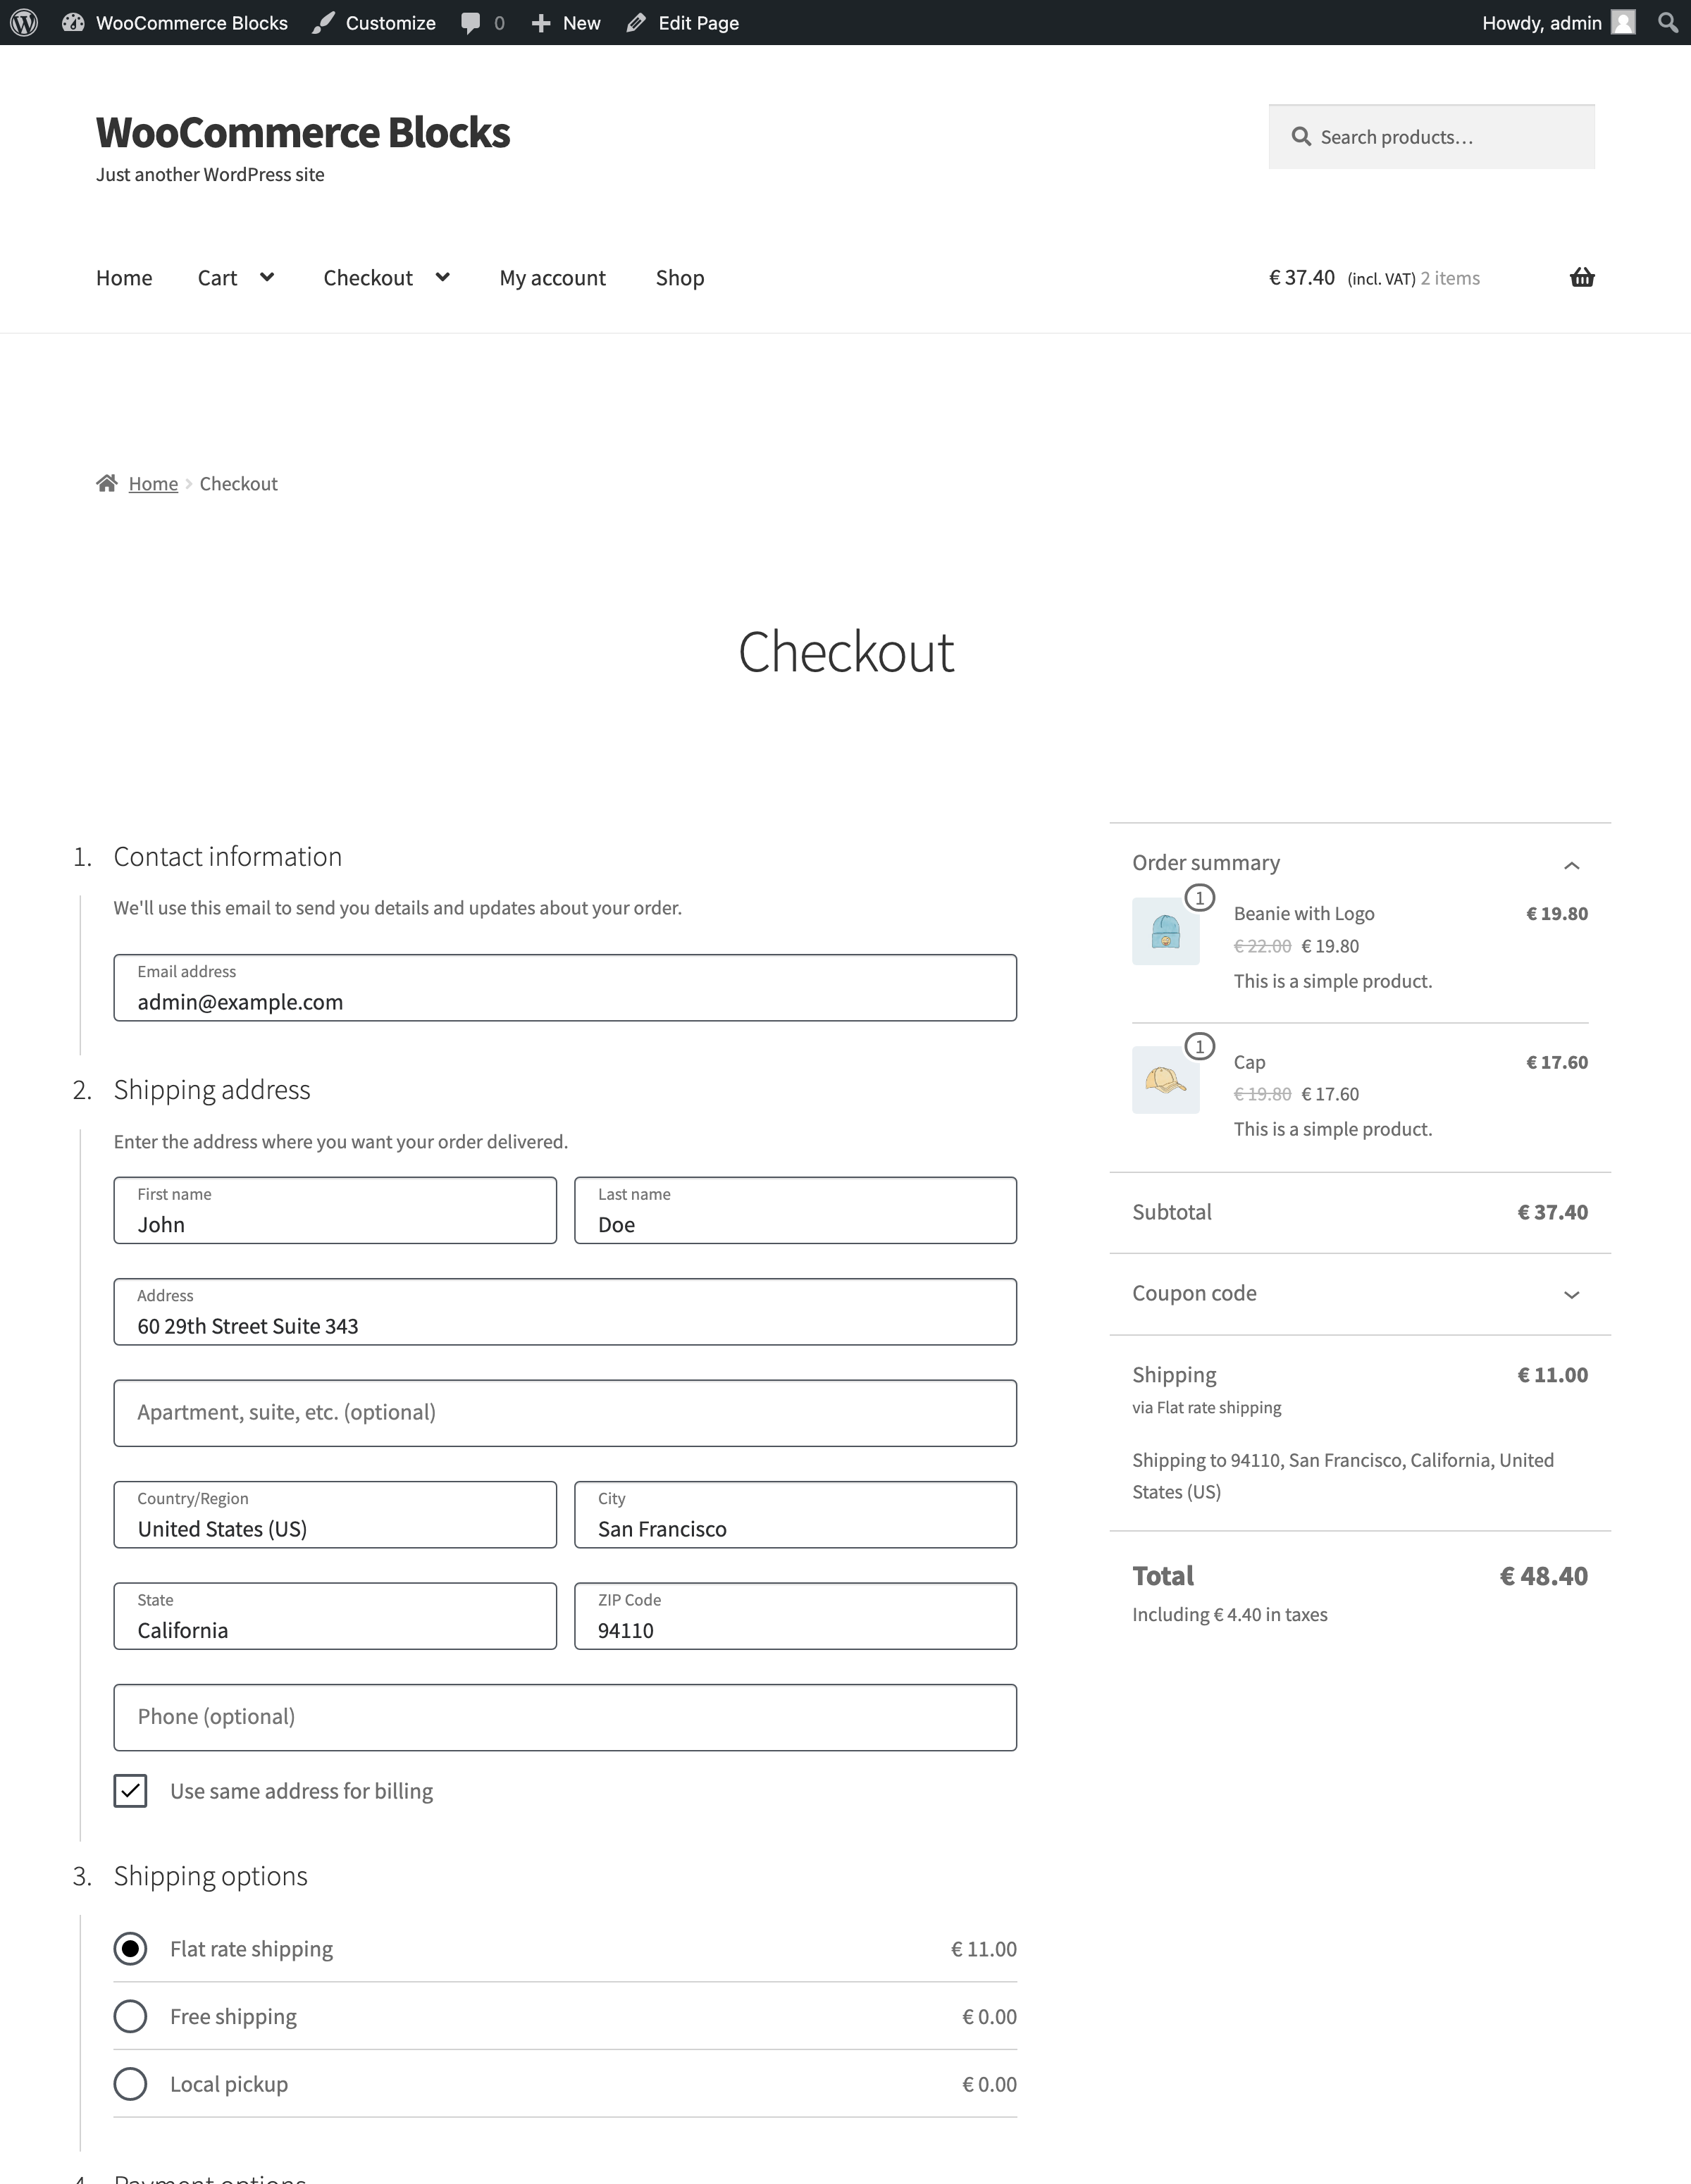
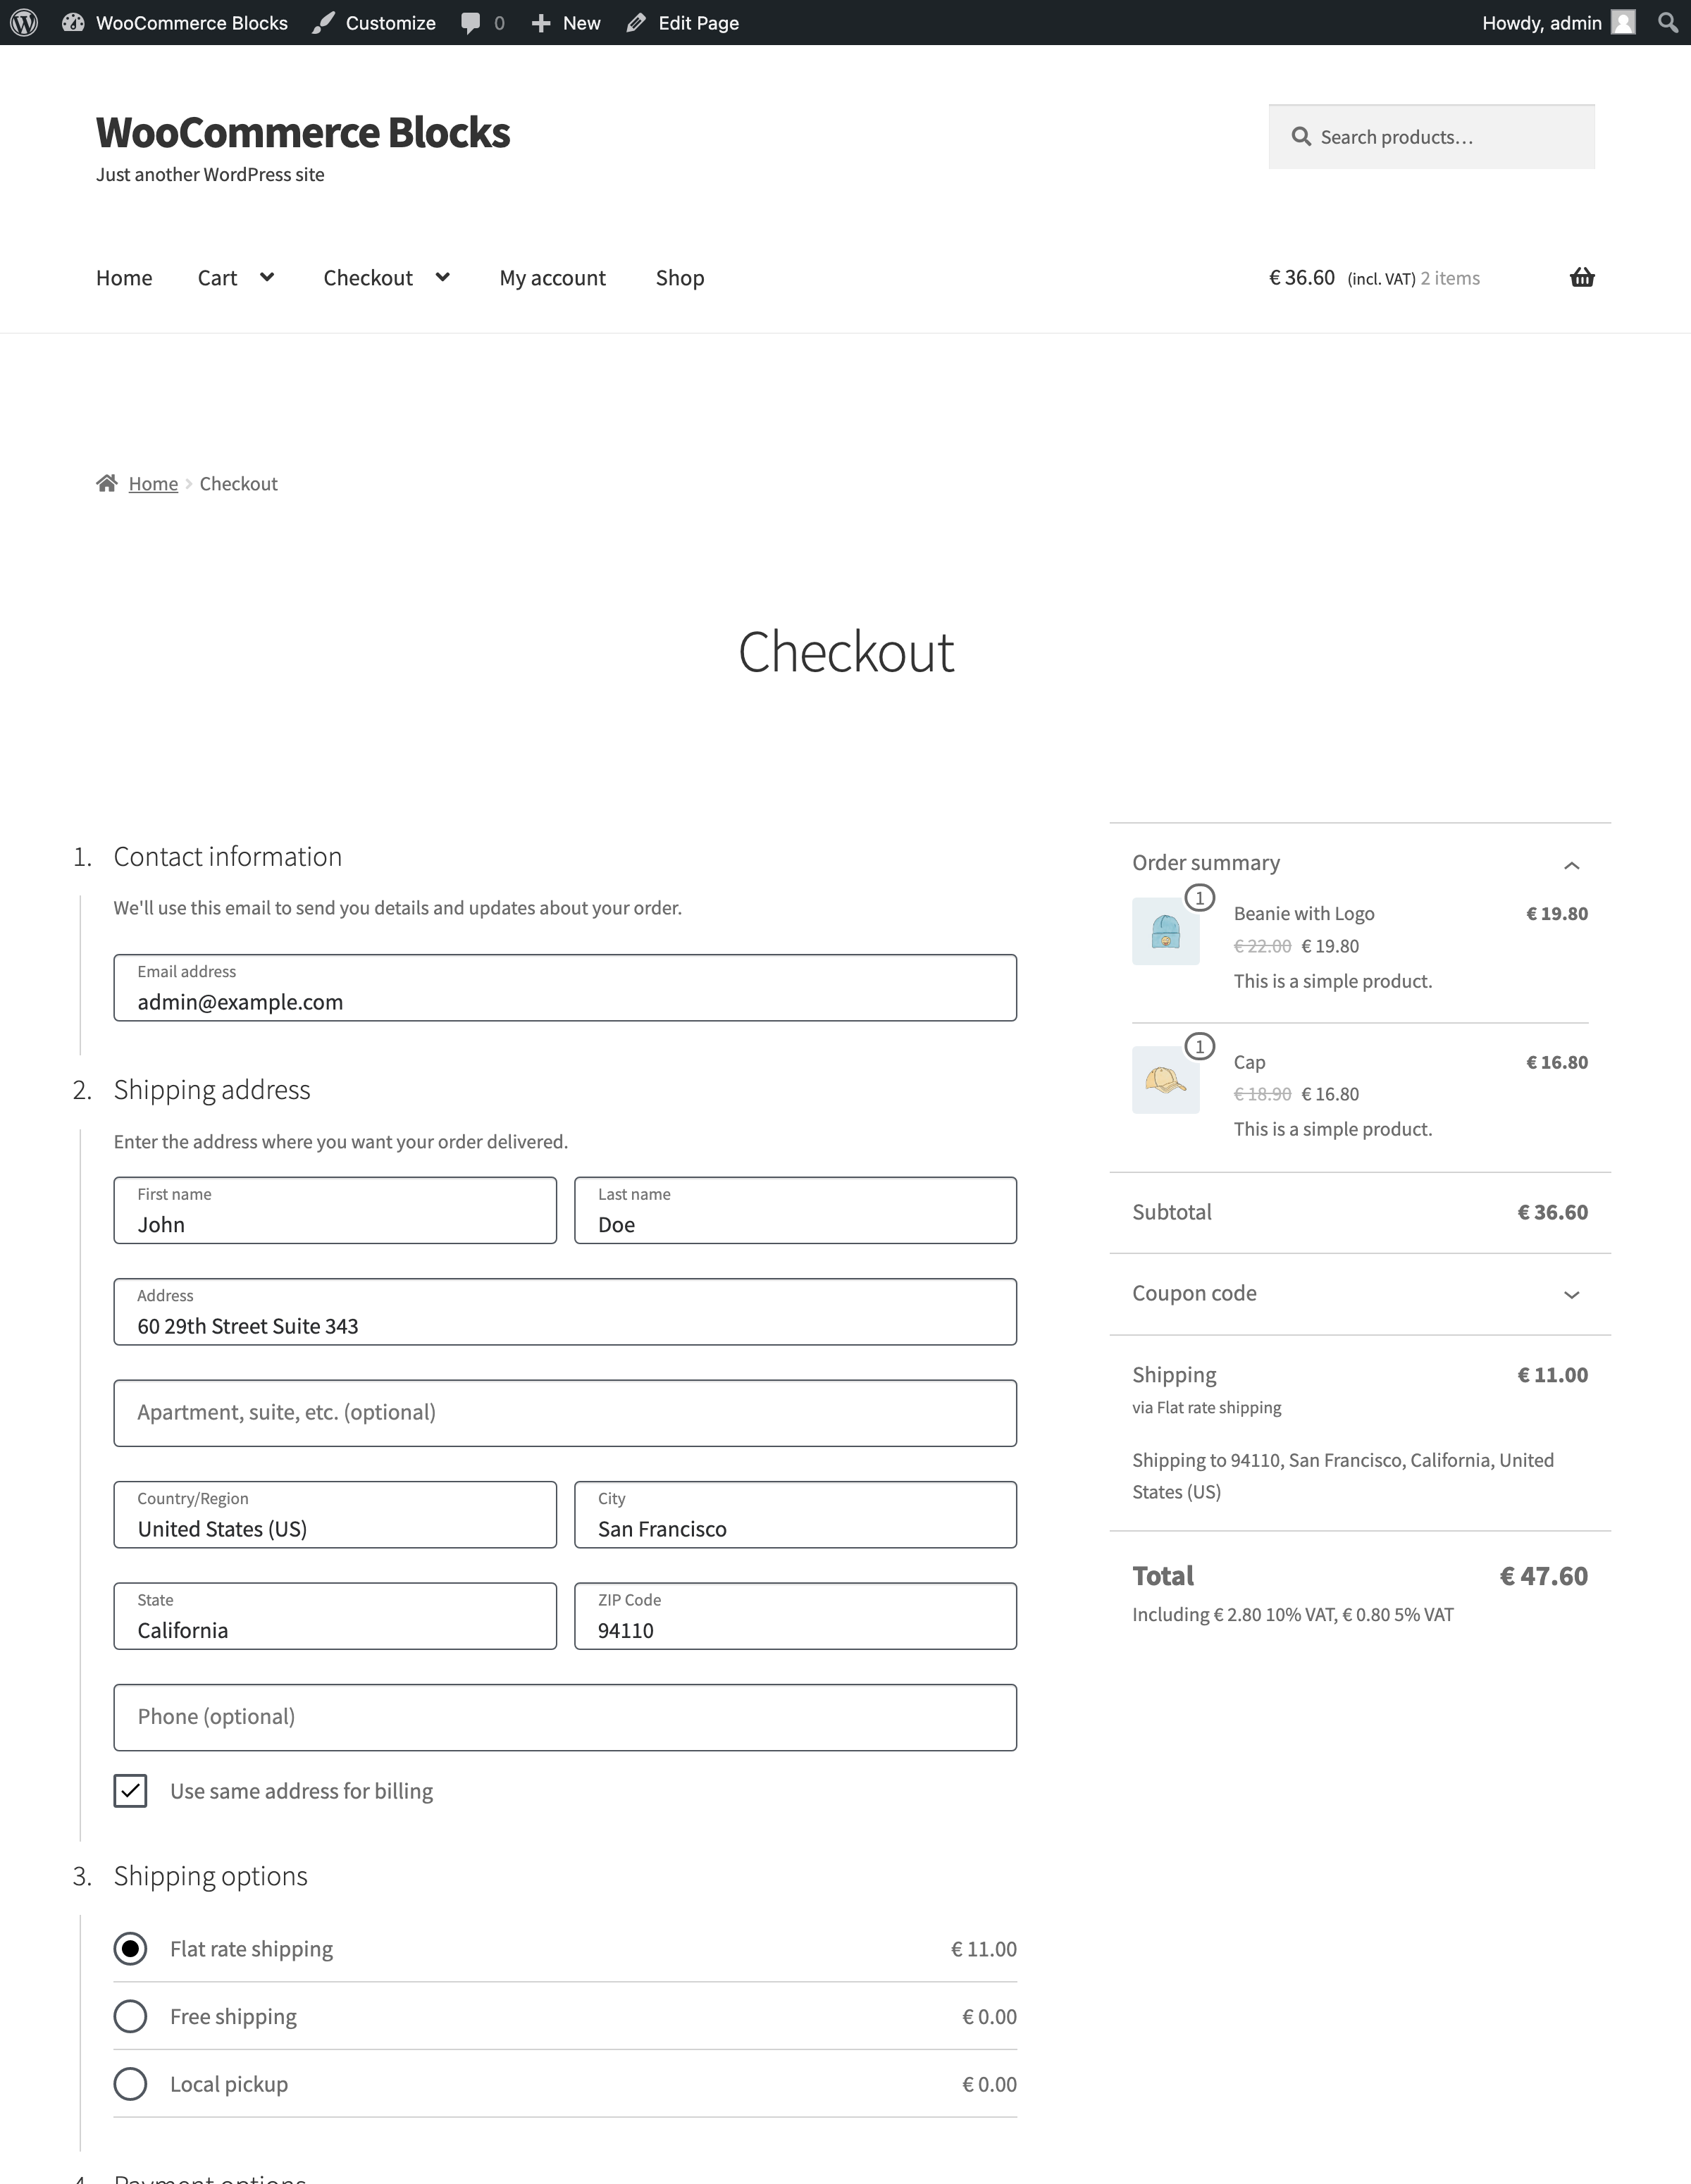
9. Go to the cart and verify that the tax labels are visible in the order summary, e.g. `Including € 2.80 10% VAT, € 0.80 5% VAT`.
|
||
10. Go to the checkout and verify that the same tax labels are visible.
|
||
|
||
<table>
|
||
<tr>
|
||
<td>Cart - before:
|
||
<br><br>
|
||
|
||
|
||
</td>
|
||
<td>Cart - after:
|
||
<br><br>
|
||
|
||
|
||
</td>
|
||
</tr>
|
||
<tr>
|
||
<td>Checkout - before:
|
||
<br><br>
|
||
|
||
|
||
</td>
|
||
<td>Checkout - after:
|
||
<br><br>
|
||
|
||
|
||
</td>
|
||
</tr>
|
||
</table>
|
||
|
||
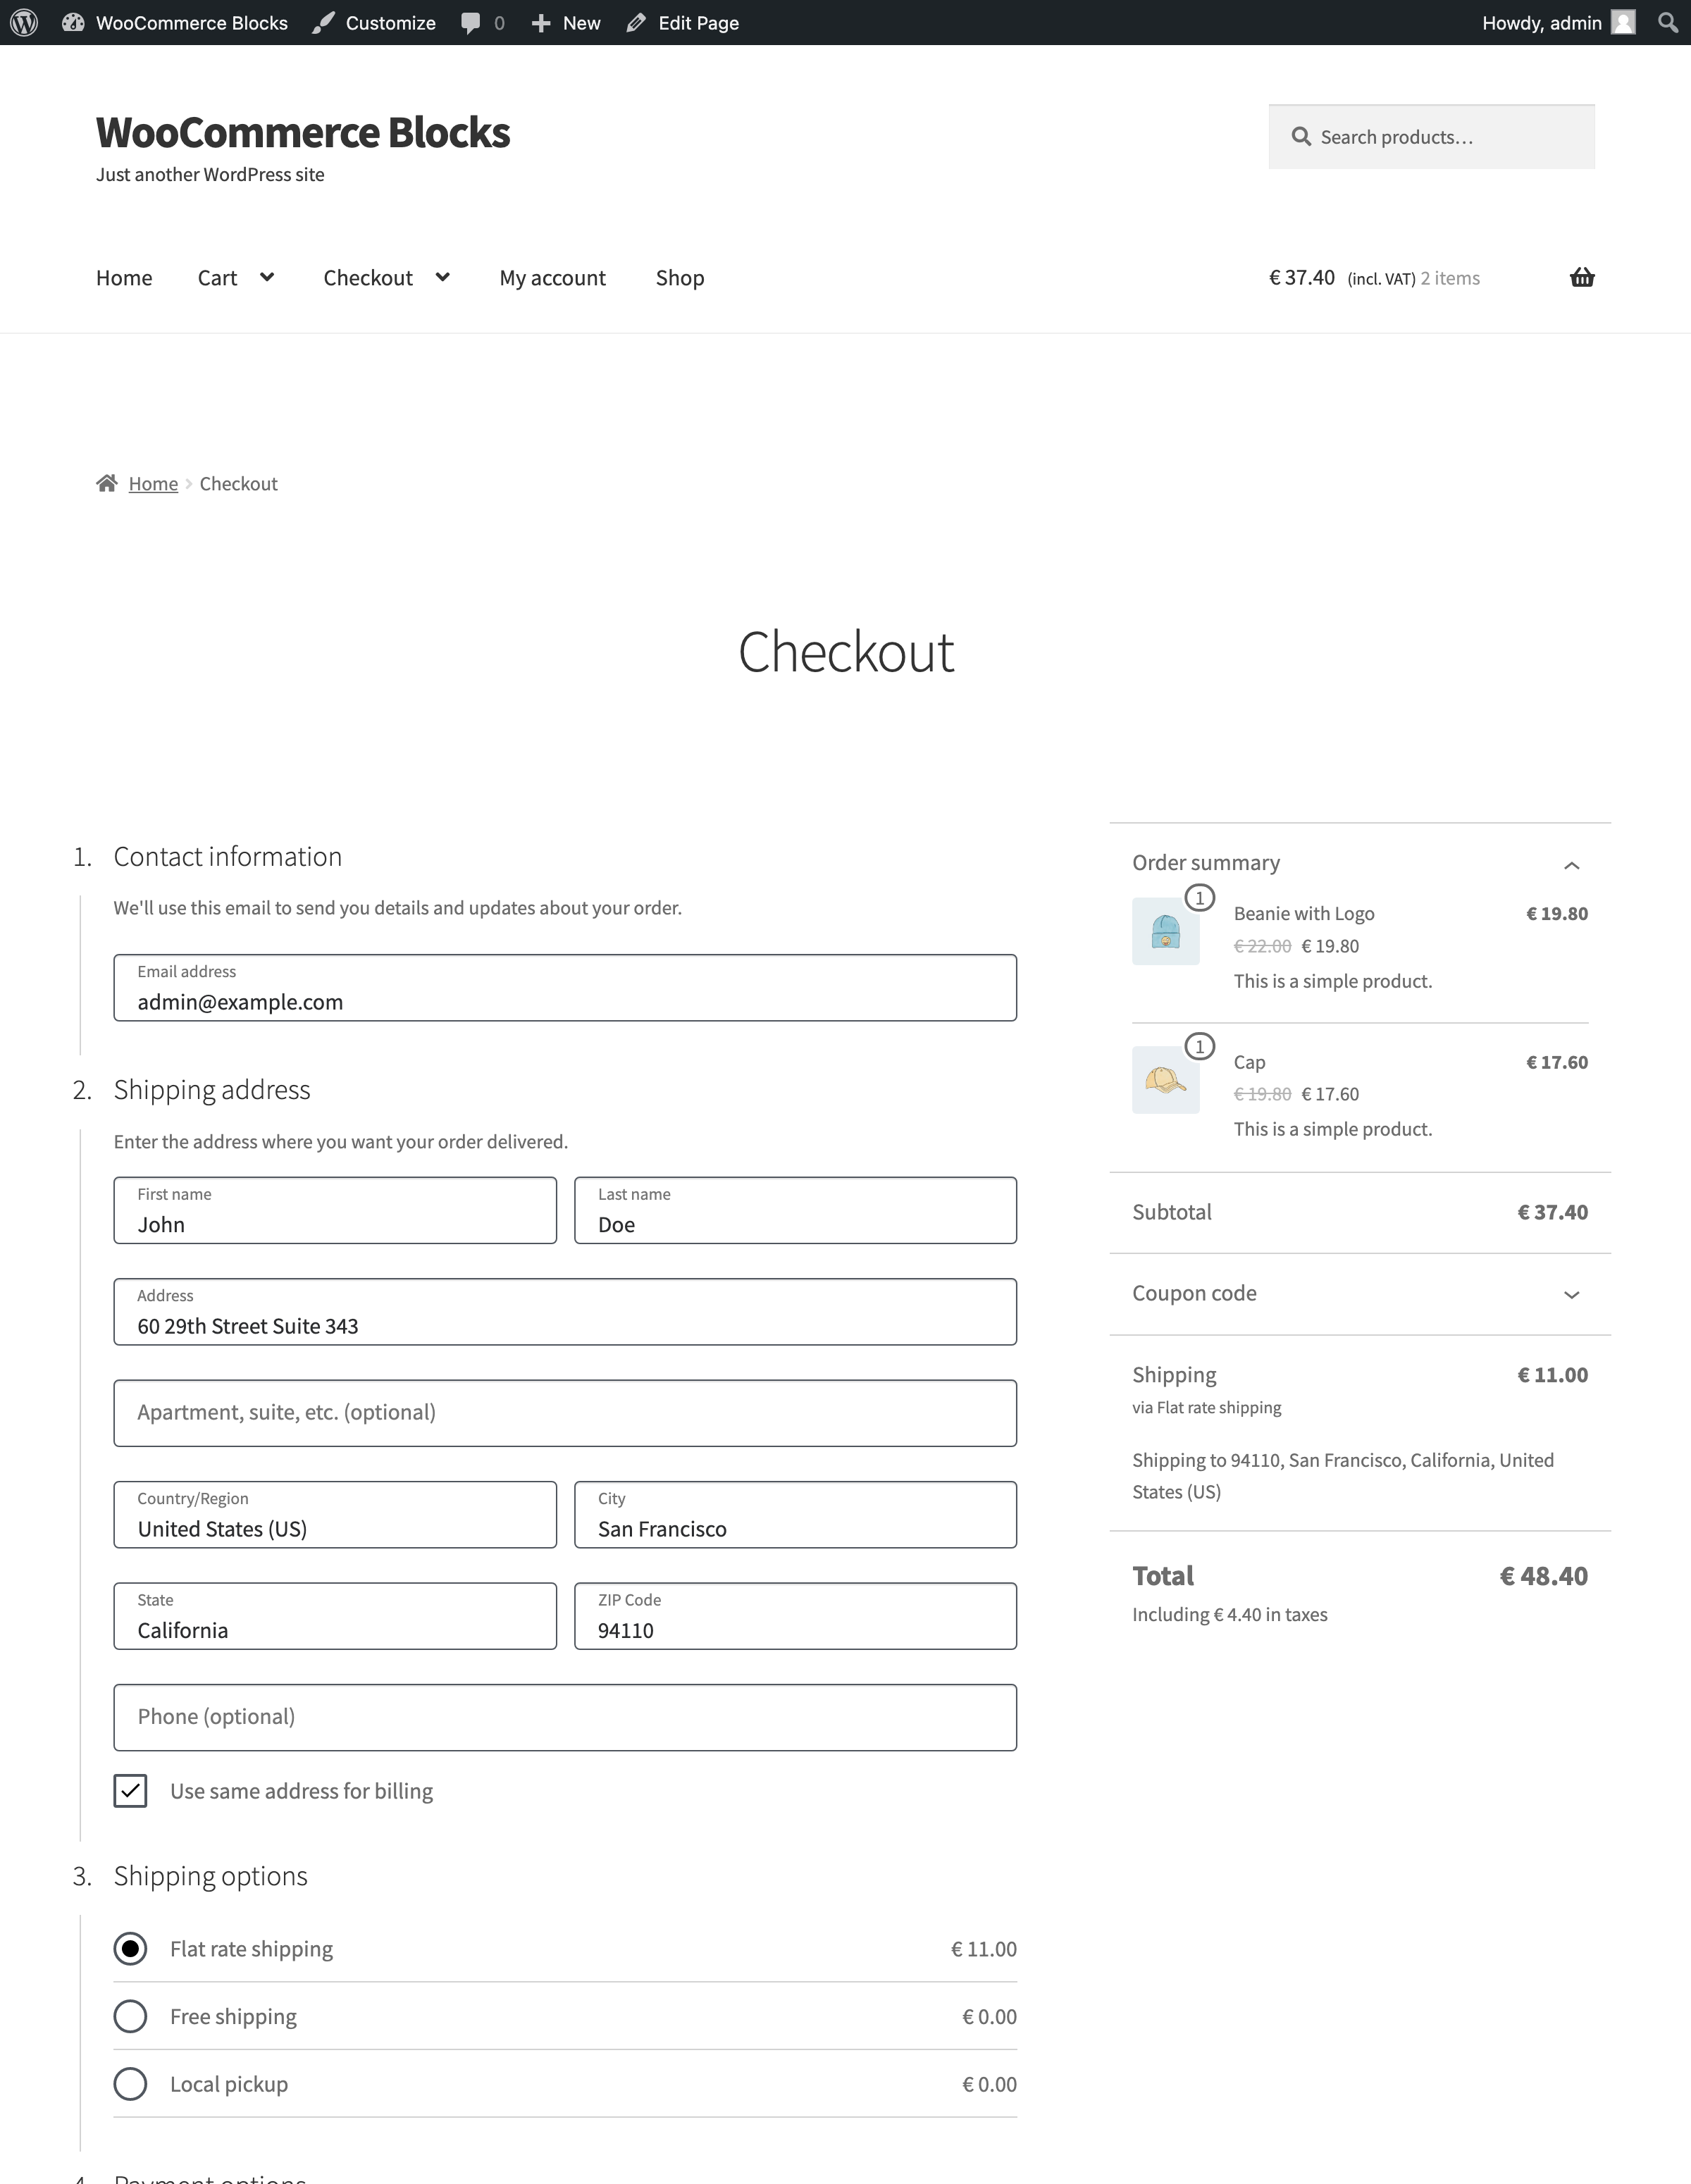
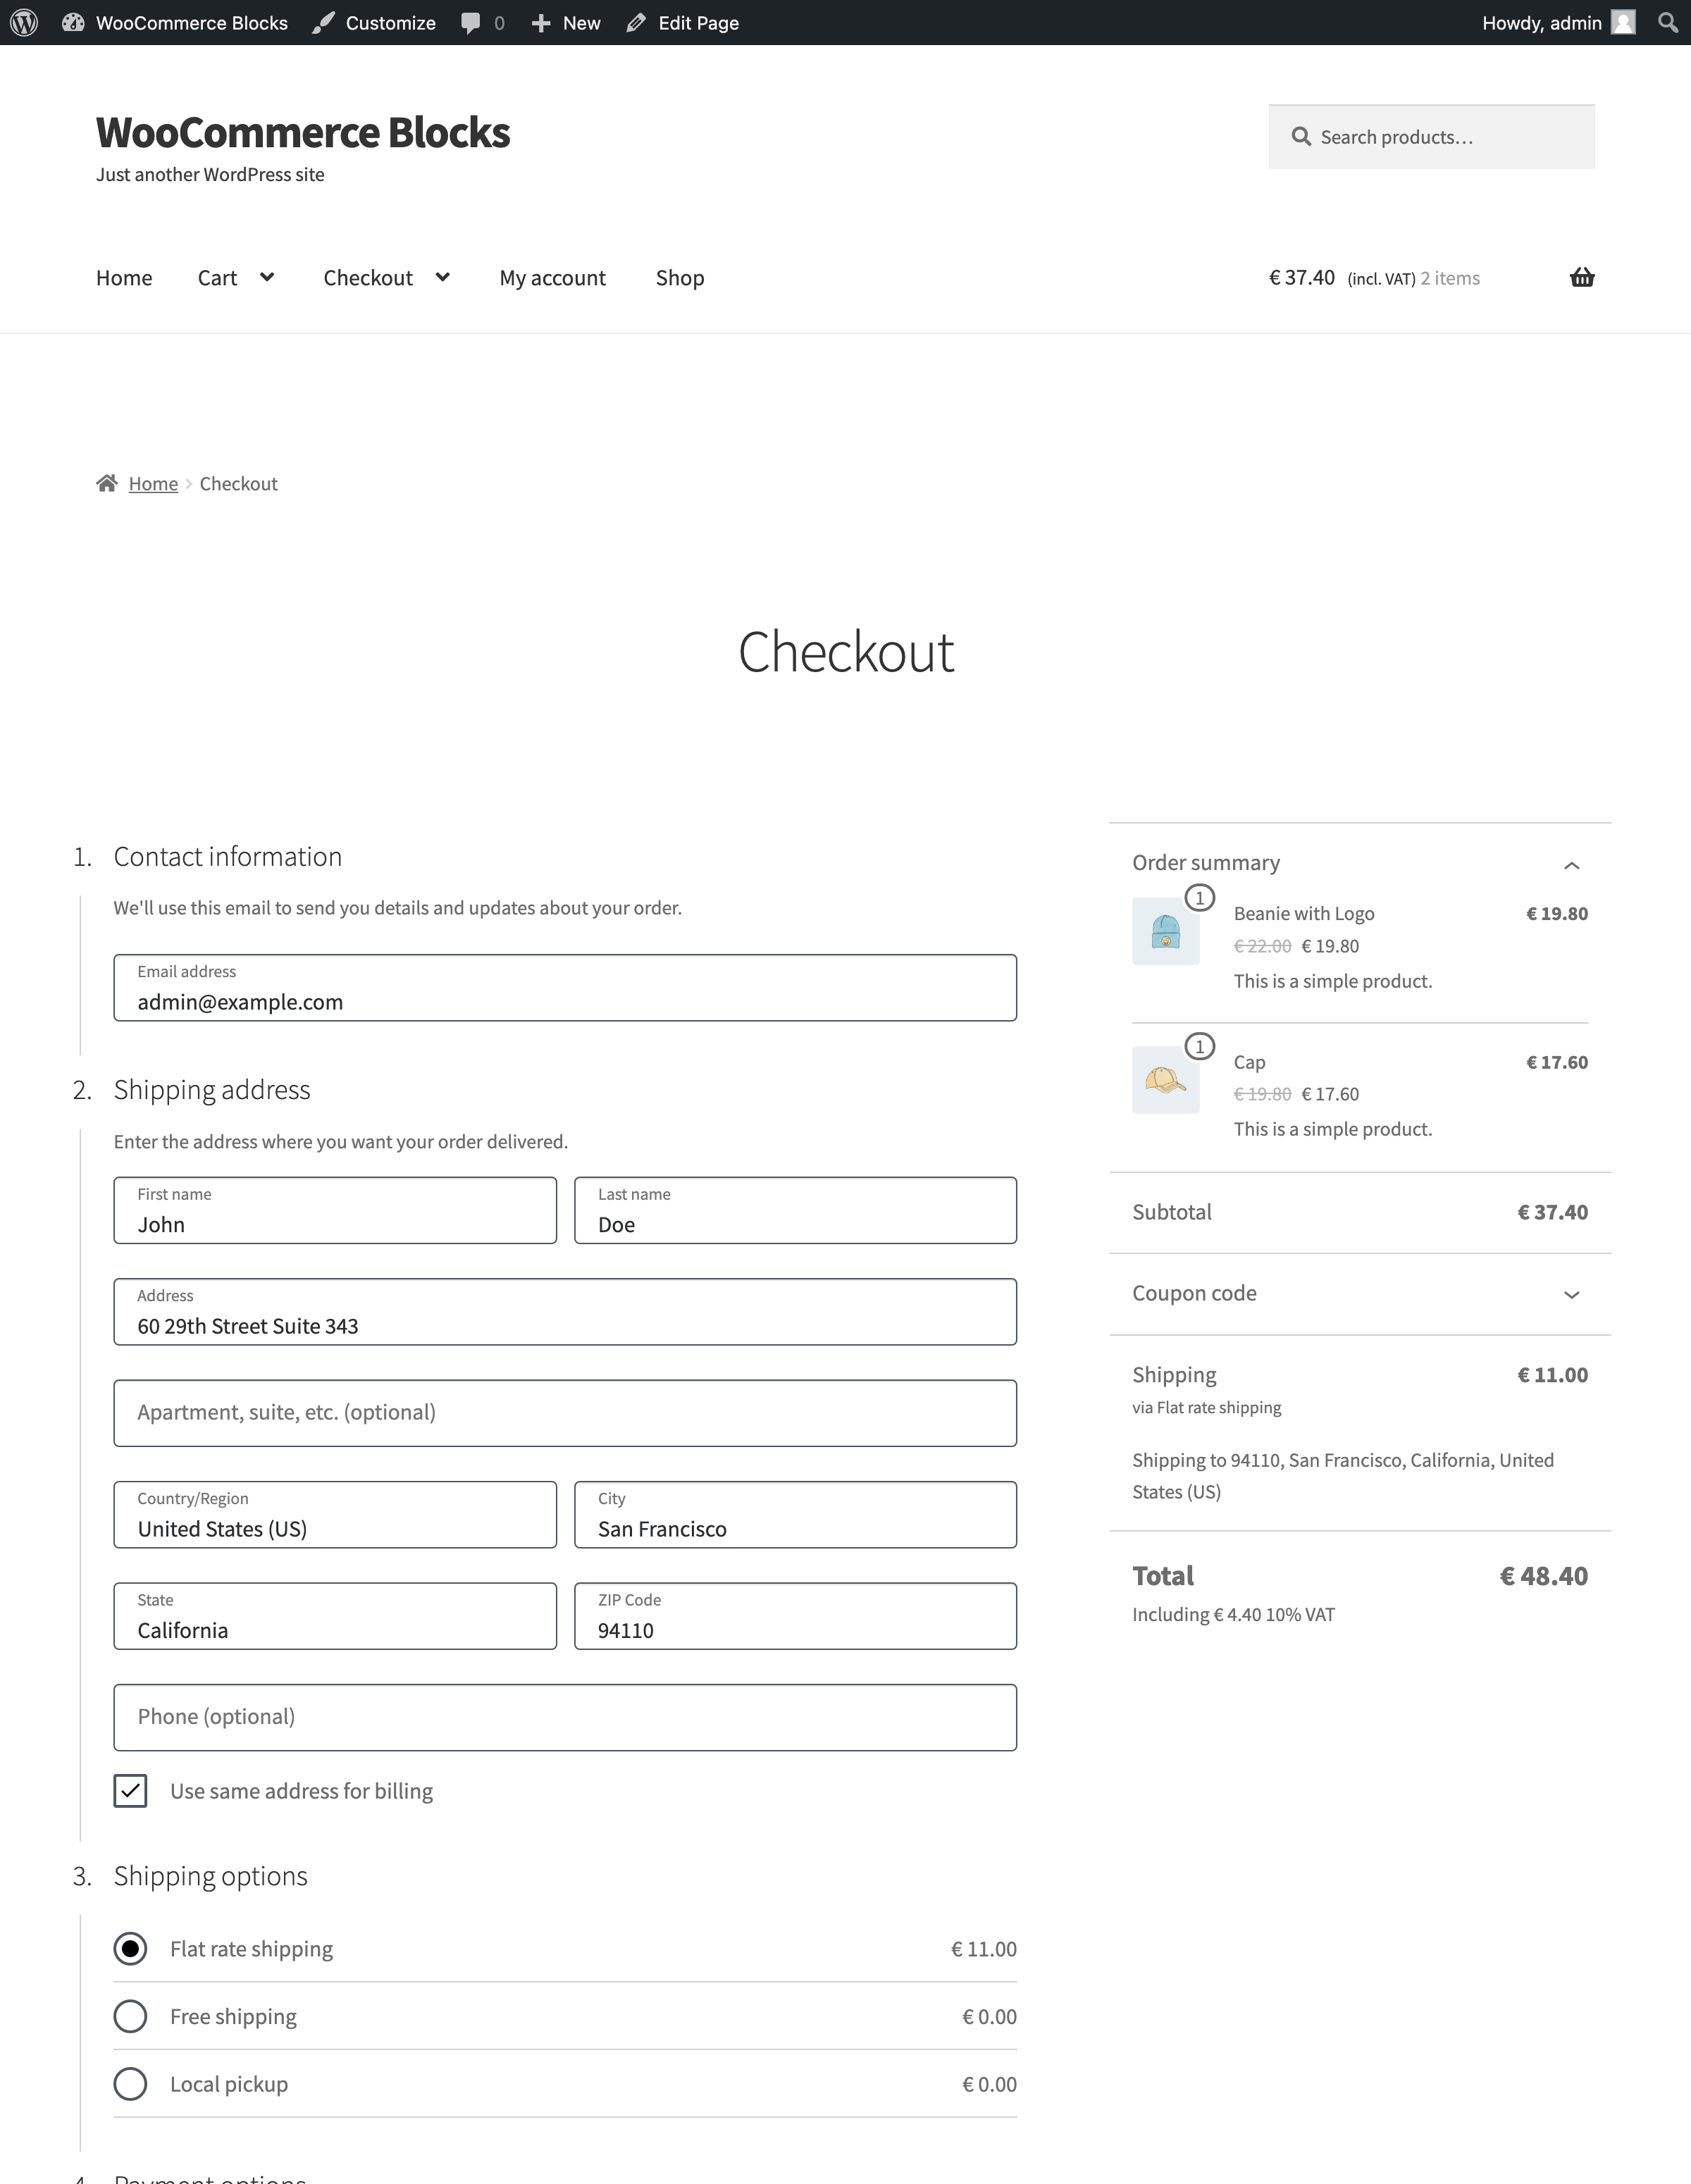
#### Single tax name / Itemized
|
||
|
||
1. Go back to `wp-admin/admin.php?page=wc-settings&tab=tax§ion=reduced` and change the tax rate as follows:
|
||
- `Rate %`: `5.000` → `10.000`
|
||
- `Tax name`: `5% Vat` → `10% Vat`
|
||
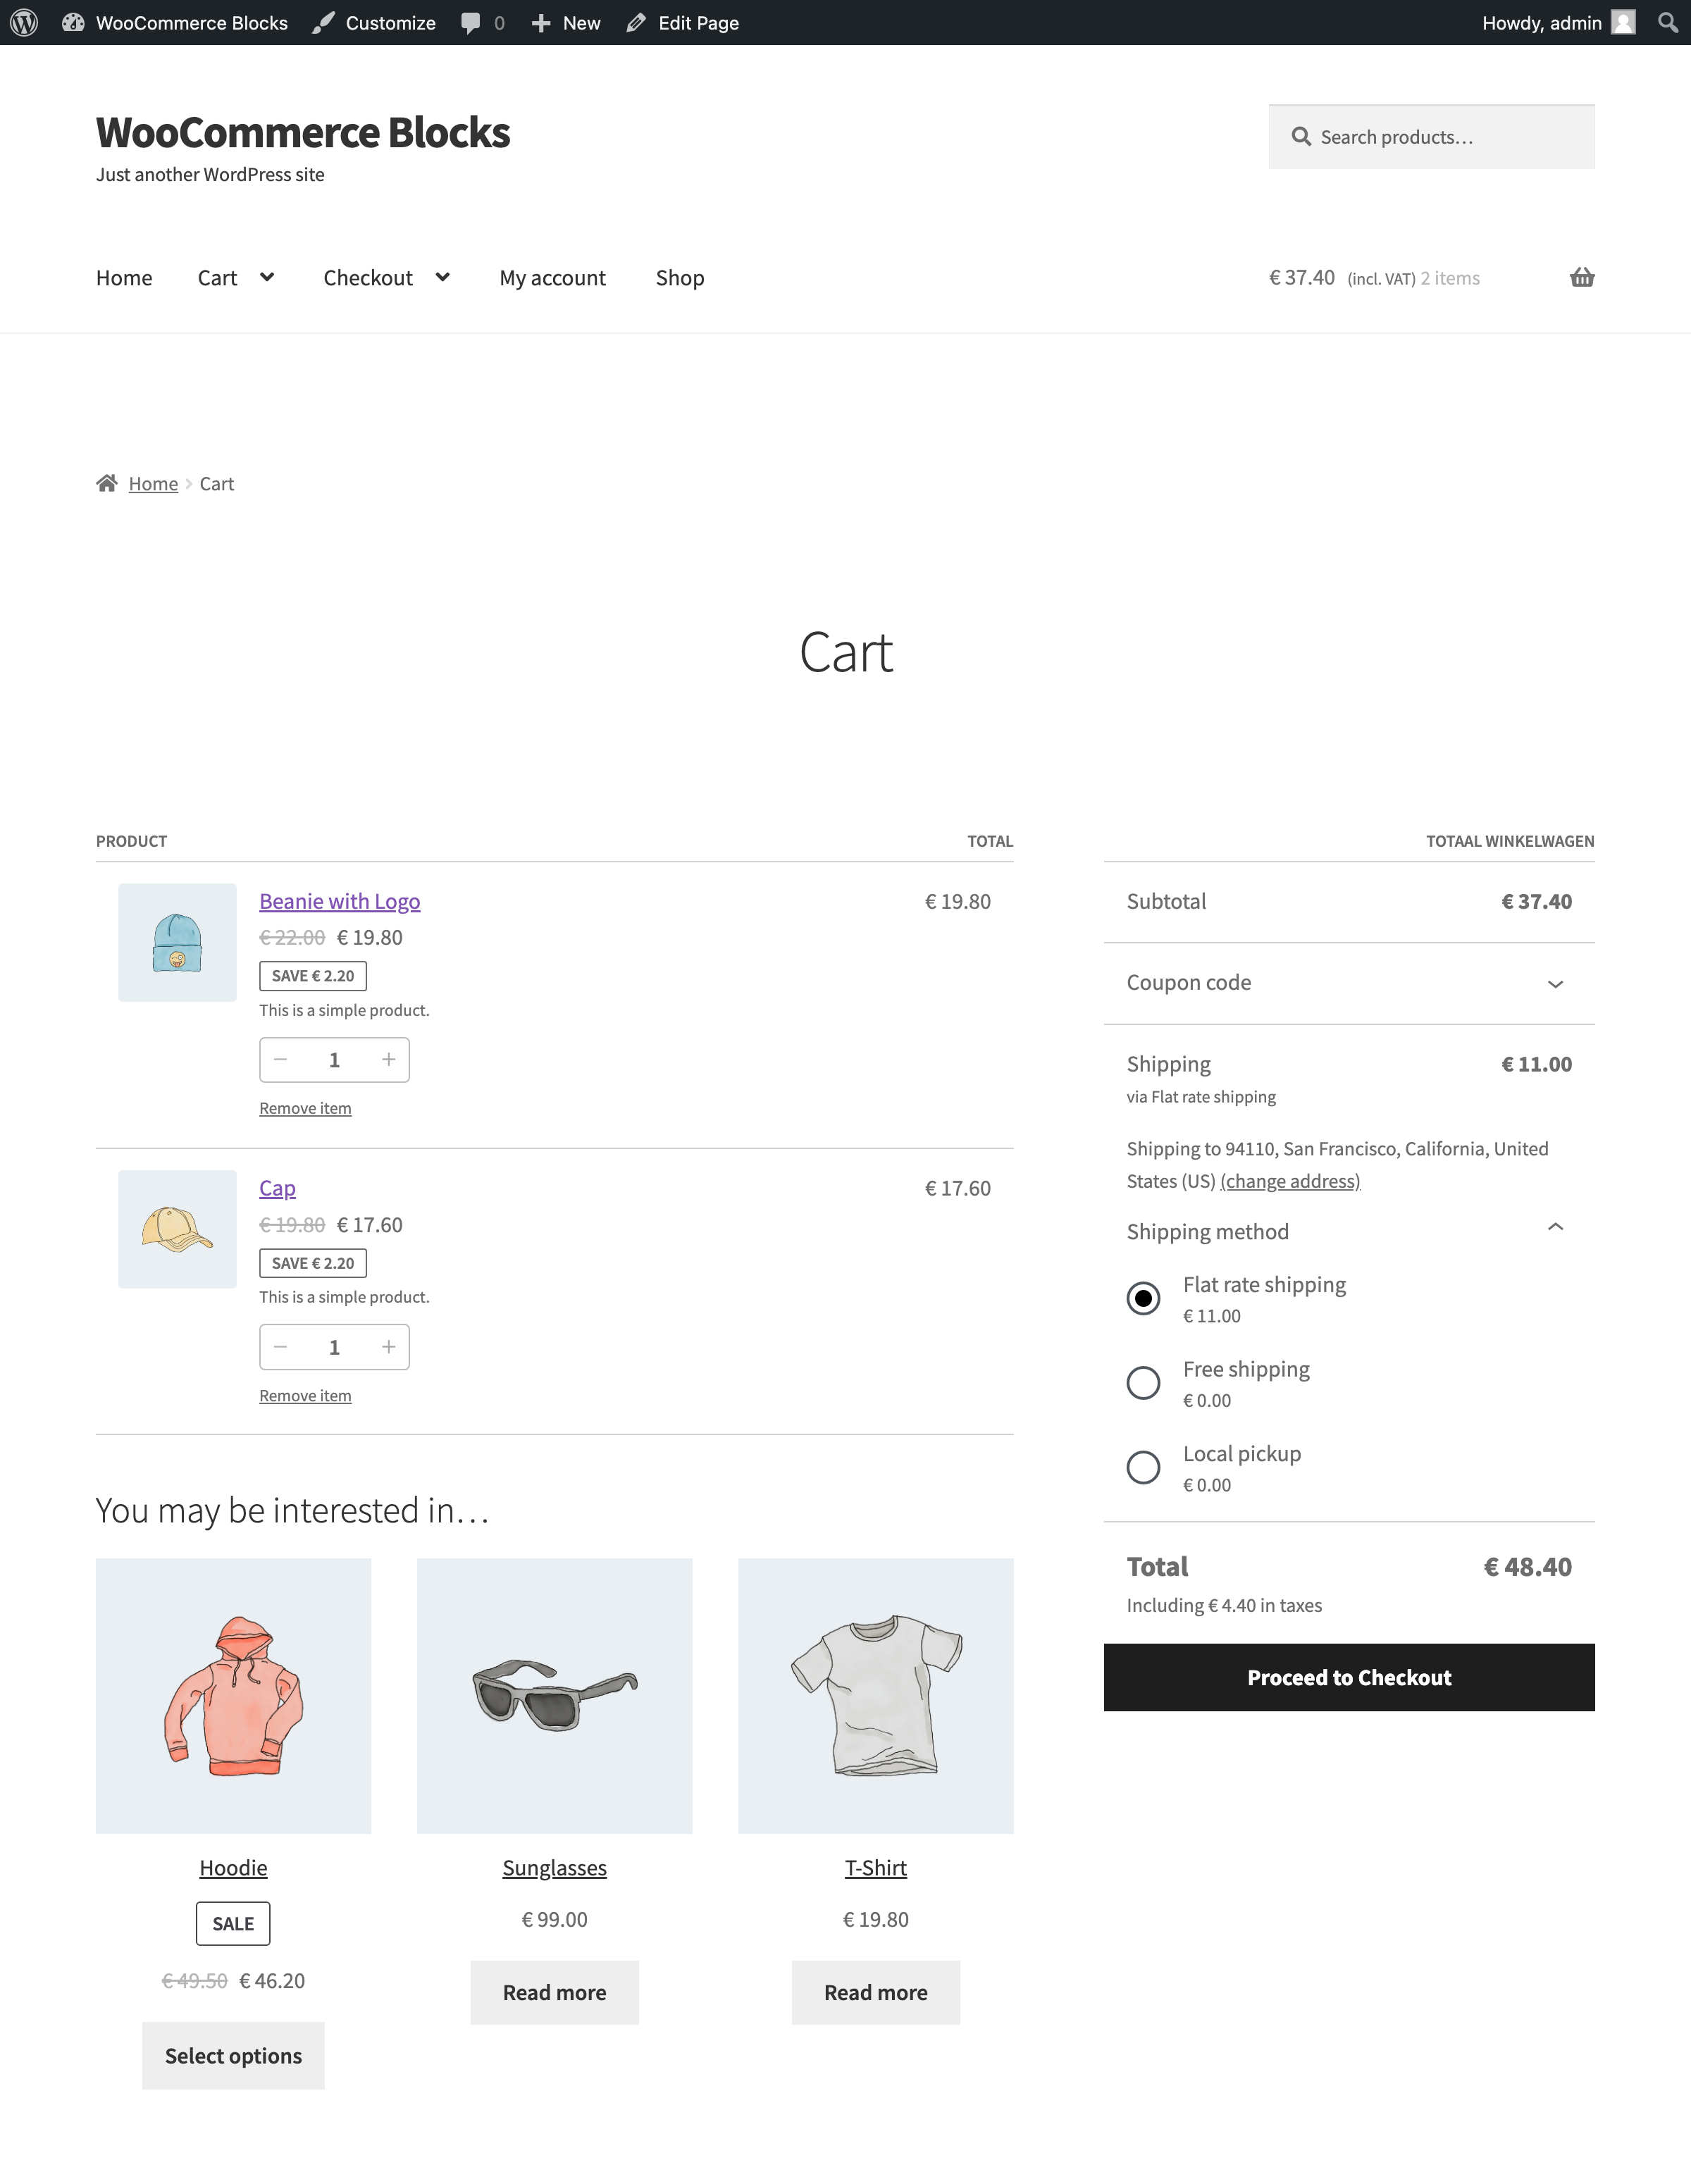
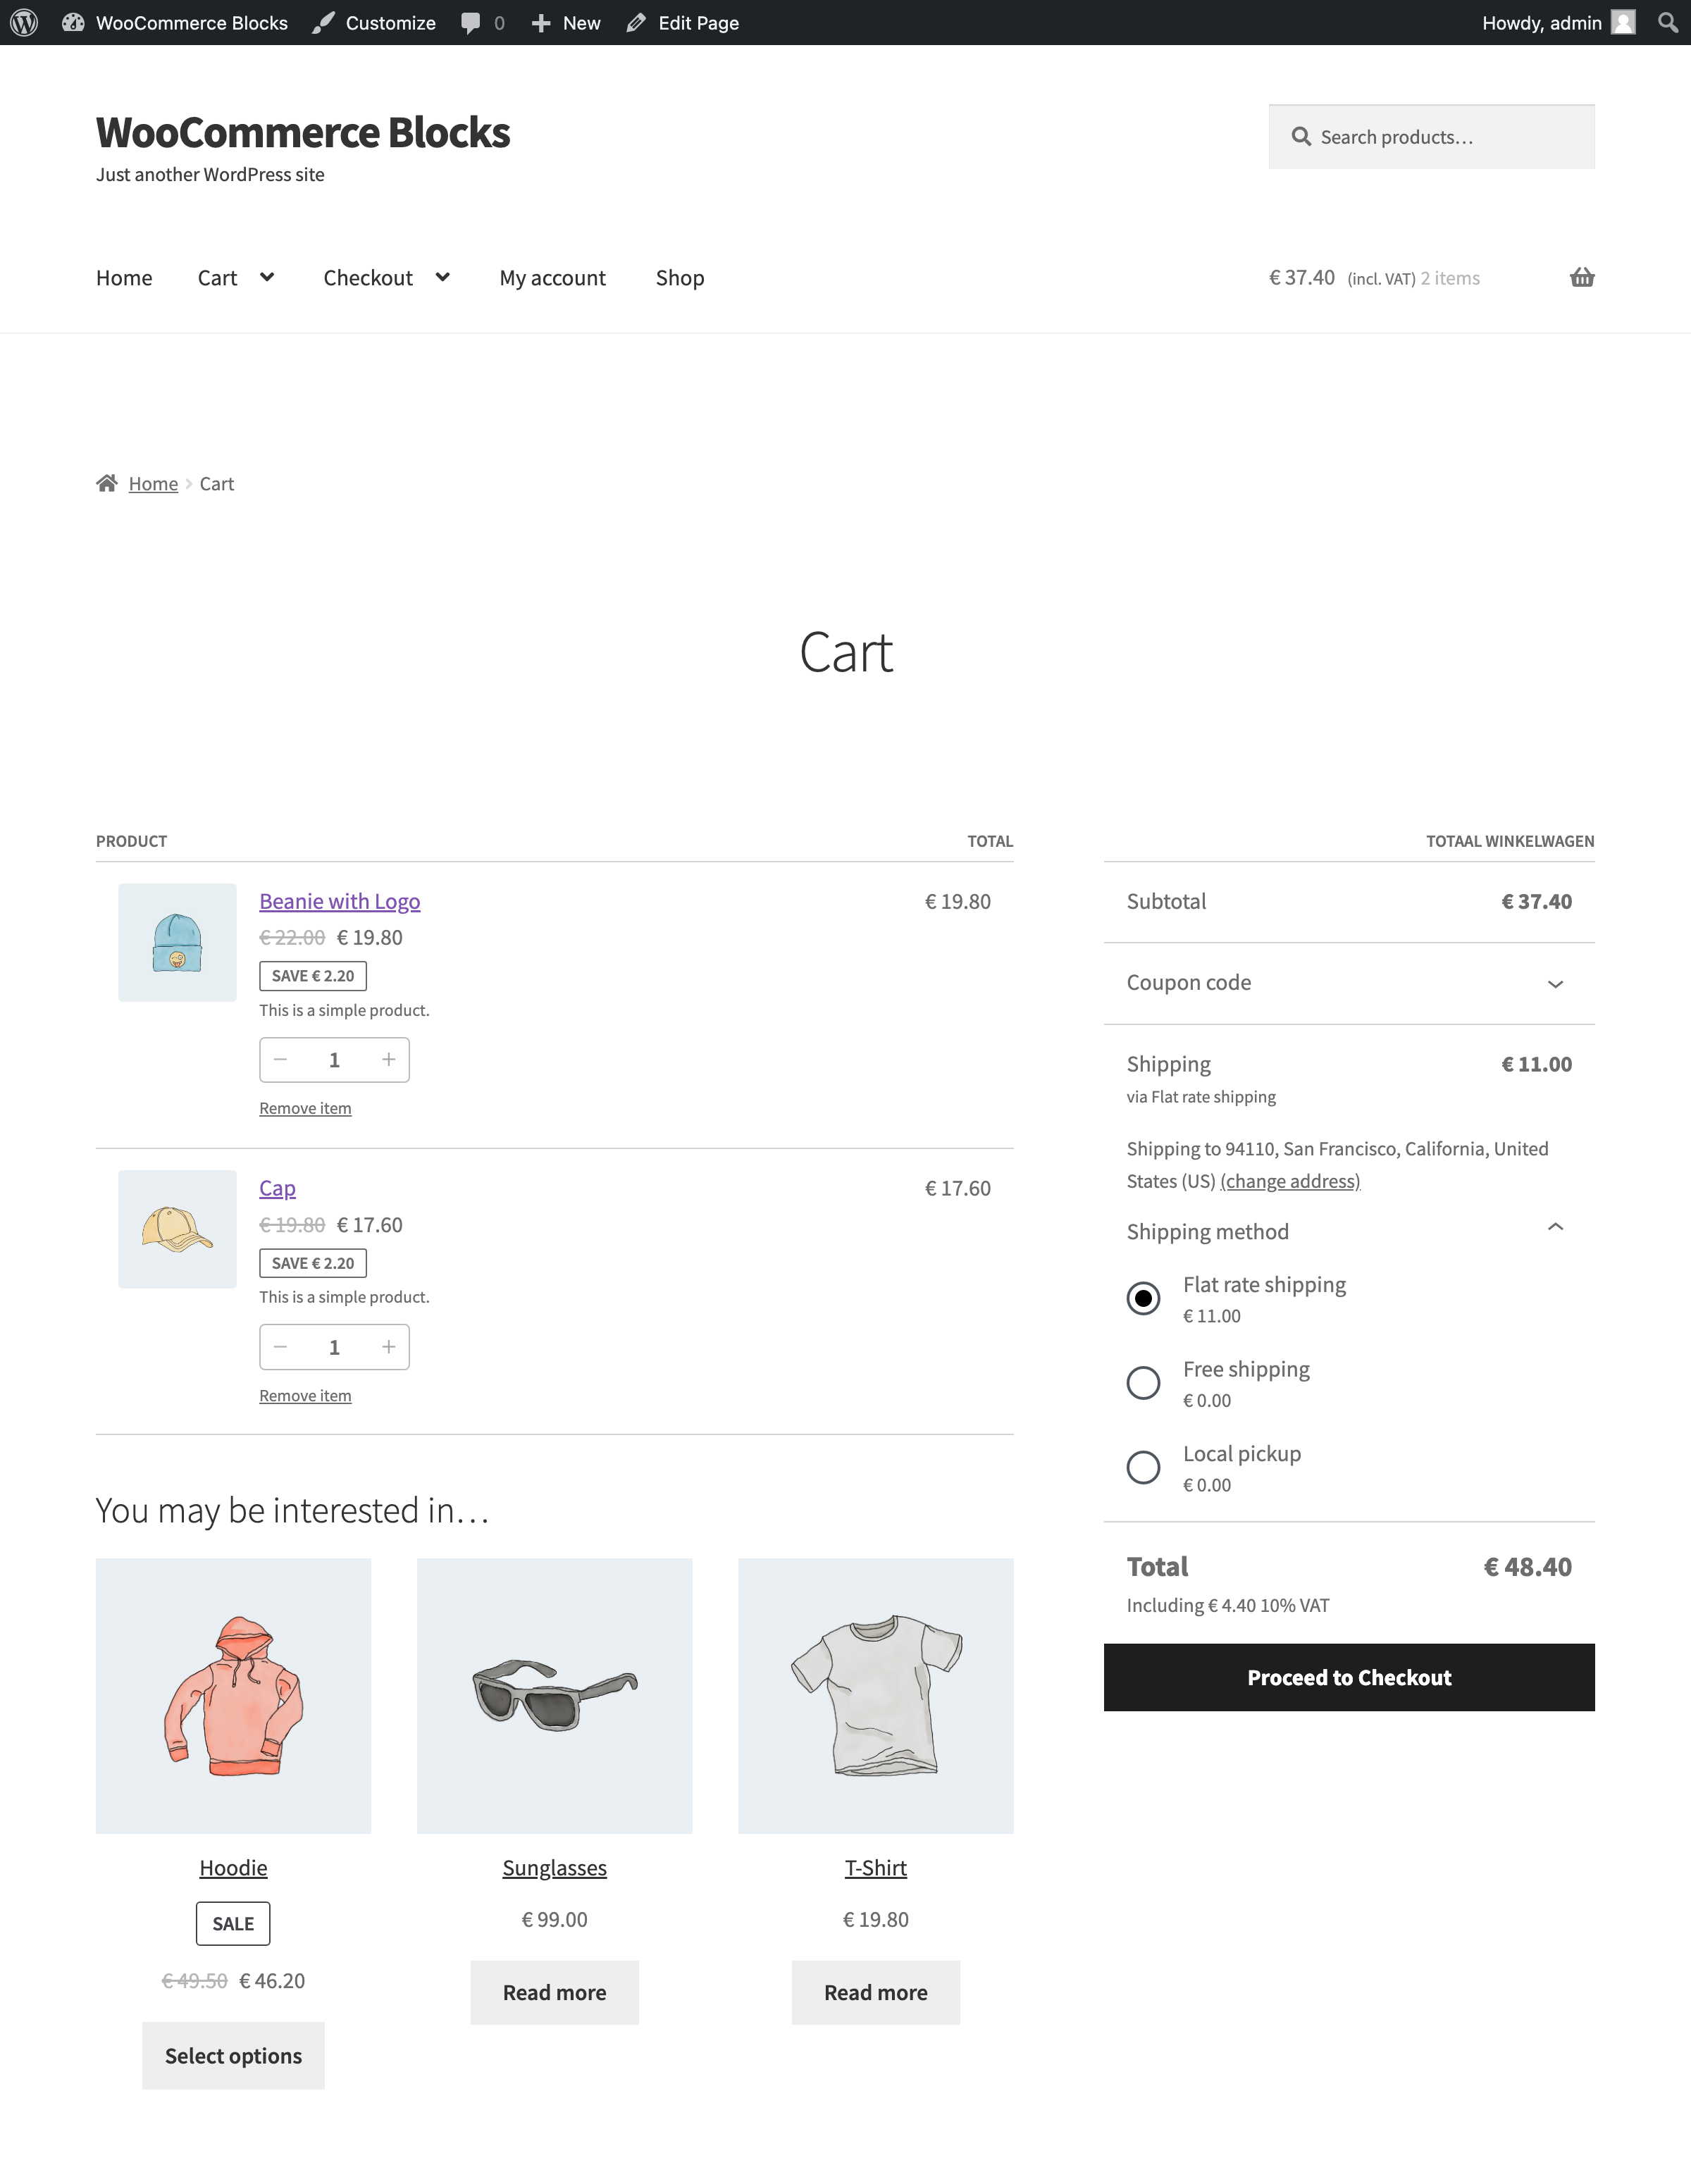
2. Go to the cart and verify that only one tax label is visible in the order summary, e.g. `Including € 4.40 10% VAT`.
|
||
3. Go to the checkout and verify that the same tax label is visible.
|
||
|
||
<table>
|
||
<tr>
|
||
<td>Cart - before:
|
||
<br><br>
|
||
|
||
|
||
</td>
|
||
<td>Cart - after:
|
||
<br><br>
|
||
|
||
|
||
</td>
|
||
</tr>
|
||
<tr>
|
||
<td>Checkout - before:
|
||
<br><br>
|
||
|
||
|
||
</td>
|
||
<td>Checkout - after:
|
||
<br><br>
|
||
|
||
|
||
</td>
|
||
</tr>
|
||
</table>
|
||
|
||
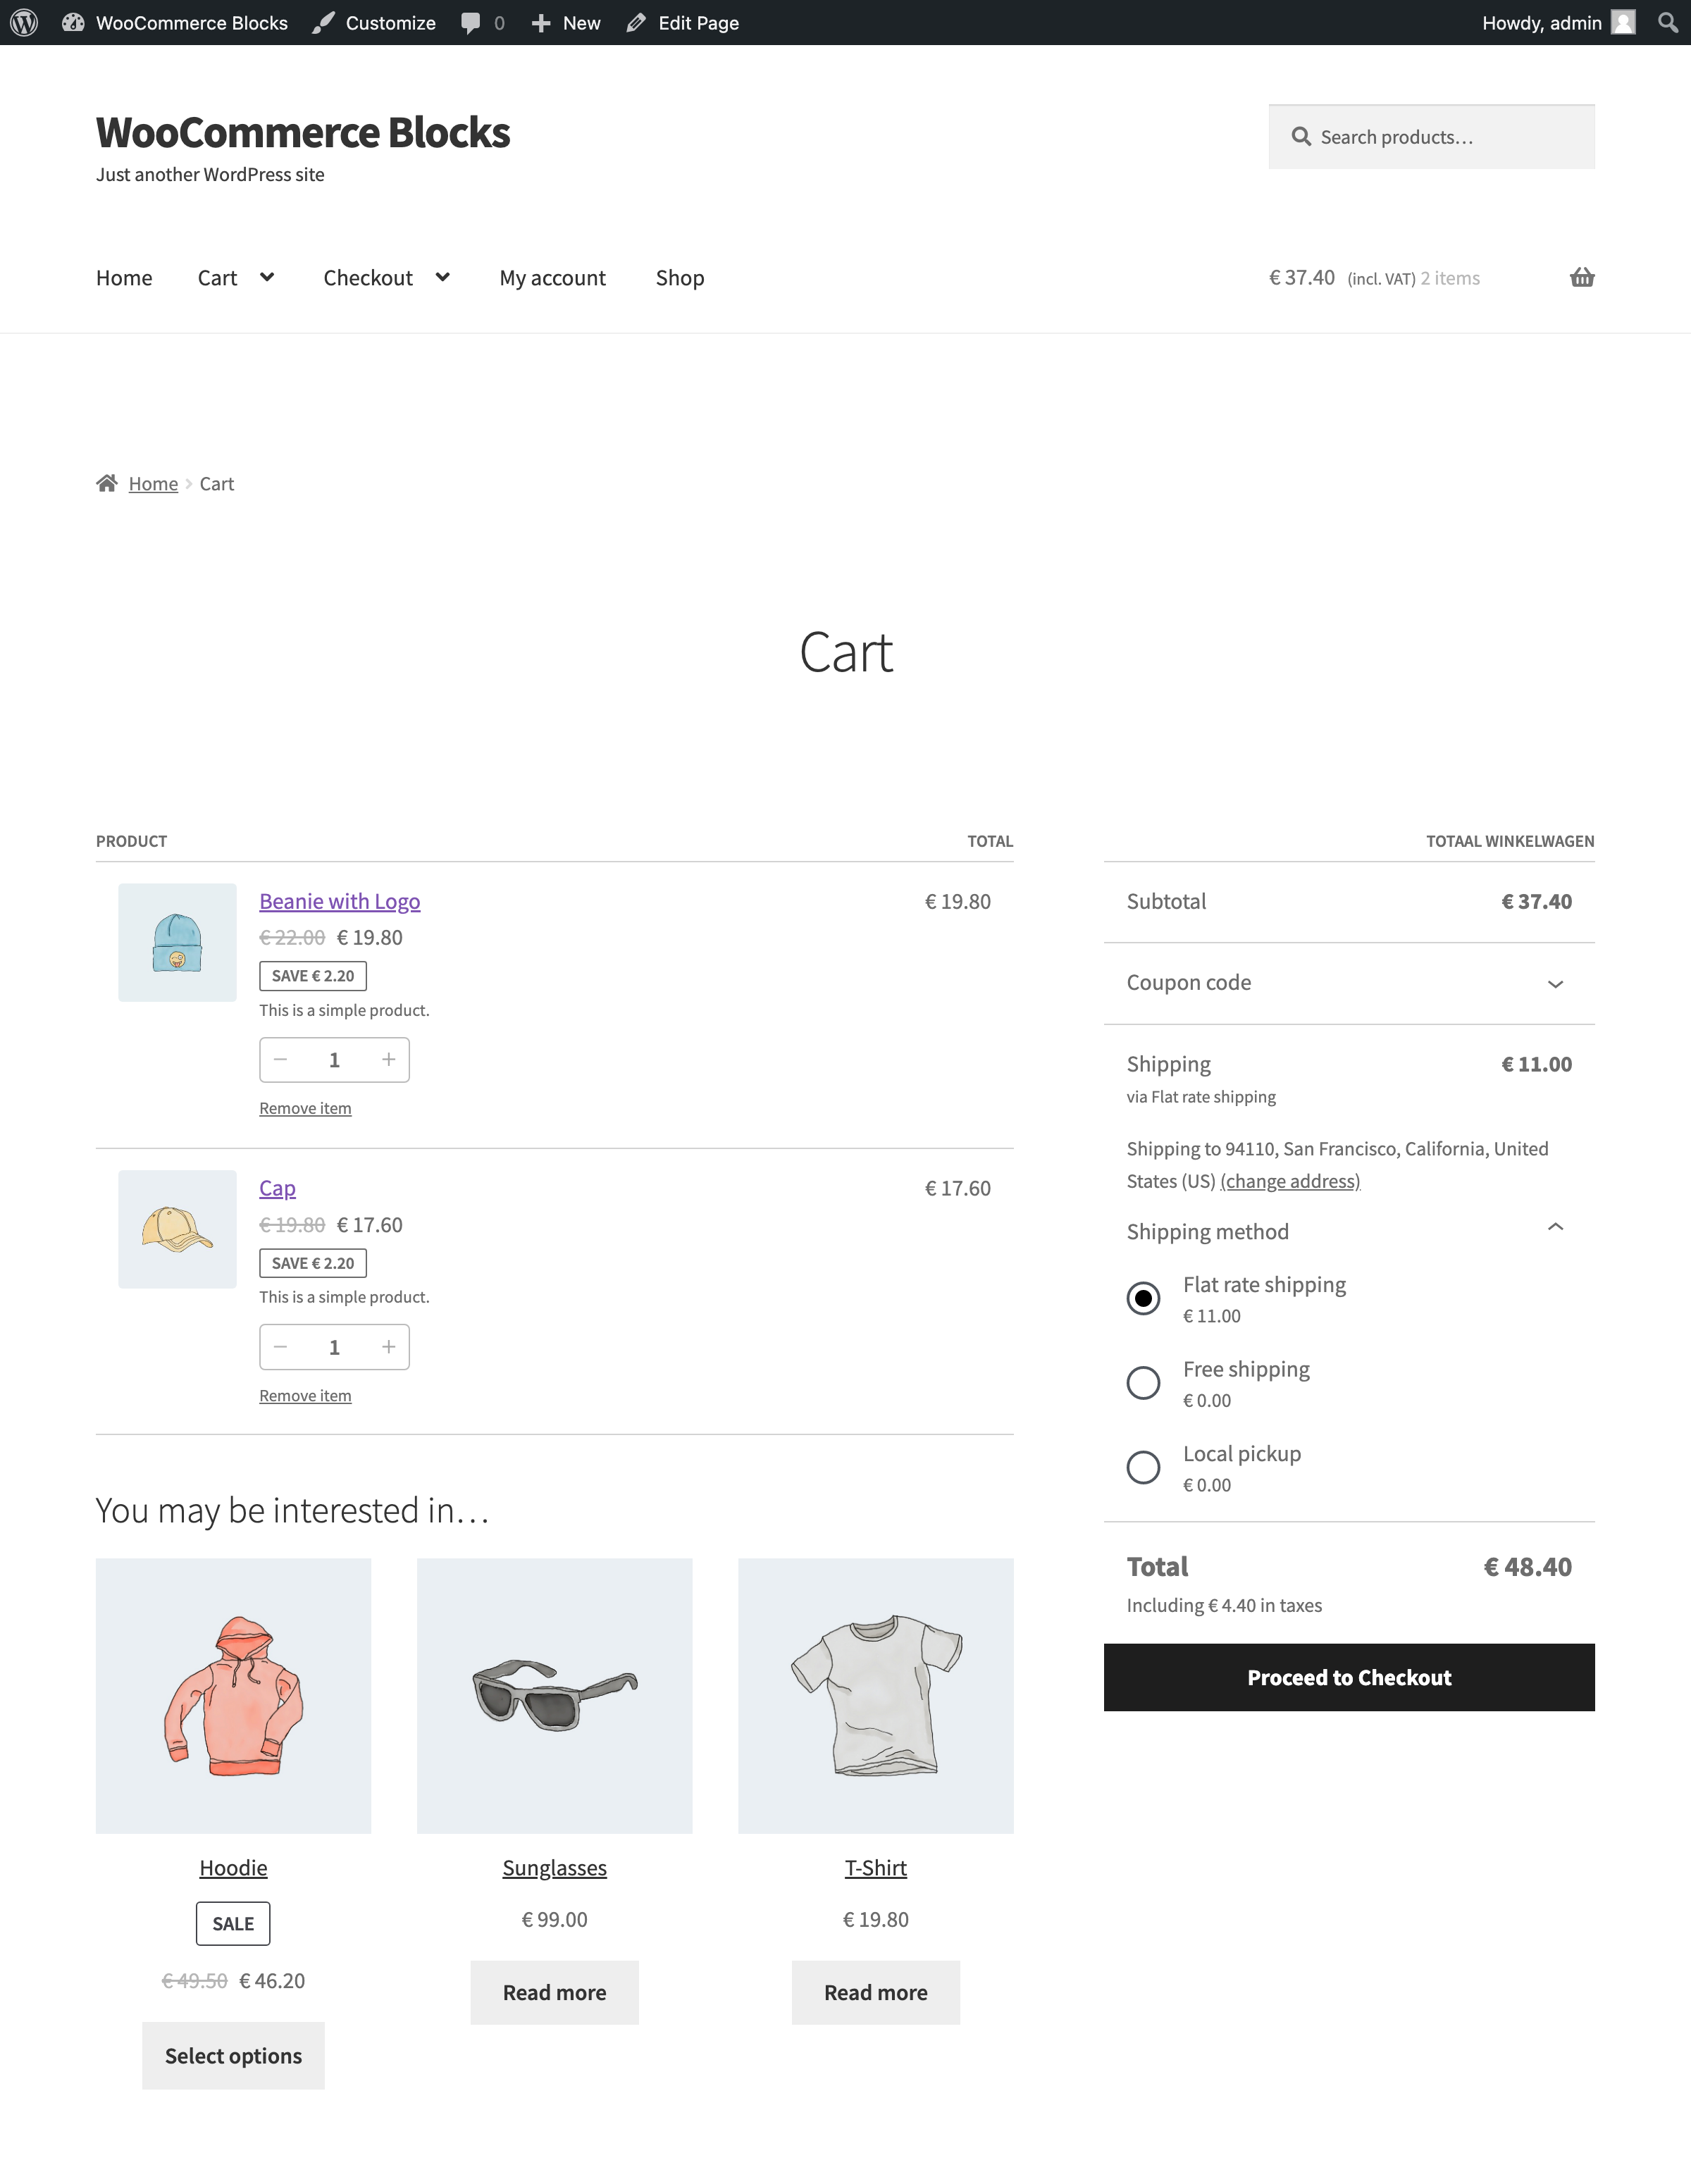
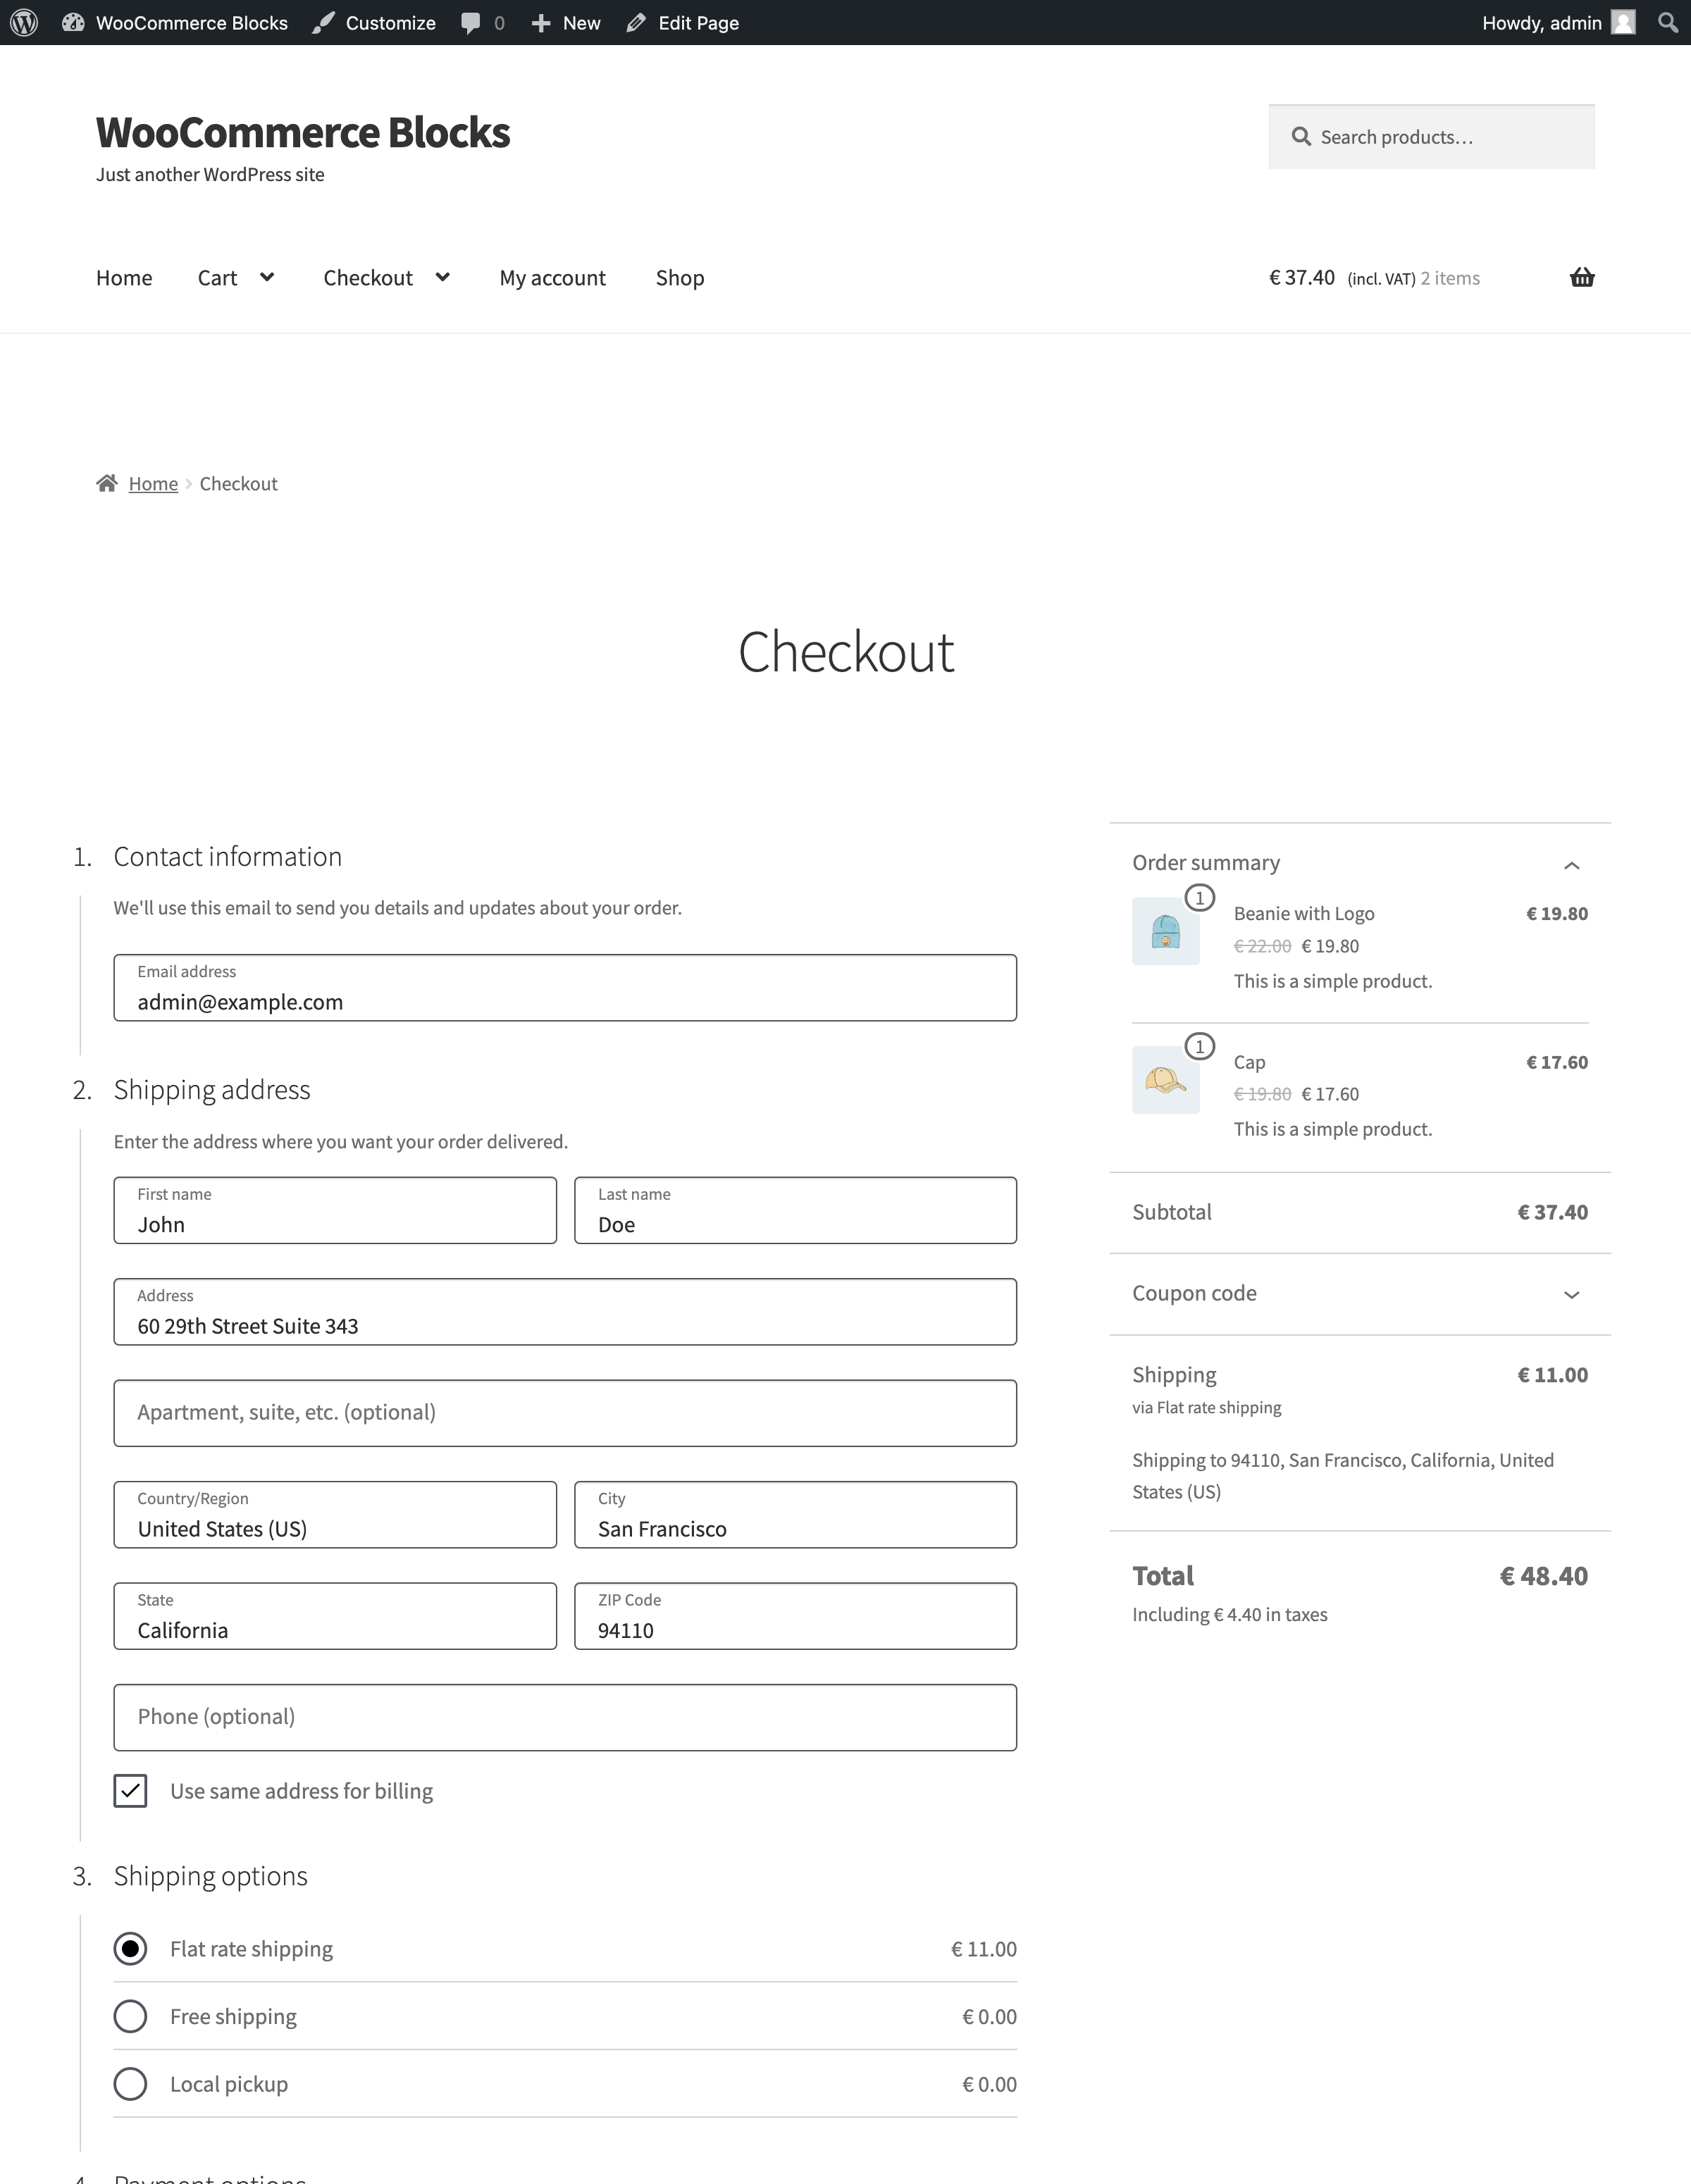
#### Single total
|
||
|
||
ℹ I added this test case to check the backwards compatibility.
|
||
|
||
1. Go to `wp-admin/admin.php?page=wc-settings&tab=tax`.
|
||
2. Ensure that `Display tax totals` is set to `As a single total`.
|
||
3. Go to the cart and verify that the generic tax label is visible in the order summary, e.g. `Including € 4.40 in taxes`.
|
||
4. Go to the checkout and verify that the same tax information is visible.
|
||
|
||
<table>
|
||
<tr>
|
||
<td valign="top">Cart - before and after:
|
||
<br><br>
|
||
|
||
|
||
</td>
|
||
<td valign="top">Checkout - before and after:
|
||
<br><br>
|
||
|
||
|
||
</td>
|
||
</tr>
|
||
</table>
|
||
|
||
### Make Footer and Header patterns available in pattern chooser. ([7699](https://github.com/woocommerce/woocommerce-blocks/pull/7699))
|
||
|
||
#### Header patterns
|
||
|
||
1. Go to Site Editor. You can choose any template.
|
||
2. Choose Header Block
|
||
3. Use "Replace" option:
|
||
<img width="520" alt="Screen Shot 2022-11-17 at 10 17 31 AM" src="https://user-images.githubusercontent.com/20098064/202406218-f6a91109-c964-4da7-b60f-3d2c3ae76d44.png">
|
||
4. Type "woocommerce" in a search bar
|
||
**Expected**: There's 6 WooCommerce patterns available
|
||
5. Choose one of them
|
||
**Expected**: Pattern is applied correctly
|
||
|
||
#### Footer patterns
|
||
|
||
Repeat the above steps, but for Footer Block
|
||
|
||
### Fix: Product (Beta) editor preview with Stock Status setting. ([7682](https://github.com/woocommerce/woocommerce-blocks/pull/7682))
|
||
|
||
1. Add the Product (Beta) block to a new page.
|
||
2. Change the stock status setting.
|
||
3. See the editor preview updates on changing the stock status setting.
|
||
4. Add the Sale status filter, see the editor preview updates on changing on sale setting as well.
|
||
5. See if the block still shows the correct products on the front end as before.
|
||
|
||
### Clean up unused CSS code. ([7751](https://github.com/woocommerce/woocommerce-blocks/pull/7751))
|
||
|
||
1. Add all WC Blocks to a post or page (you can use this gist and paste it with Ctrl + V).
|
||
2. Verify there are no visual regressions in the editor. Publish the page and verify there are no visual regressions in the frontend.
|
||
3. In the editor, add one of the blocks that display the SearchListControl component (ie: Filter by Attribute) and verify it's displayed correctly:
|
||
|