13 KiB
13 KiB
Testing notes and ZIP for release 9.1.0
Zip file for testing: woocommerce-gutenberg-products-block.zip
Feature plugin and package inclusion in WooCommerce
Add "Store Info Alternating Image and Text" commerce adjacent pattern (7827)
- Create a new page and edit it.
- Browse to the WooCommerce category for Block patterns and look for the "WooCommerce Alternating Image and Text" pattern in the "Explore All Patterns" dialog. Click to insert.
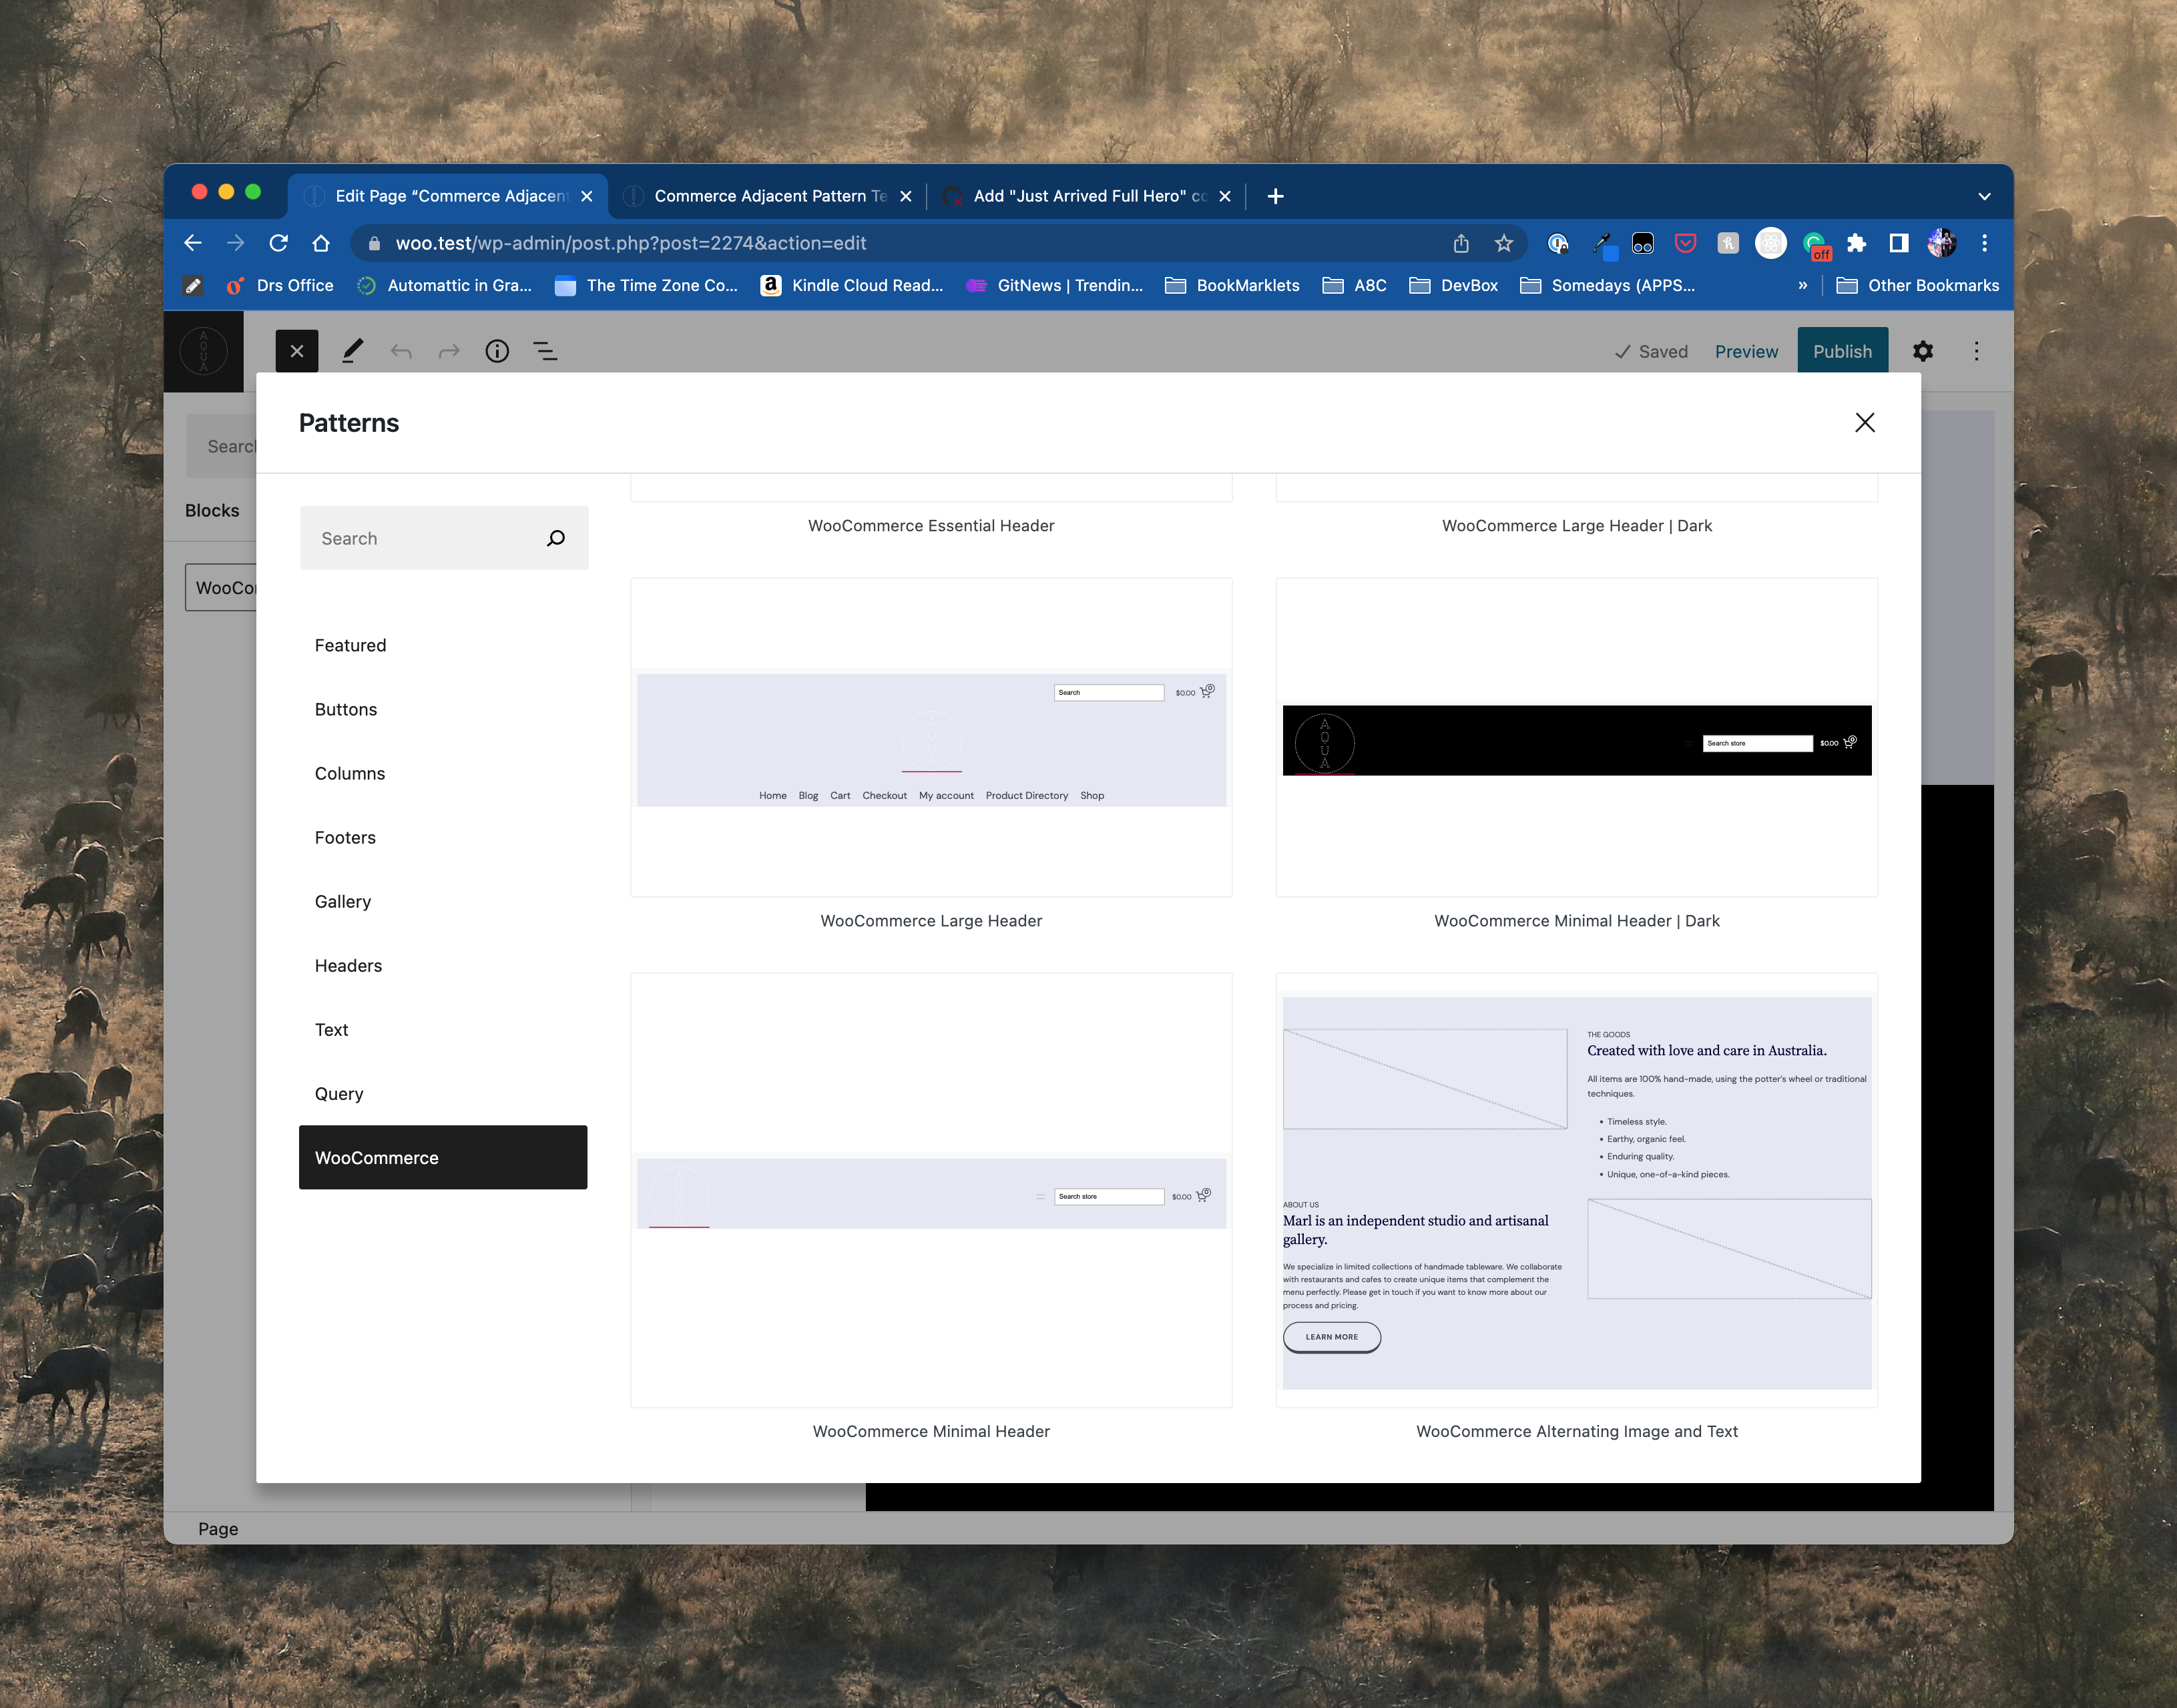
- Verify the pattern inserted on the page. It may look different depending on the theme being used with testing.
Add to Cart Button: Add support for the alignment setting. (7816)
- Add the Product (Beta) block to a page.
- Add the Add to Cart Button block.
- Make sure that you can set the alignment to left, center and right.
- Make sure all options work both in the editor and on the page.
Products block: Make the block available to the users of the feature plugin. (7815)
- Open the inserter in the editor.
- Make sure the block appears as “Products (Beta)“ instead of “Product Query” and has a “Stacks” icon instead of “Sparkles” icon. Icon should still be purple.
- Add the block and select it.
- Make sure the description says: “A block that displays a selection of products in your store.”
- Make sure there is a Feedback prompt at the bottom of the inspector with a link going here.
- Make sure the default inner blocks are as follows:
- Product Image
- Post Title
- Product Price
- Add to Cart Button
Add "Product Hero 2 Column 2 Row" commerce adjacent pattern. (7814)
- Create a new page and edit it.
- Browse to the WooCommerce category for Block patterns and look for the "WooCommerce Product Hero 2 Column 2 Row" pattern in the "Explore All Patterns" dialog. Click to insert.
- Verify the pattern inserted on the page. It may look different depending on the theme being used with testing.
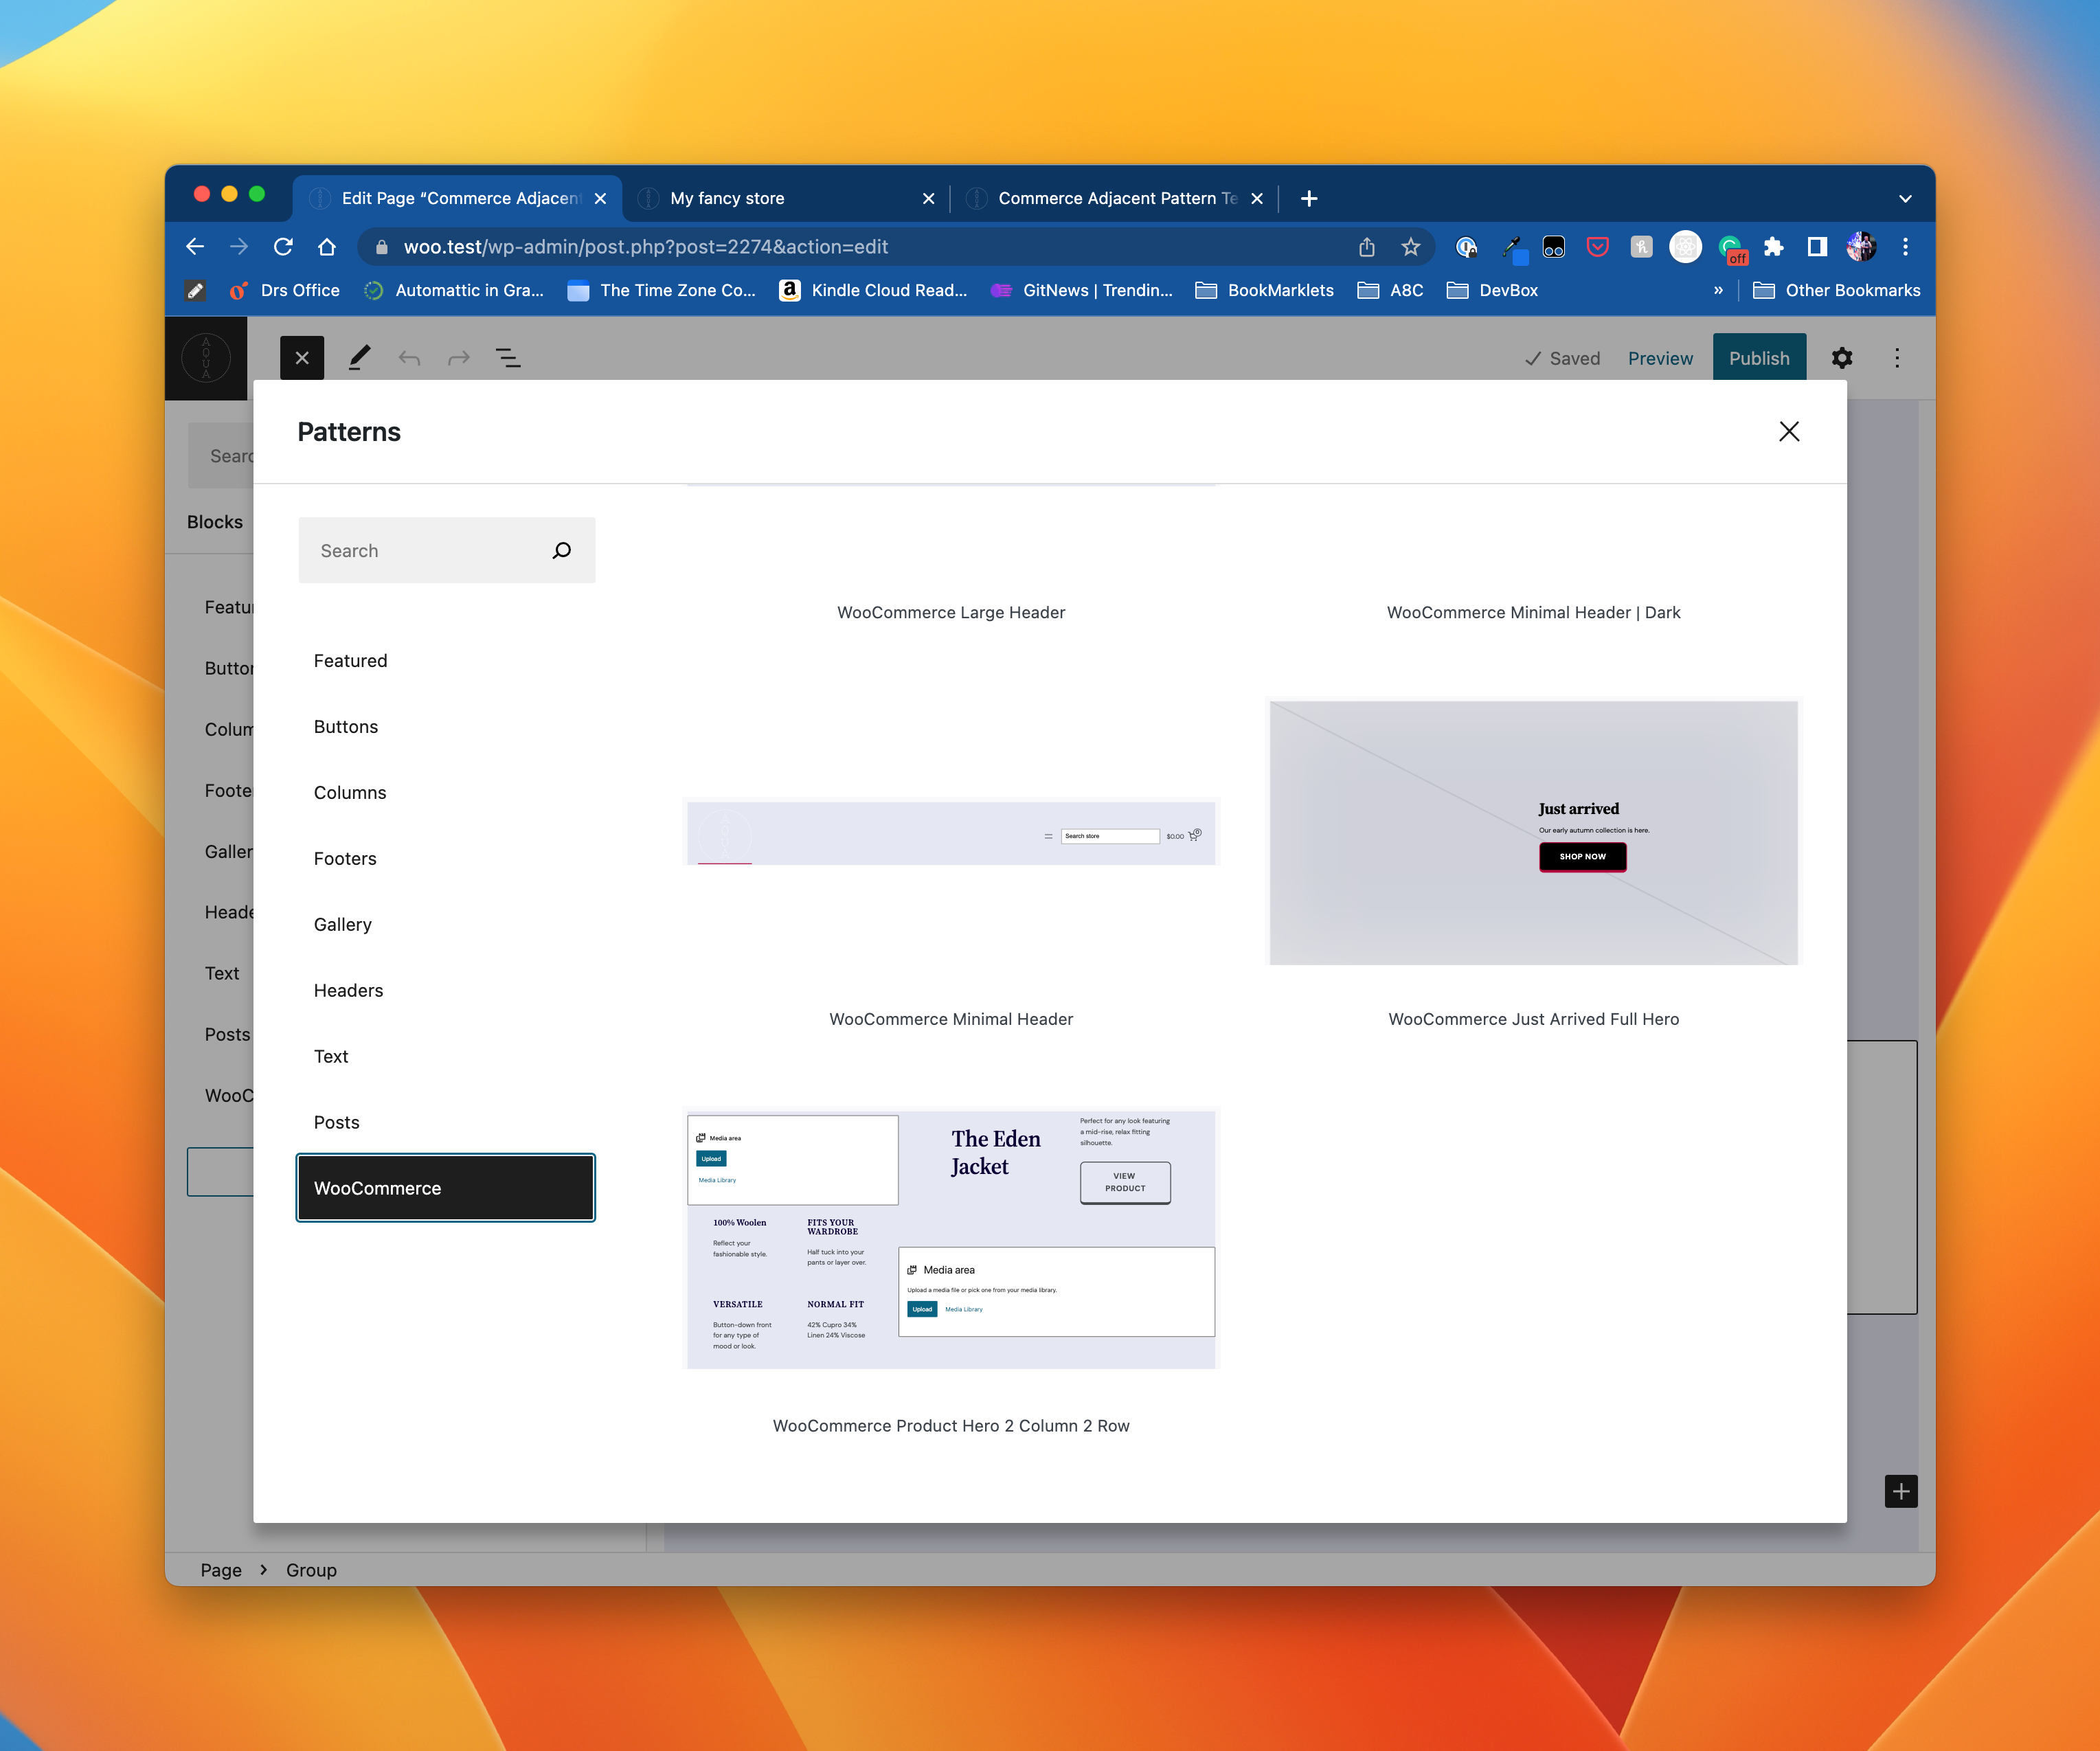
Add "Just Arrived Full Hero" commerce adjacent pattern. (7812)
- Create a new page and edit it.
- Browse to the WooCommerce category for Block patterns and look for the WooCommerce Just Arrived Full Hero pattern in the "Explore All Patterns" dialog. Click to insert.

- Verify the pattern inserted on the page. It may look different depending on the theme
Product Rating: Add support for the alignment setting. (7790)
- Add the Products (Beta) block to a page.
- Add the Product Rating block.
- Make sure that you can set the alignment to left, center and right.
- Make sure all options work both in the editor and on the page.
Rename Active Product Filters block to Active Filters. (7753)
- Create a post or page and open the block inserter.
- Search for active.
- Verify there is a block named Active Filters (and there isn't one named Active Product Filters).
Product Query: Add support for filtering by attributes within the block. (7743)
- Go to the editor and add a “Product (Beta) block.
- Ensure a new “Product Attributes” input is accessible via the “Advanced Filters” panel in the inspector controls.
- Ensure that the input autocompletes with all the available terms for your store in the format
${Taxonomy}: ${Term}. - Ensure that when selecting the attributes, the products filter in the editor.
- Ensure that when you remove an attribute, the editor preview also gets updated.
- Save the post.
- Ensure that the block displays correctly in the front-end.
Align the font-sizes in filters. (7707)
- Enter Site Editor
- Insert WooCommerce Product Filters pattern
- Check the font-sizes in both, Editor and the Frontend, of the following elements in following combinations
- Active filters: list and chips
- Active filters: "Clear All" button
- Filter by Price: editable and text
- Filter by Attribute: list and dropdown (check placeholder, dropdown options and chips)
- Filter by Rating
- Filter by Stock
- For each of the above enable "Apply" button - check it too
- On the frontend:
- Check "Apply" button
- Provide any change to filters without applying - check "Reset" button
Expected: All of the above have the same font-size:
- Twenty Twenty-Two: 15.75px
- Twenty Twenty-Three: 14 - 15.75px (depends on the screen width, narrower the screen, smaller the font)
Note: headings are not expected to change!
Check at least briefly other blocks of a WooCommerce that could be influenced by the changes (there may be something I might've missed).
Mini Cart block: Load wc-blocks-registry package at the page's load instead of lazy load it. (7813)
- Install Page Optimize and Product Bundles.
- Enable a block theme.
- Customize the block theme and add the Mini Cart block in the header via Site Editor.
- Save the changes.
- In the frontend, lick on the Mini Cart. The drawer should open and show the "empty cart" message.
- Go to the shop page and add a product to your cart.
- Click on the Mini Cart. The drawer should open and show the product you just added.
Hide the shipping address form from Checkout Block in Editor and rename the Billing Address label when "Force shipping to the customer billing address" is enabled. (7800)
- Go to
wp-admin/admin.php?page=wc-settings&tab=shipping§ion=optionspage. - Enable the
Force shipping to the customer billing addressoption and save the changes. - Go to Checkout block Editor, and confirm Shipping Address form is not visible.
- Confirm Billing Address form label is
Billing and shipping addressand the description isEnter the billing and shipping address that matches your payment method. - Go to the Checkout block front-end, and confirm Shipping Address form is not visible.
- Confirm Billing Address form label is
Billing and shipping addressand the description isEnter the billing and shipping address that matches your payment method. - Change the billing address, confirm the shipping address in the order summary gets changed, and shipping methods are updated.
- Disable the
Force shipping to the customer billing addressoption and save the changes. - Confirm Shipping Address form is visible in both the frontend and Editor.
- Please test around this issue with multiple use cases.
Product Price: Fix the alignment setting. (7795)
- Add the Product (Beta) block to a page.
- Add the Product Price block.
- Make sure that you can set the alignment to left, center and right.
- Make sure all options work both in the editor and on the page.
Fix: Show tax label in Cart and Checkout block. (7785)
Multiple tax names / Itemized
- Go to
wp-admin/admin.php?page=wc-settings&tab=tax. - Ensure the additional tax class
Reducedexists. - Ensure that
Display prices during cart and checkoutis set toIncluding tax. - Ensure that
Display tax totalsis set toItemized. - Go to
wp-admin/admin.php?page=wc-settings&tab=tax§ion=standardand add the following tax rate:Rate %:10.000Tax name:10% Vat
- Go to
wp-admin/admin.php?page=wc-settings&tab=tax§ion=reducedand add the following tax rate:Rate %:5.000Tax name:5% Vat
- Create two test products and assign the test products to the tax classes
StandardandReduced. - Add the test products to the cart.
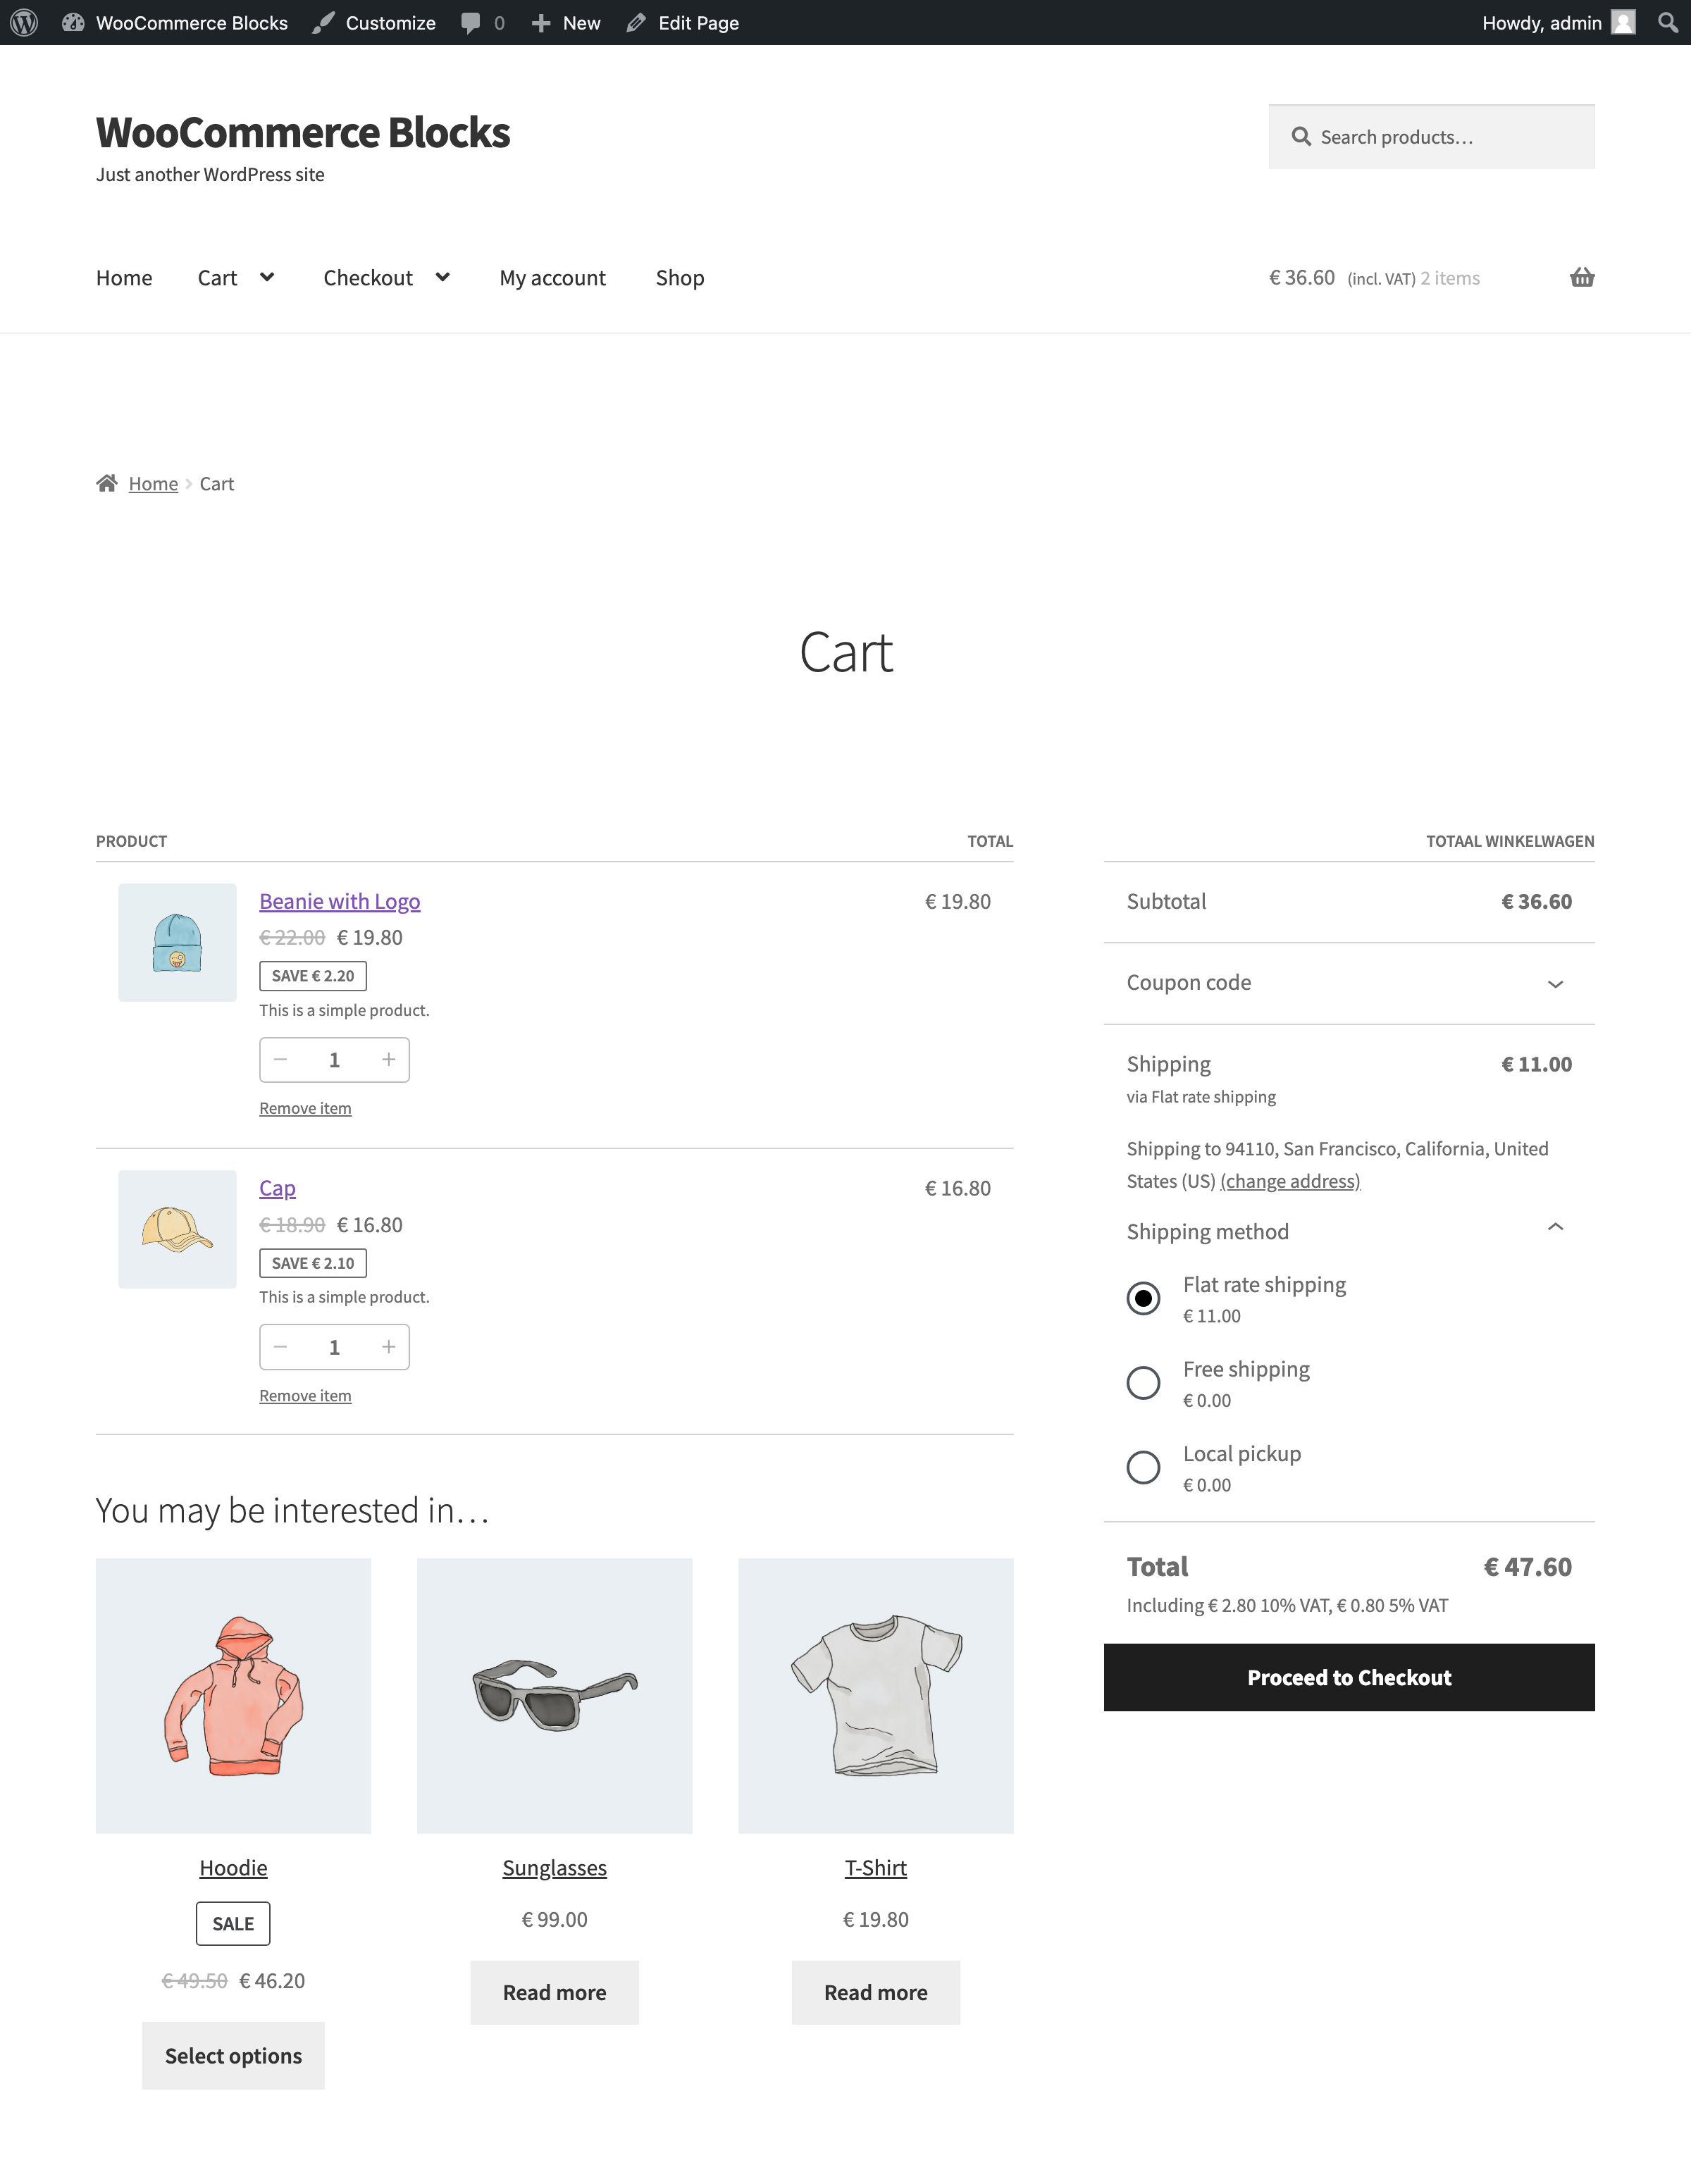
- Go to the cart and verify that the tax labels are visible in the order summary, e.g.
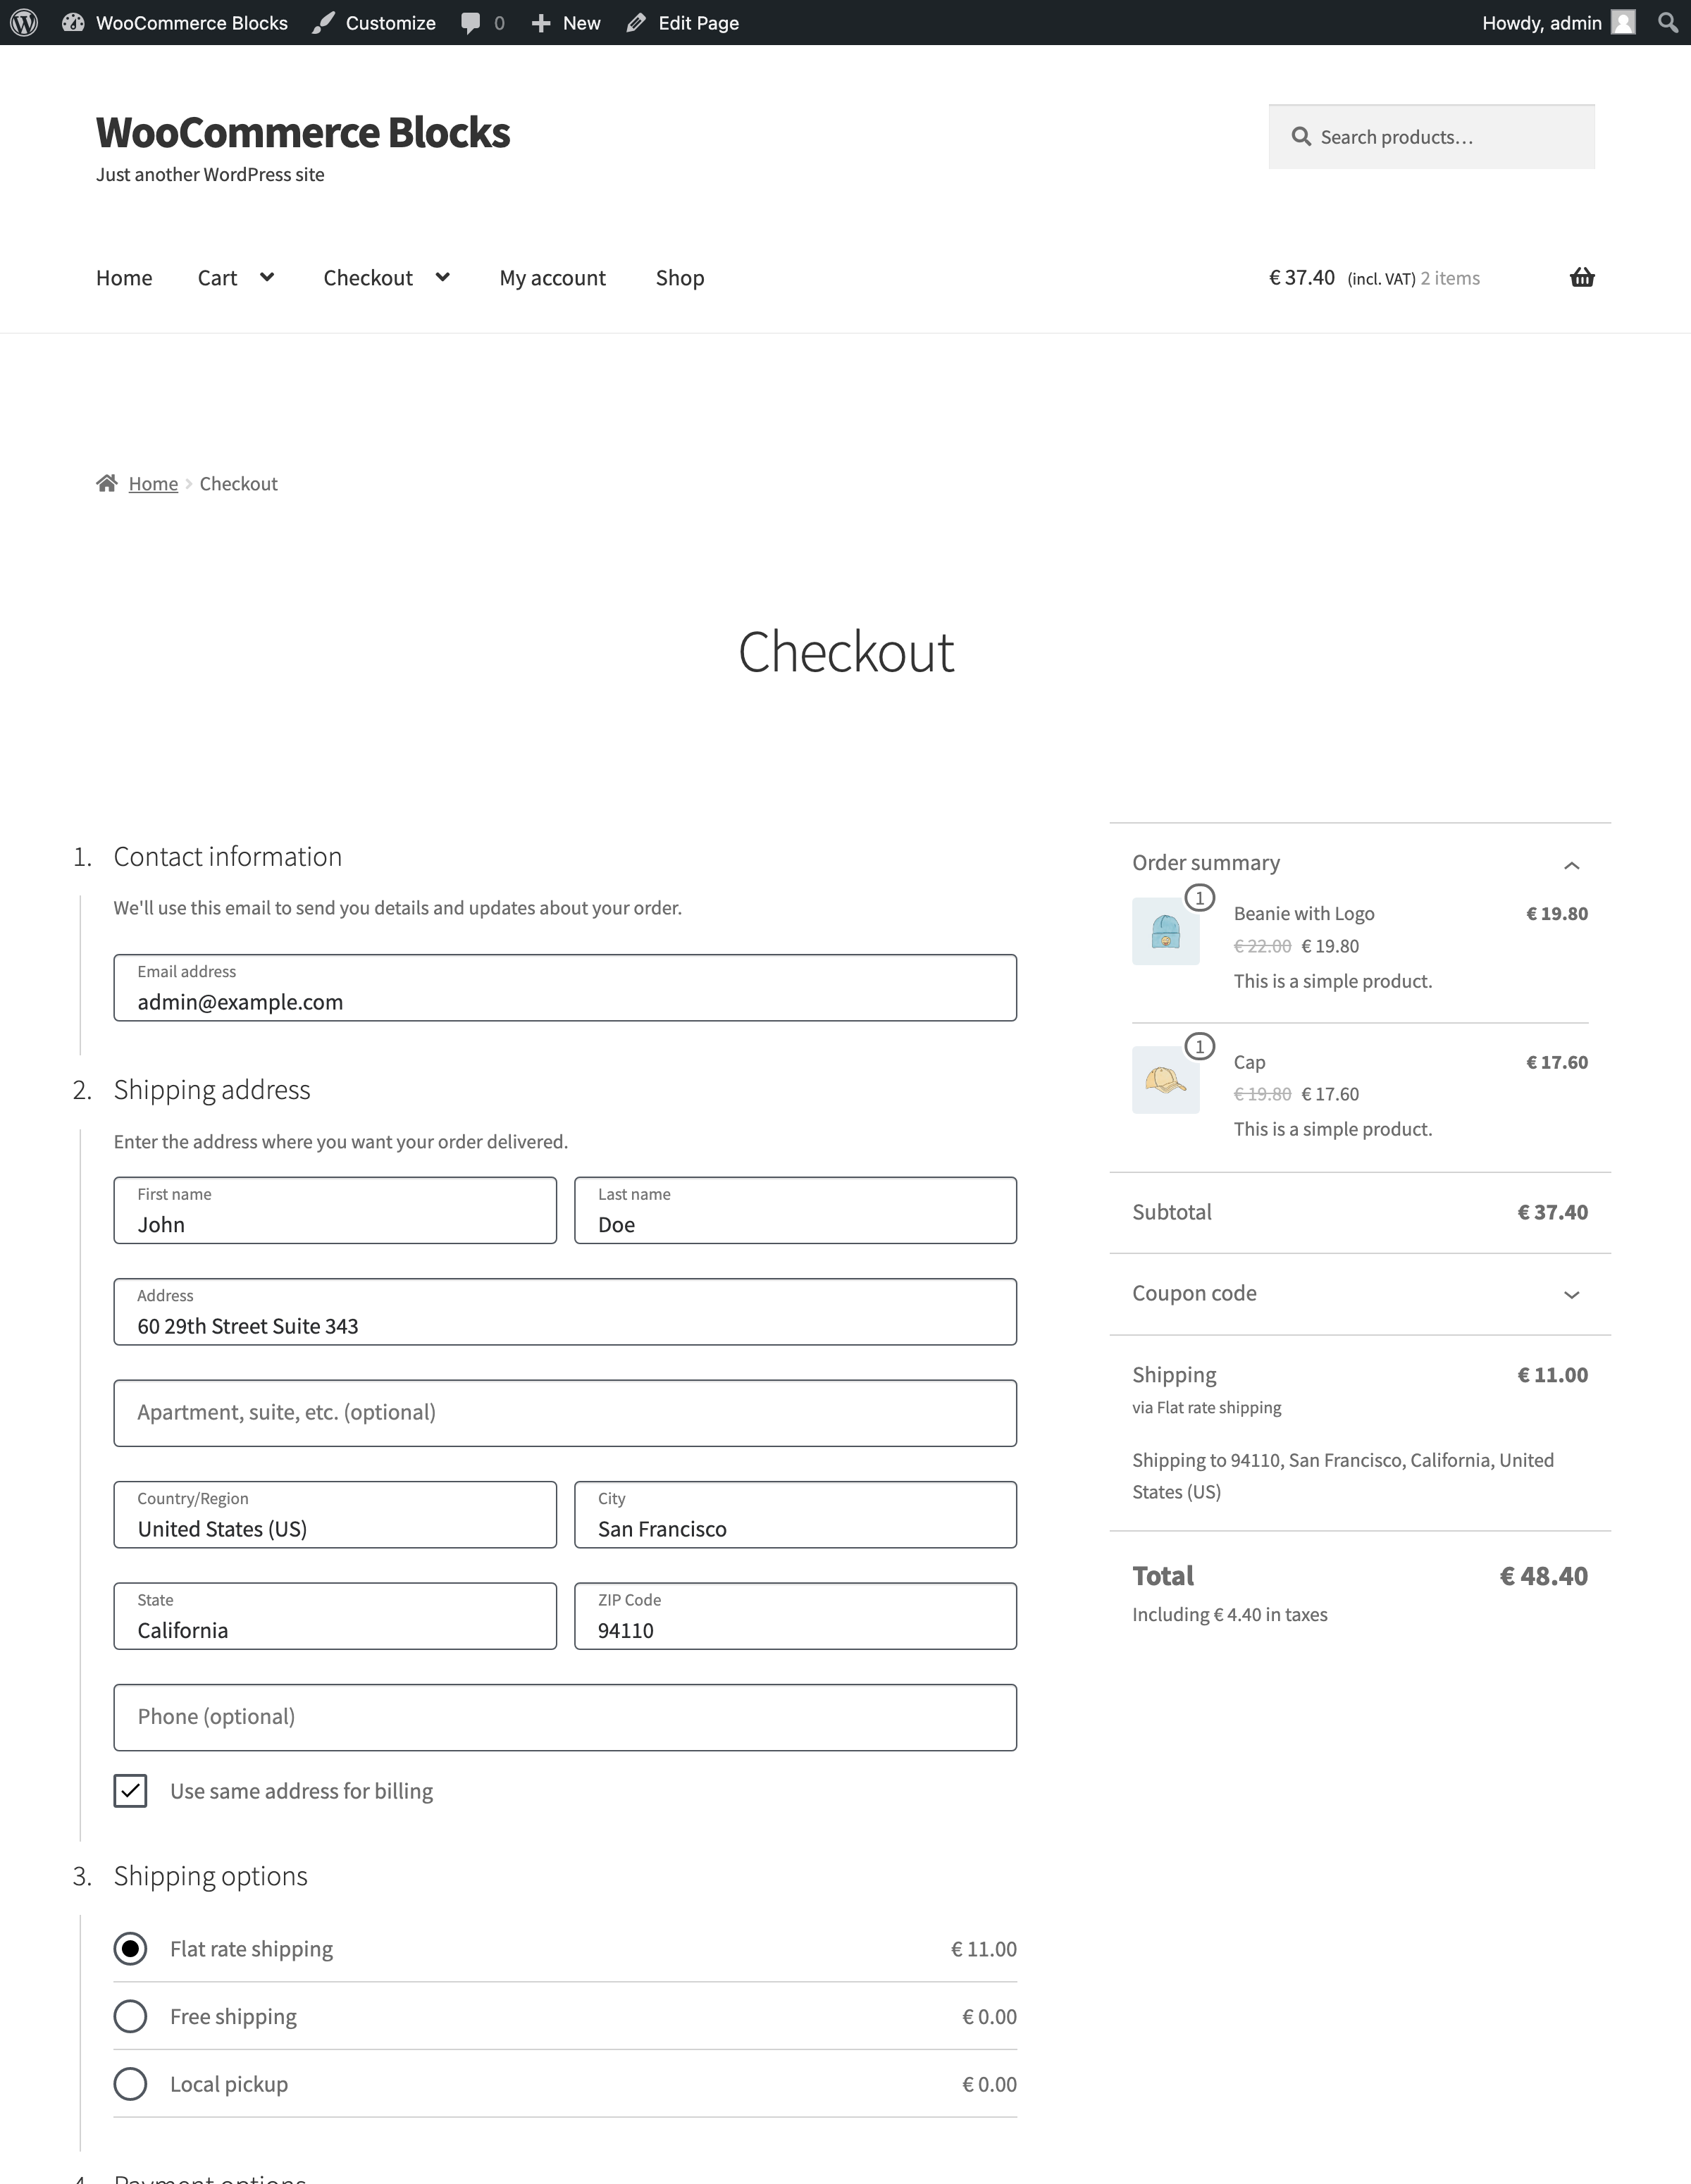
Including € 2.80 10% VAT, € 0.80 5% VAT. - Go to the checkout and verify that the same tax labels are visible.
| Cart - before:
|
Cart - after:
|
| Checkout - before:
|
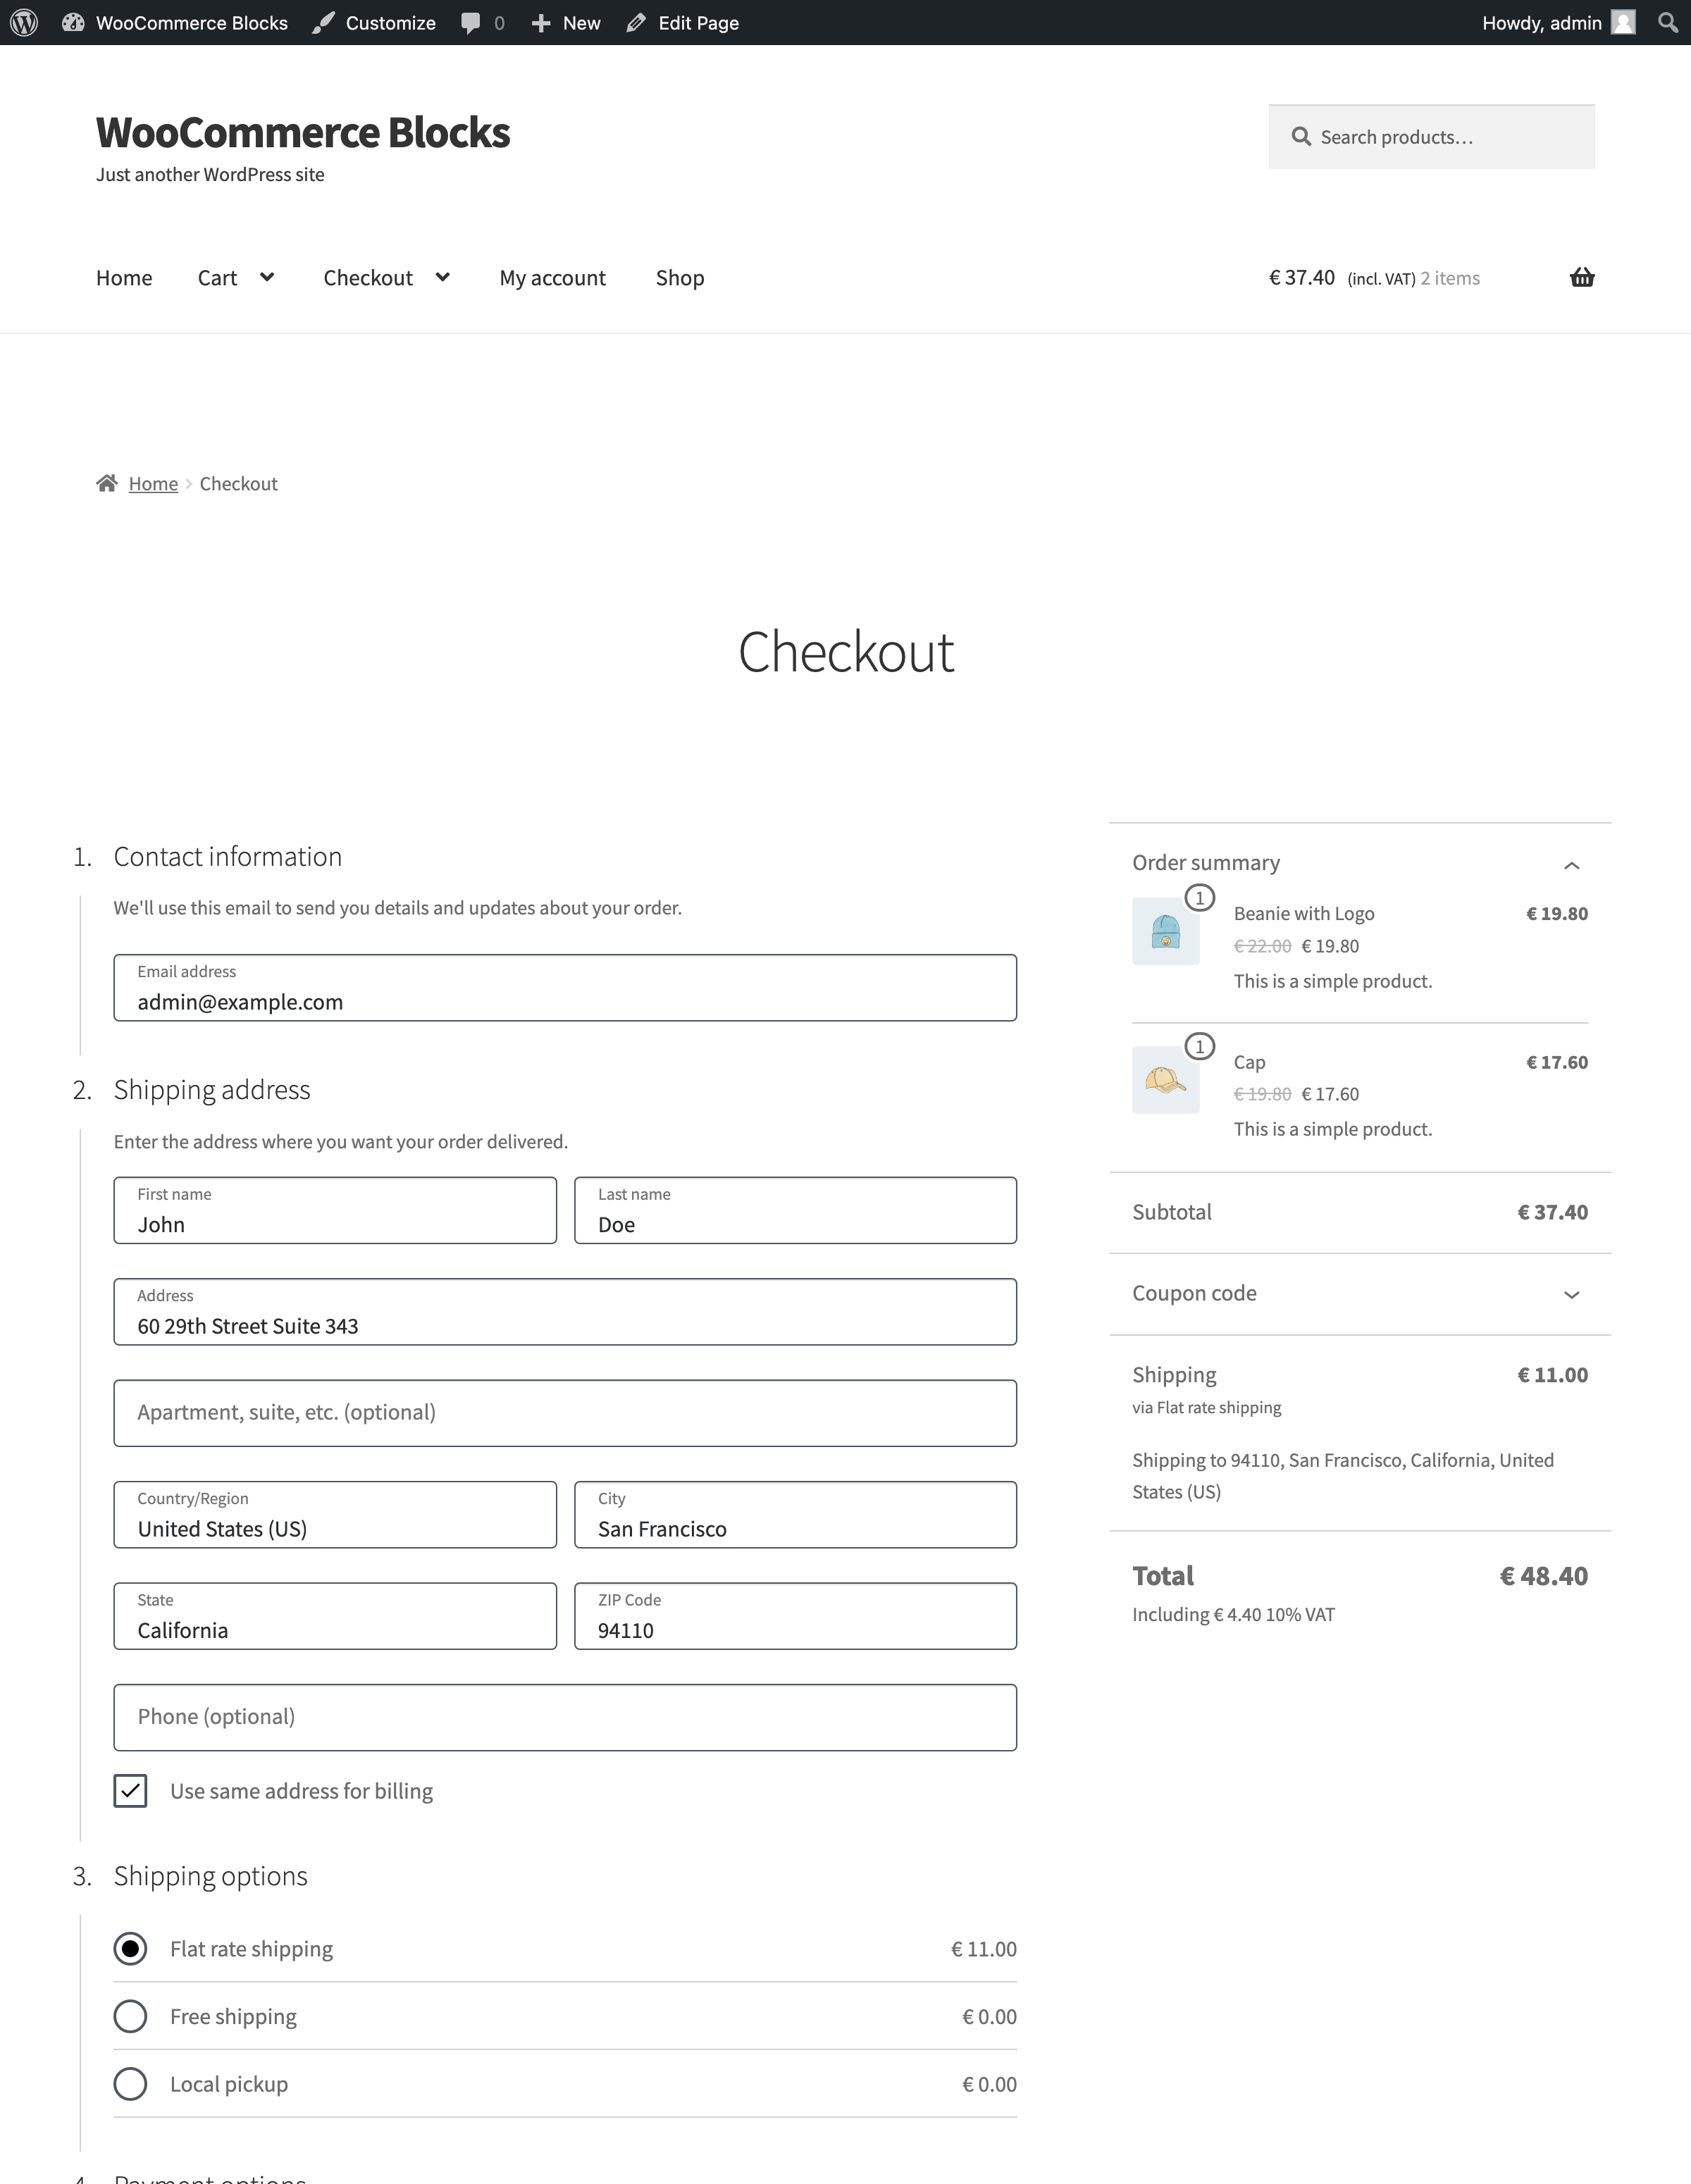
Checkout - after:
|


Single tax name / Itemized
- Go back to
wp-admin/admin.php?page=wc-settings&tab=tax§ion=reducedand change the tax rate as follows:Rate %:5.000→10.000Tax name:5% Vat→10% Vat
- Go to the cart and verify that only one tax label is visible in the order summary, e.g.
Including € 4.40 10% VAT. - Go to the checkout and verify that the same tax label is visible.
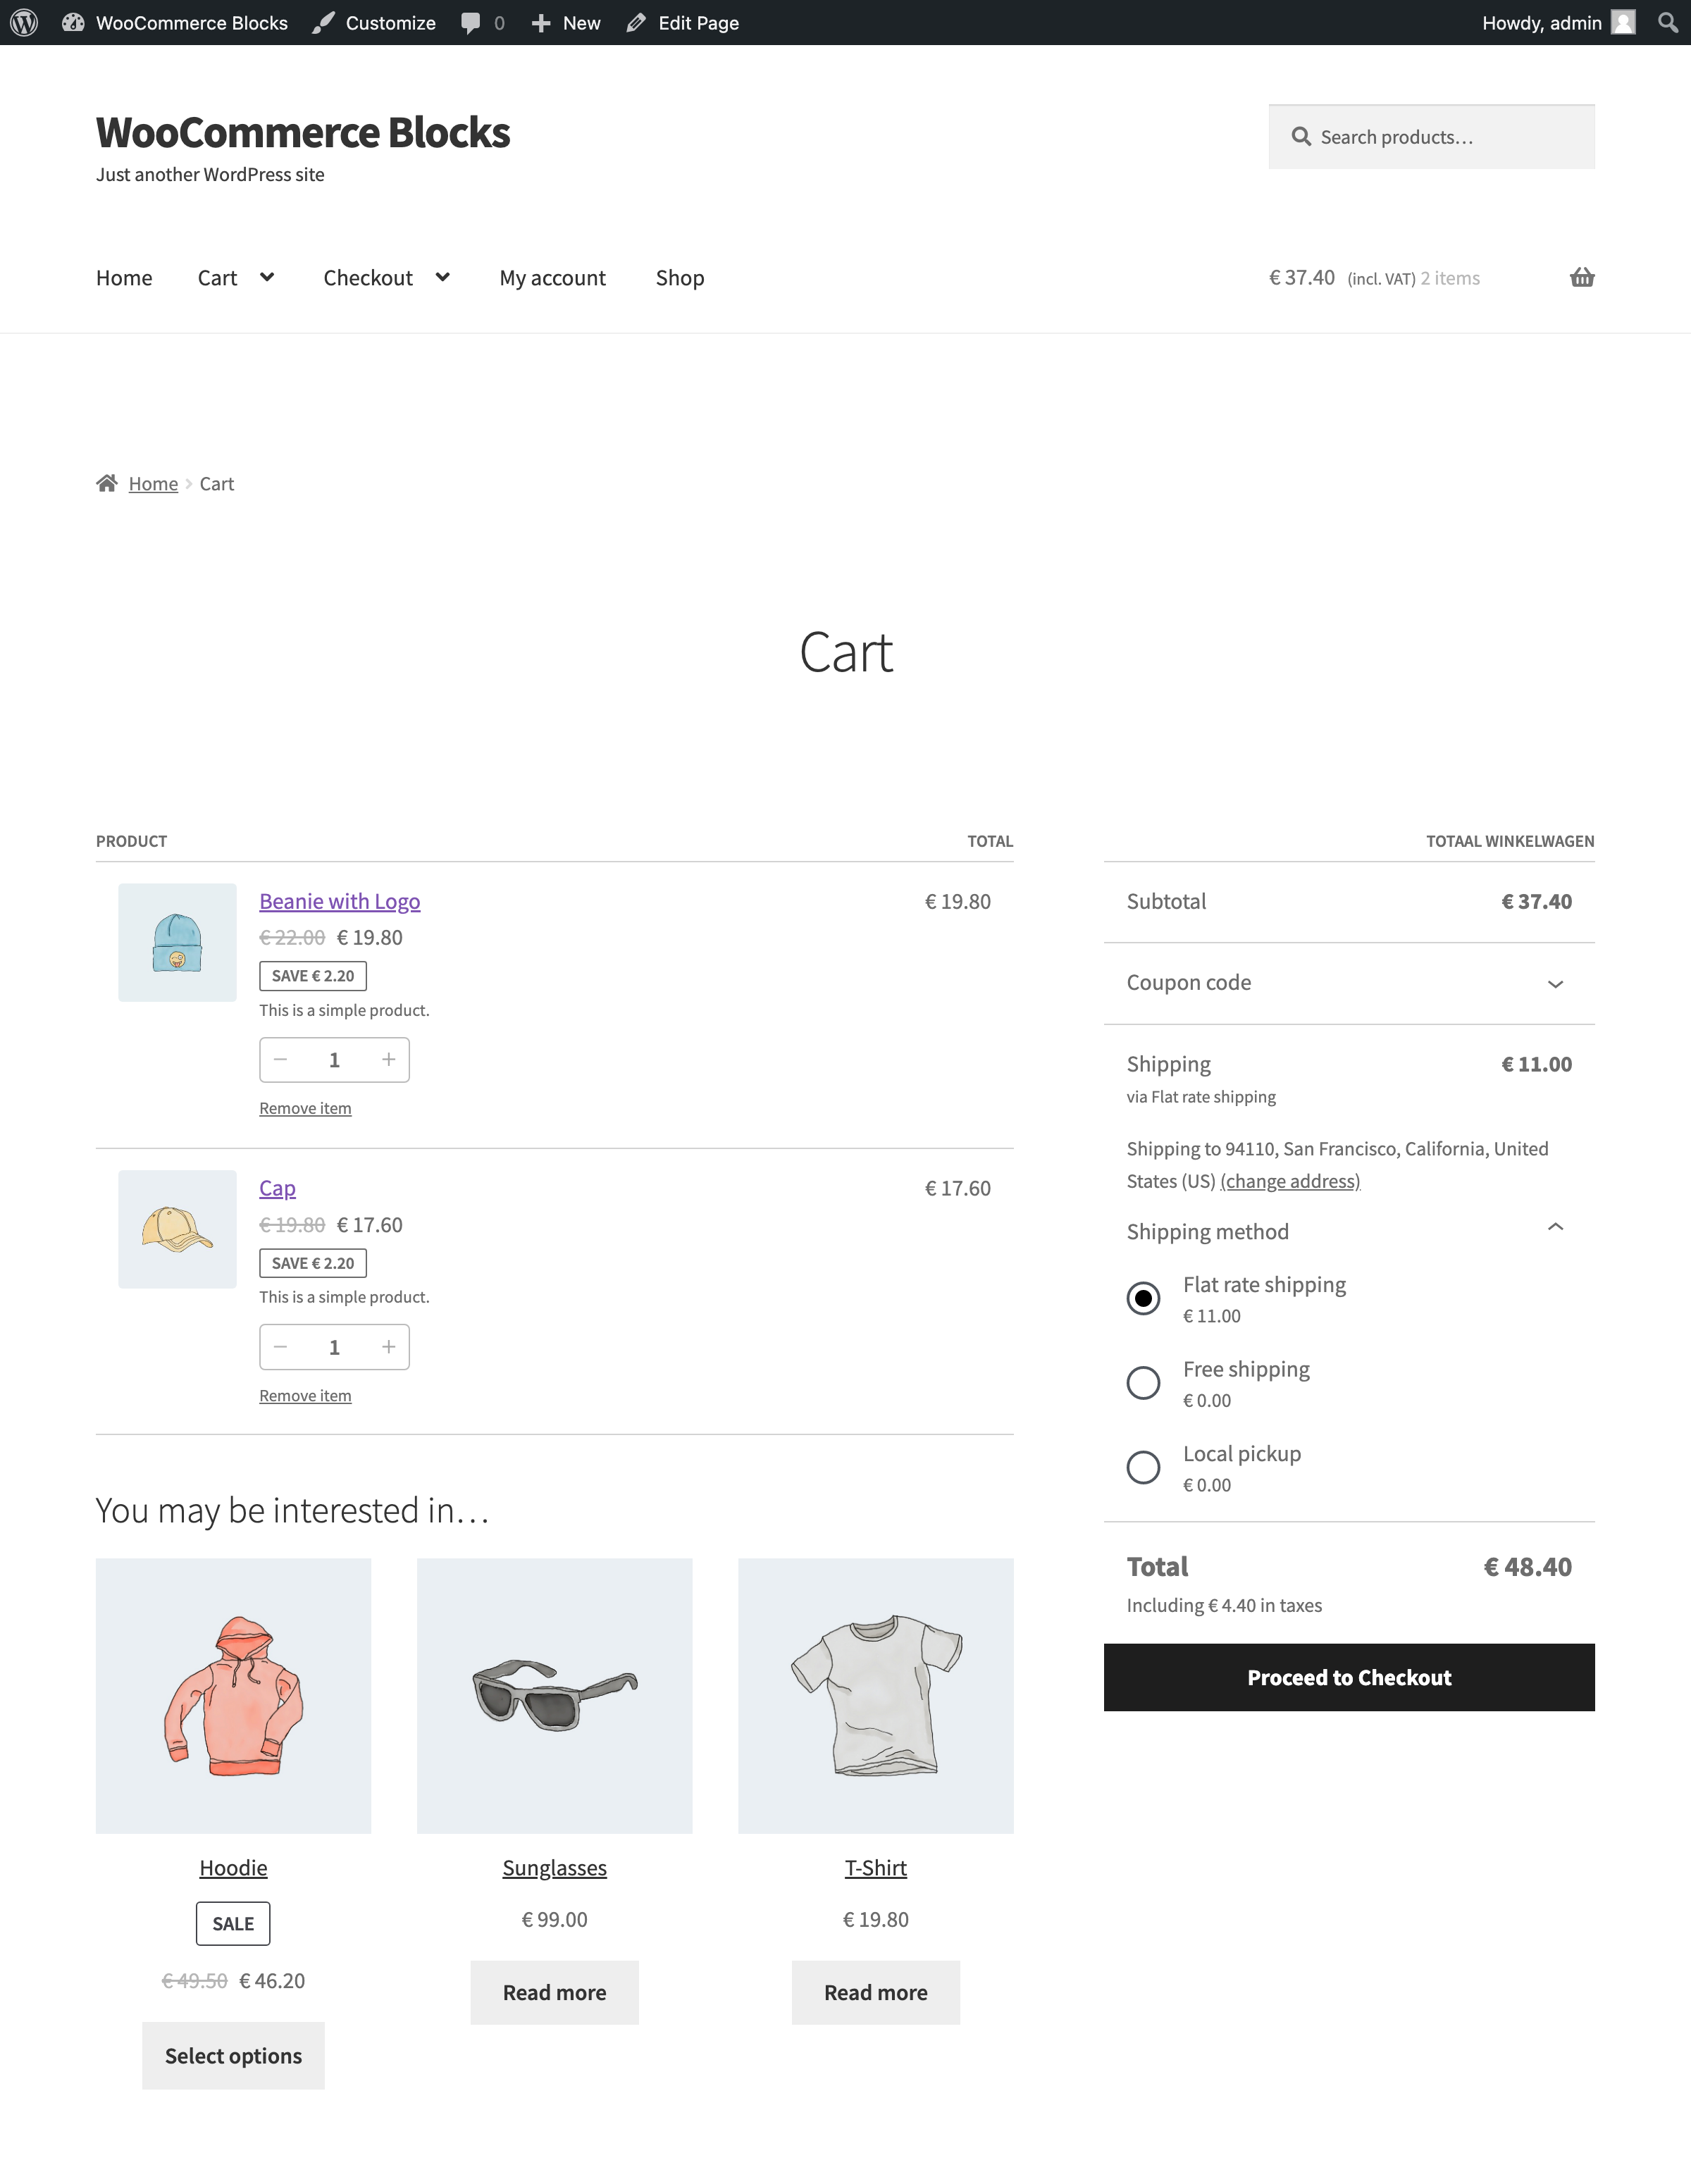
| Cart - before:
|
Cart - after:
|
| Checkout - before:
|
Checkout - after:
|


Single total
ℹ I added this test case to check the backwards compatibility.
- Go to
wp-admin/admin.php?page=wc-settings&tab=tax. - Ensure that
Display tax totalsis set toAs a single total. - Go to the cart and verify that the generic tax label is visible in the order summary, e.g.
Including € 4.40 in taxes. - Go to the checkout and verify that the same tax information is visible.
| Cart - before and after:
|
Checkout - before and after:
|

Make Footer and Header patterns available in pattern chooser. (7699)
Header patterns
- Go to Site Editor. You can choose any template.
- Choose Header Block
- Use "Replace" option:

- Type "woocommerce" in a search bar Expected: There's 6 WooCommerce patterns available
- Choose one of them Expected: Pattern is applied correctly
Footer patterns
Repeat the above steps, but for Footer Block
Fix: Product (Beta) editor preview with Stock Status setting. (7682)
- Add the Product (Beta) block to a new page.
- Change the stock status setting.
- See the editor preview updates on changing the stock status setting.
- Add the Sale status filter, see the editor preview updates on changing on sale setting as well.
- See if the block still shows the correct products on the front end as before.
Clean up unused CSS code. (7751)
- Add all WC Blocks to a post or page (you can use this gist and paste it with Ctrl + V).
- Verify there are no visual regressions in the editor. Publish the page and verify there are no visual regressions in the frontend.
- In the editor, add one of the blocks that display the SearchListControl component (ie: Filter by Attribute) and verify it's displayed correctly: