17 KiB
Testing notes and ZIP for release 9.3.0
Zip file for testing: woocommerce-gutenberg-products-block.zip
load all JSON translation files correctly (8034)
- Switch to Dutch in your website.
- Make sure all translation is working fine (in Shipping, summary items, and express payment).
Disable Rate Limiting when editing Blocks in admin (7934)
Screenshots
| Before | After |
|---|---|
 |
 |
Testing
- Enable the rate limiting filter for Store API. You can use the Code Snippets plugin to add the following PHP script:
  add_filter( 'woocommerce_store_api_rate_limit_options', function() {
	return [
		'enabled' => true, // enables/disables Rate Limiting. Default: false
		'proxy_support' => false, // enables/disables Proxy support. Default: false
		'limit' => 1, // limit of request per timeframe. Default: 25
		'seconds' => 500, // timeframe in seconds. Default: 10
	];
  } );
- Create a product related page (e.g., Hand-picked Products)
- Update the block to send some requests to the Store API. In the case of the
Hand-picked Productsblock, clicking onEdit selected productsshould do the work:
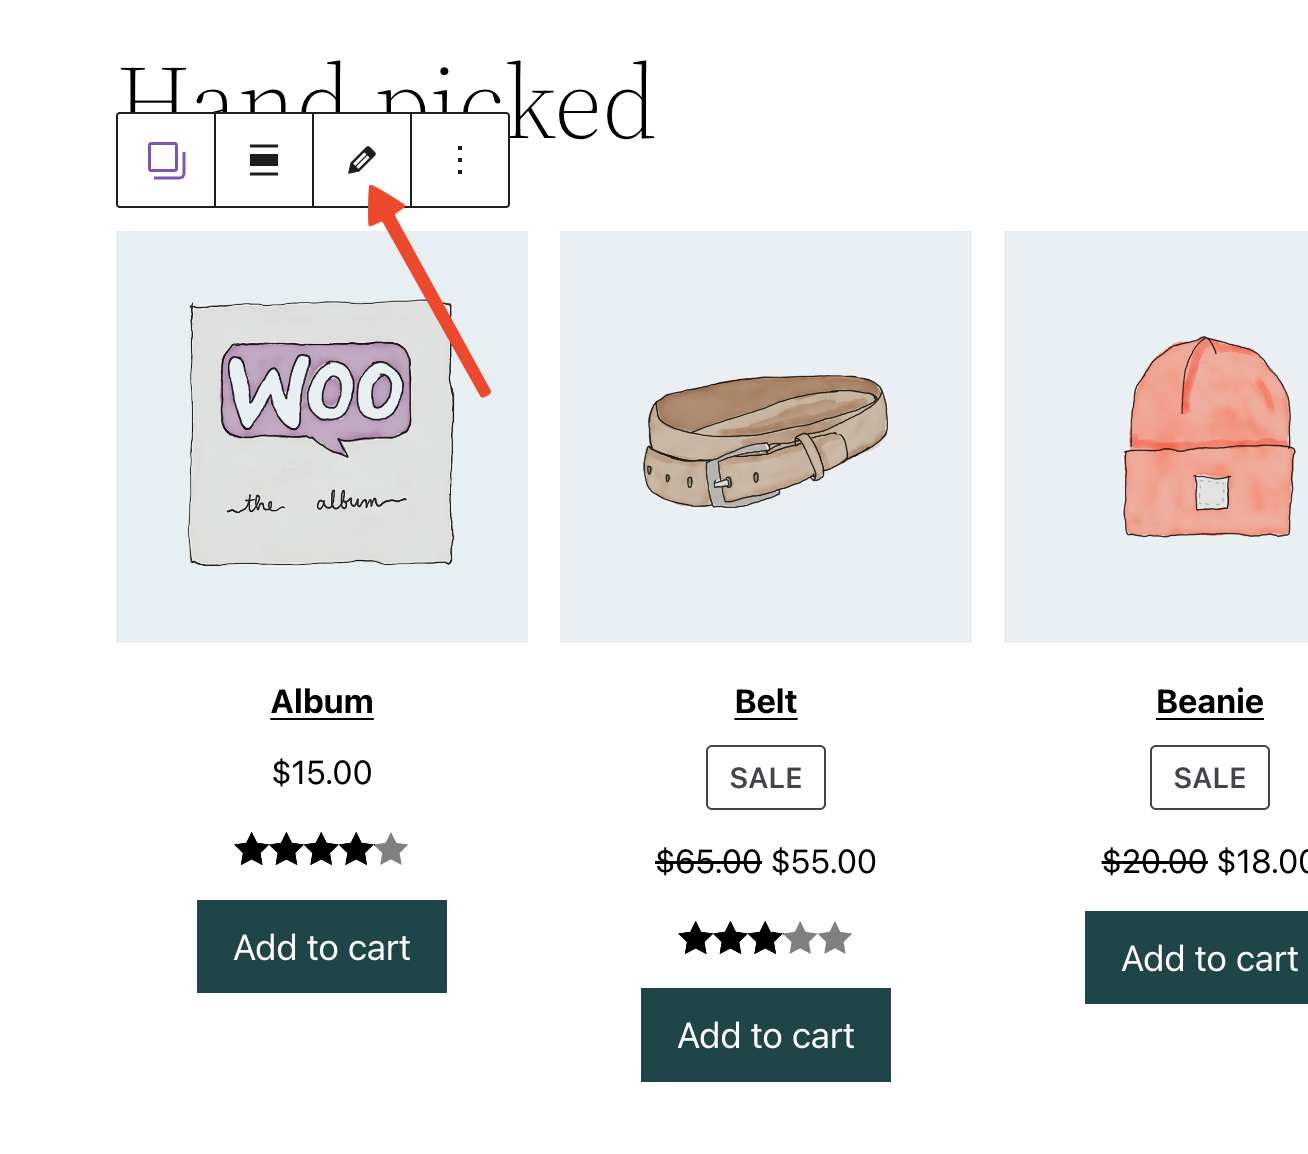
-
Make sure the block is working as expected and you aren't getting any rate-limiting warnings.
-
Open your store in a new window using your browser's incognito mode. Add a product and go to the Cart Block page
-
Increase or decrease the product quantity couple of times. You can see failed rate limited request in the browser dev tools under
Networktab, or you can reload the page to see the last saved product quantity value. See recording: https://user-images.githubusercontent.com/14235870/209964938-36018e19-5a0c-414a-8b8b-14683bf7617c.mov -
Repeat step 6 with a customer role account logged in. You should get the same result from step 6.
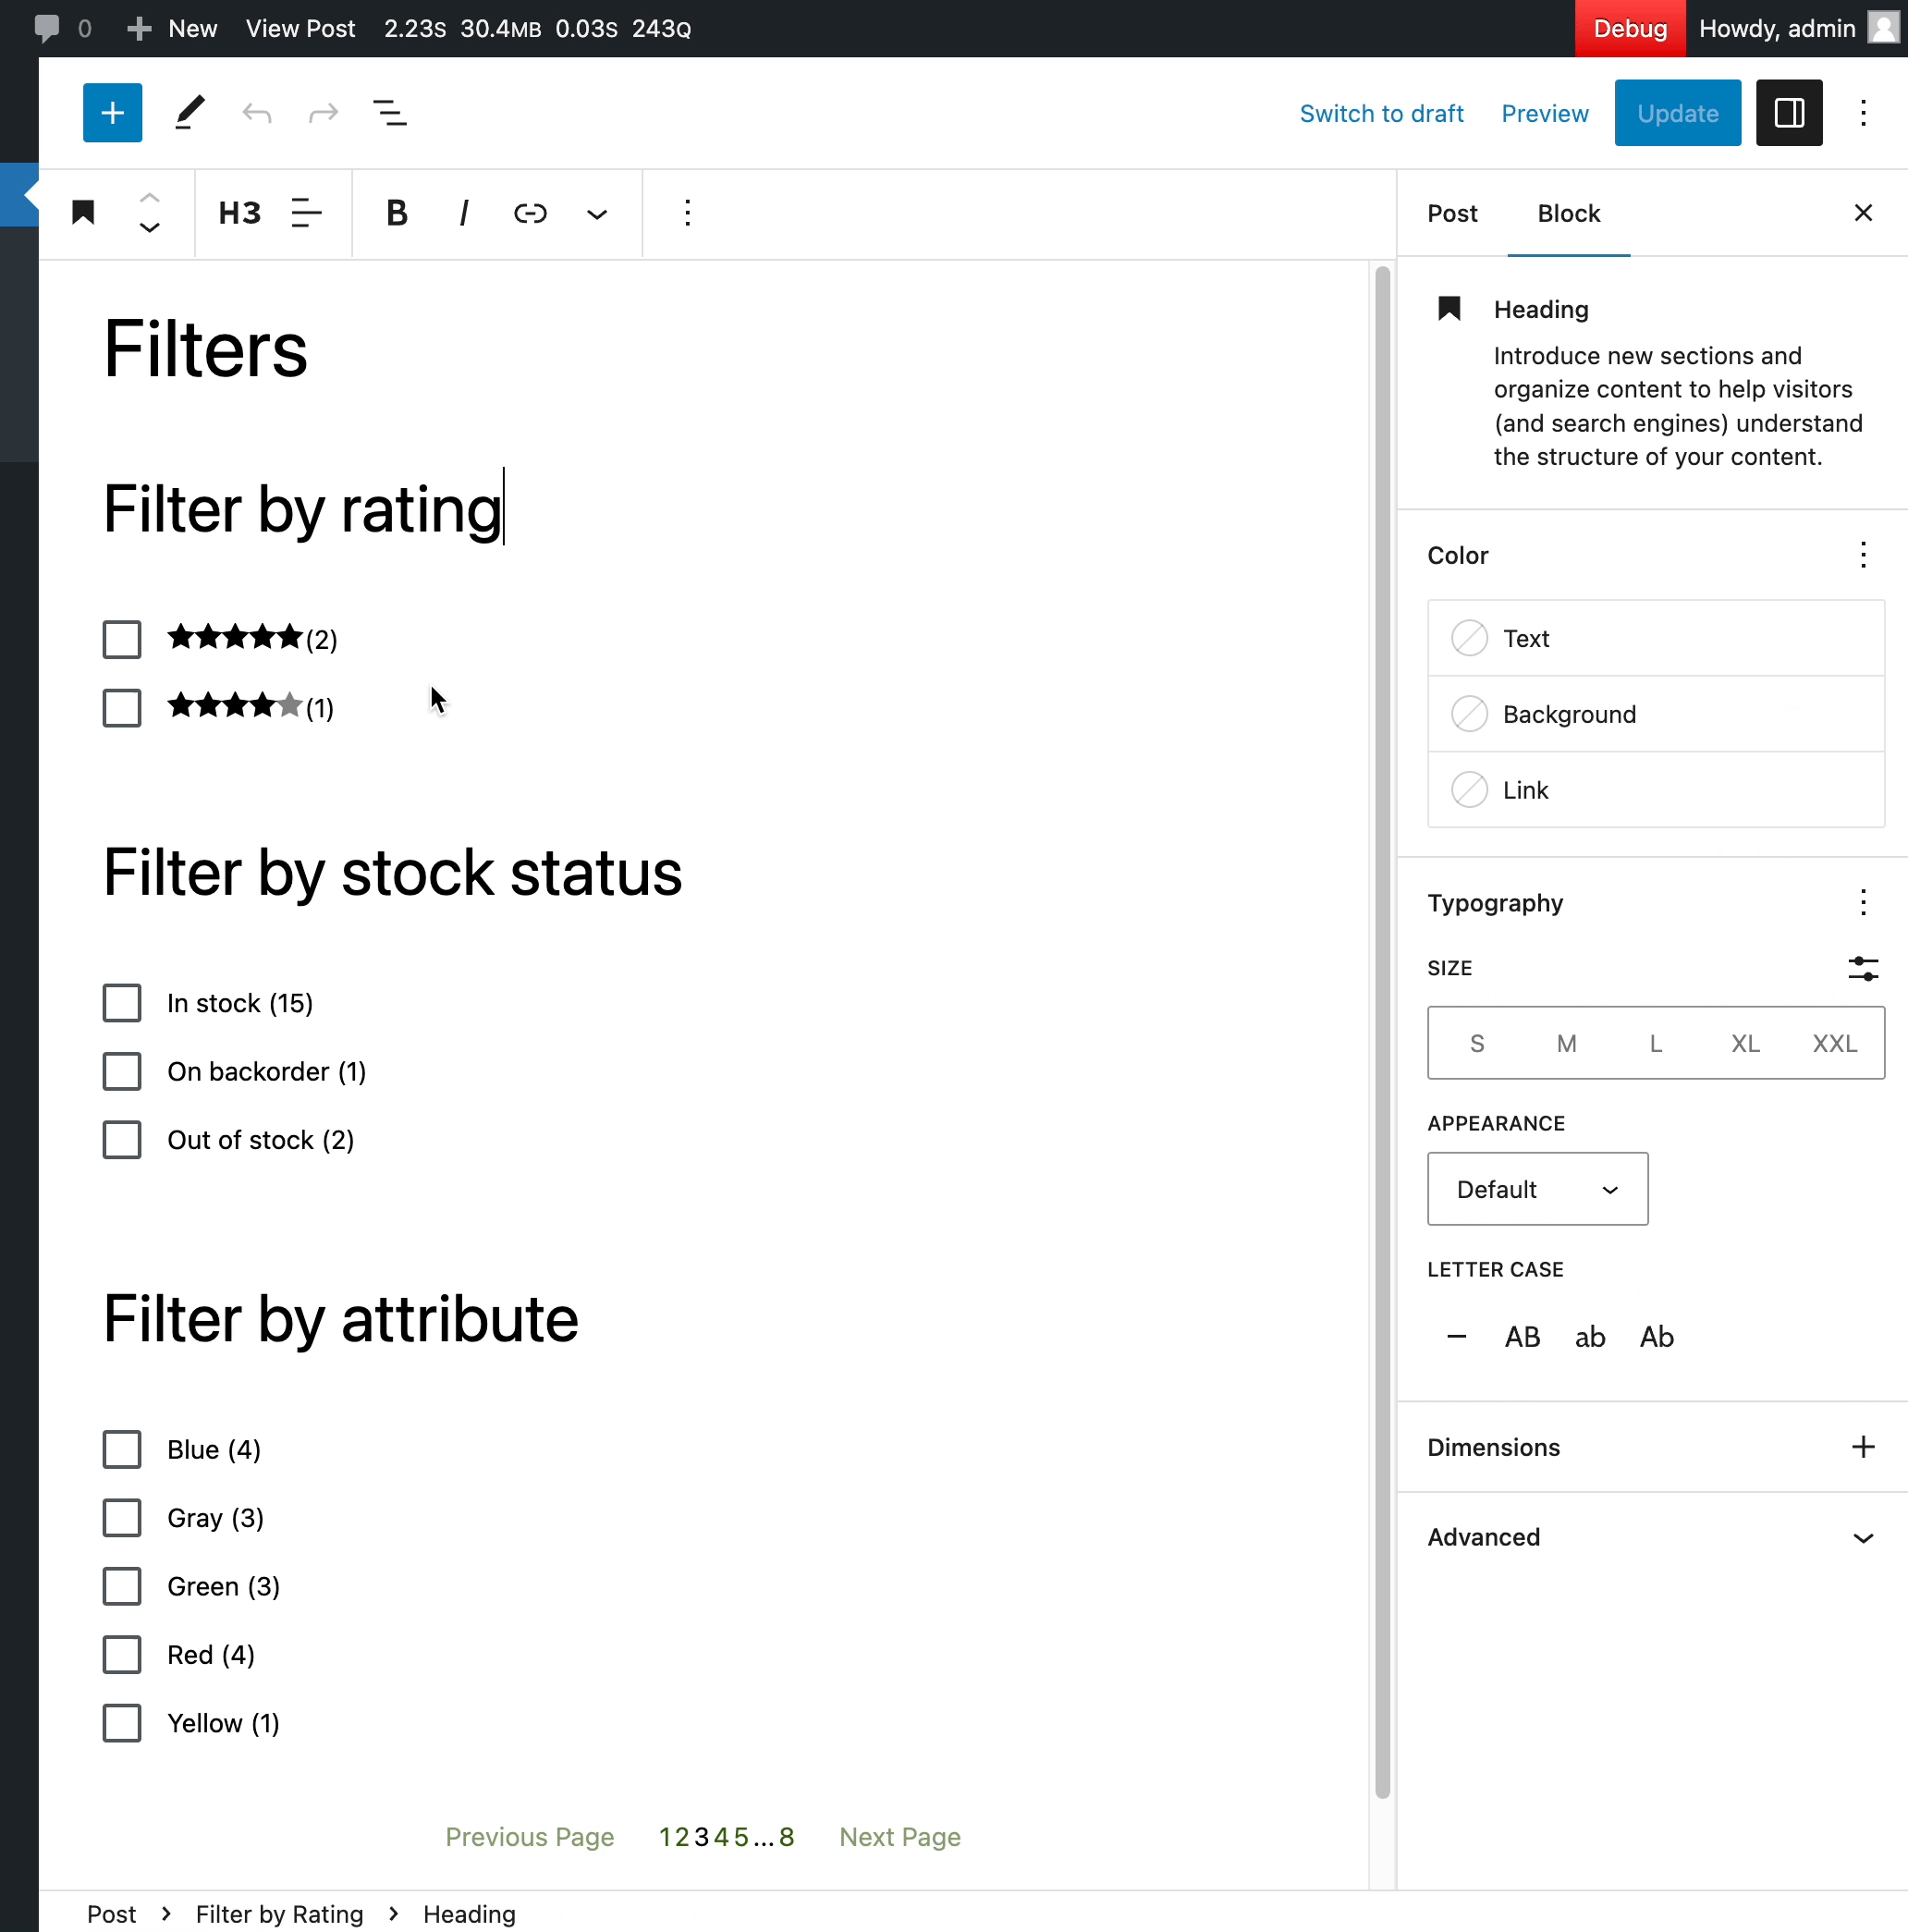
Ensure filter blocks are not reloaded every time they are selected in the editor (8002)
Screenshots
| Before | After |
|---|---|
 |
 |
Testing
- Create a new post, add the following blocks: Filter by rating, filter by stock, filter by attribute, filter by price, Products (Beta), and publish it.
- Access the post as a regular customer would. Ensure nothing has changed, and all filters are working as expected.
- Now edit the post: ensure all components are normally loaded in the editor. When you click on them, ensure that you see the same behavior as demonstrated on this gif shared earlier on this PR (no preloaders should be displayed).
Product Query: create variation of core/post-template as a Product Query inner block (7838)
- Add a Product Query block.
- Ensure that the “Product Template” block shows up in the tree view instead of the “Post Template”.
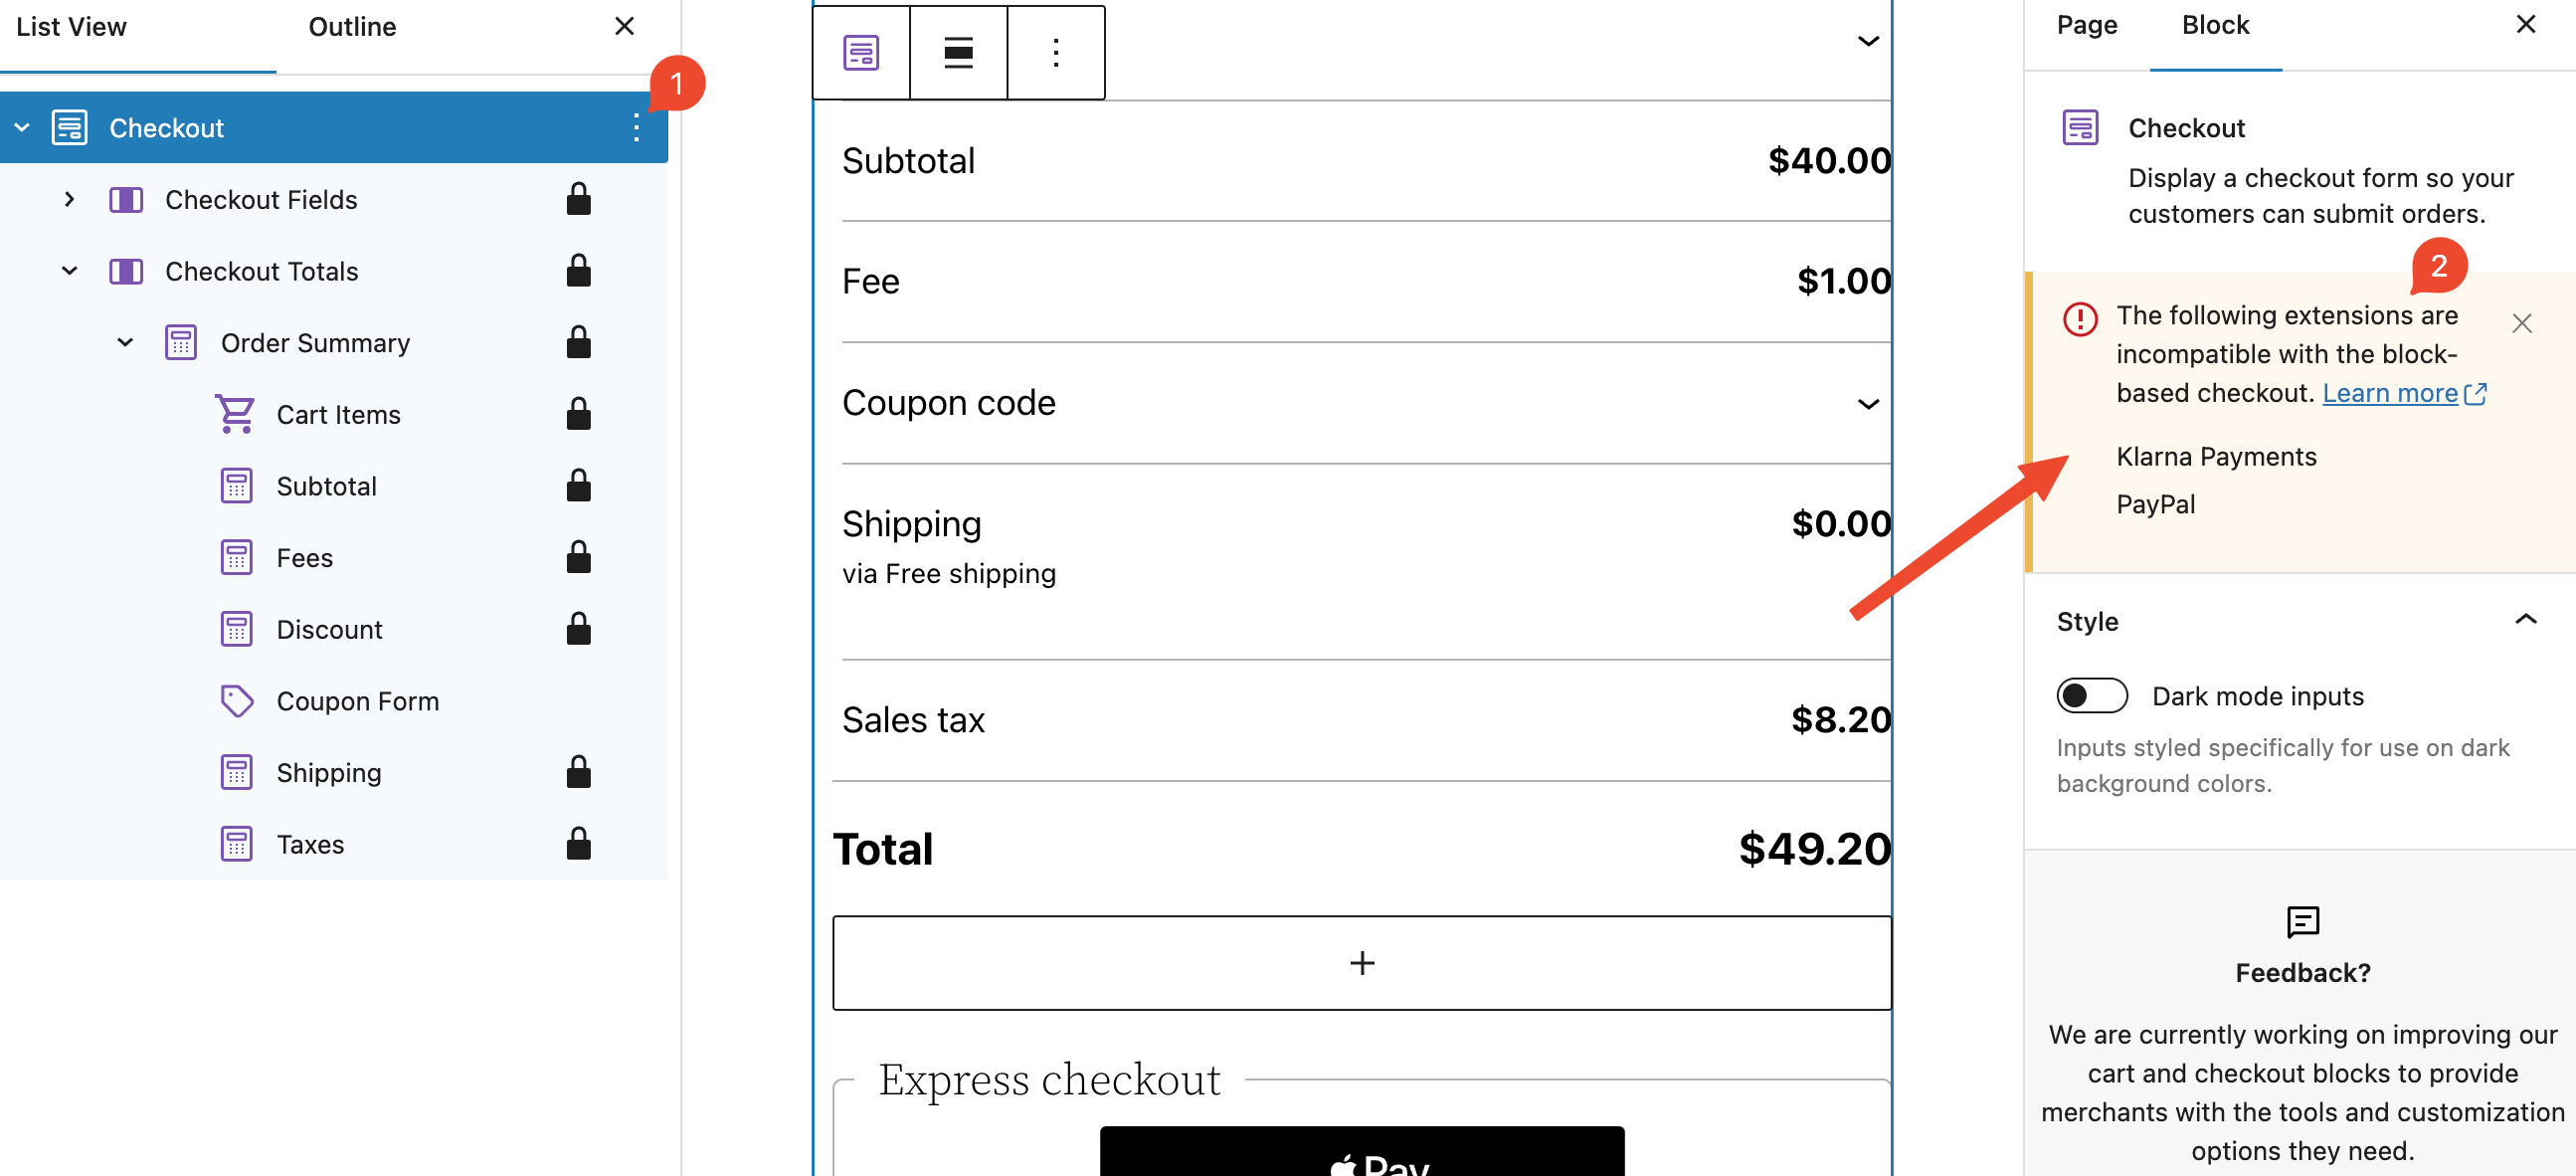
Highlight incompatible payment gateways (7412)
Screenshots
Highlight incompatible payment gateways using a sidebar notice
Before:

|
After:
|
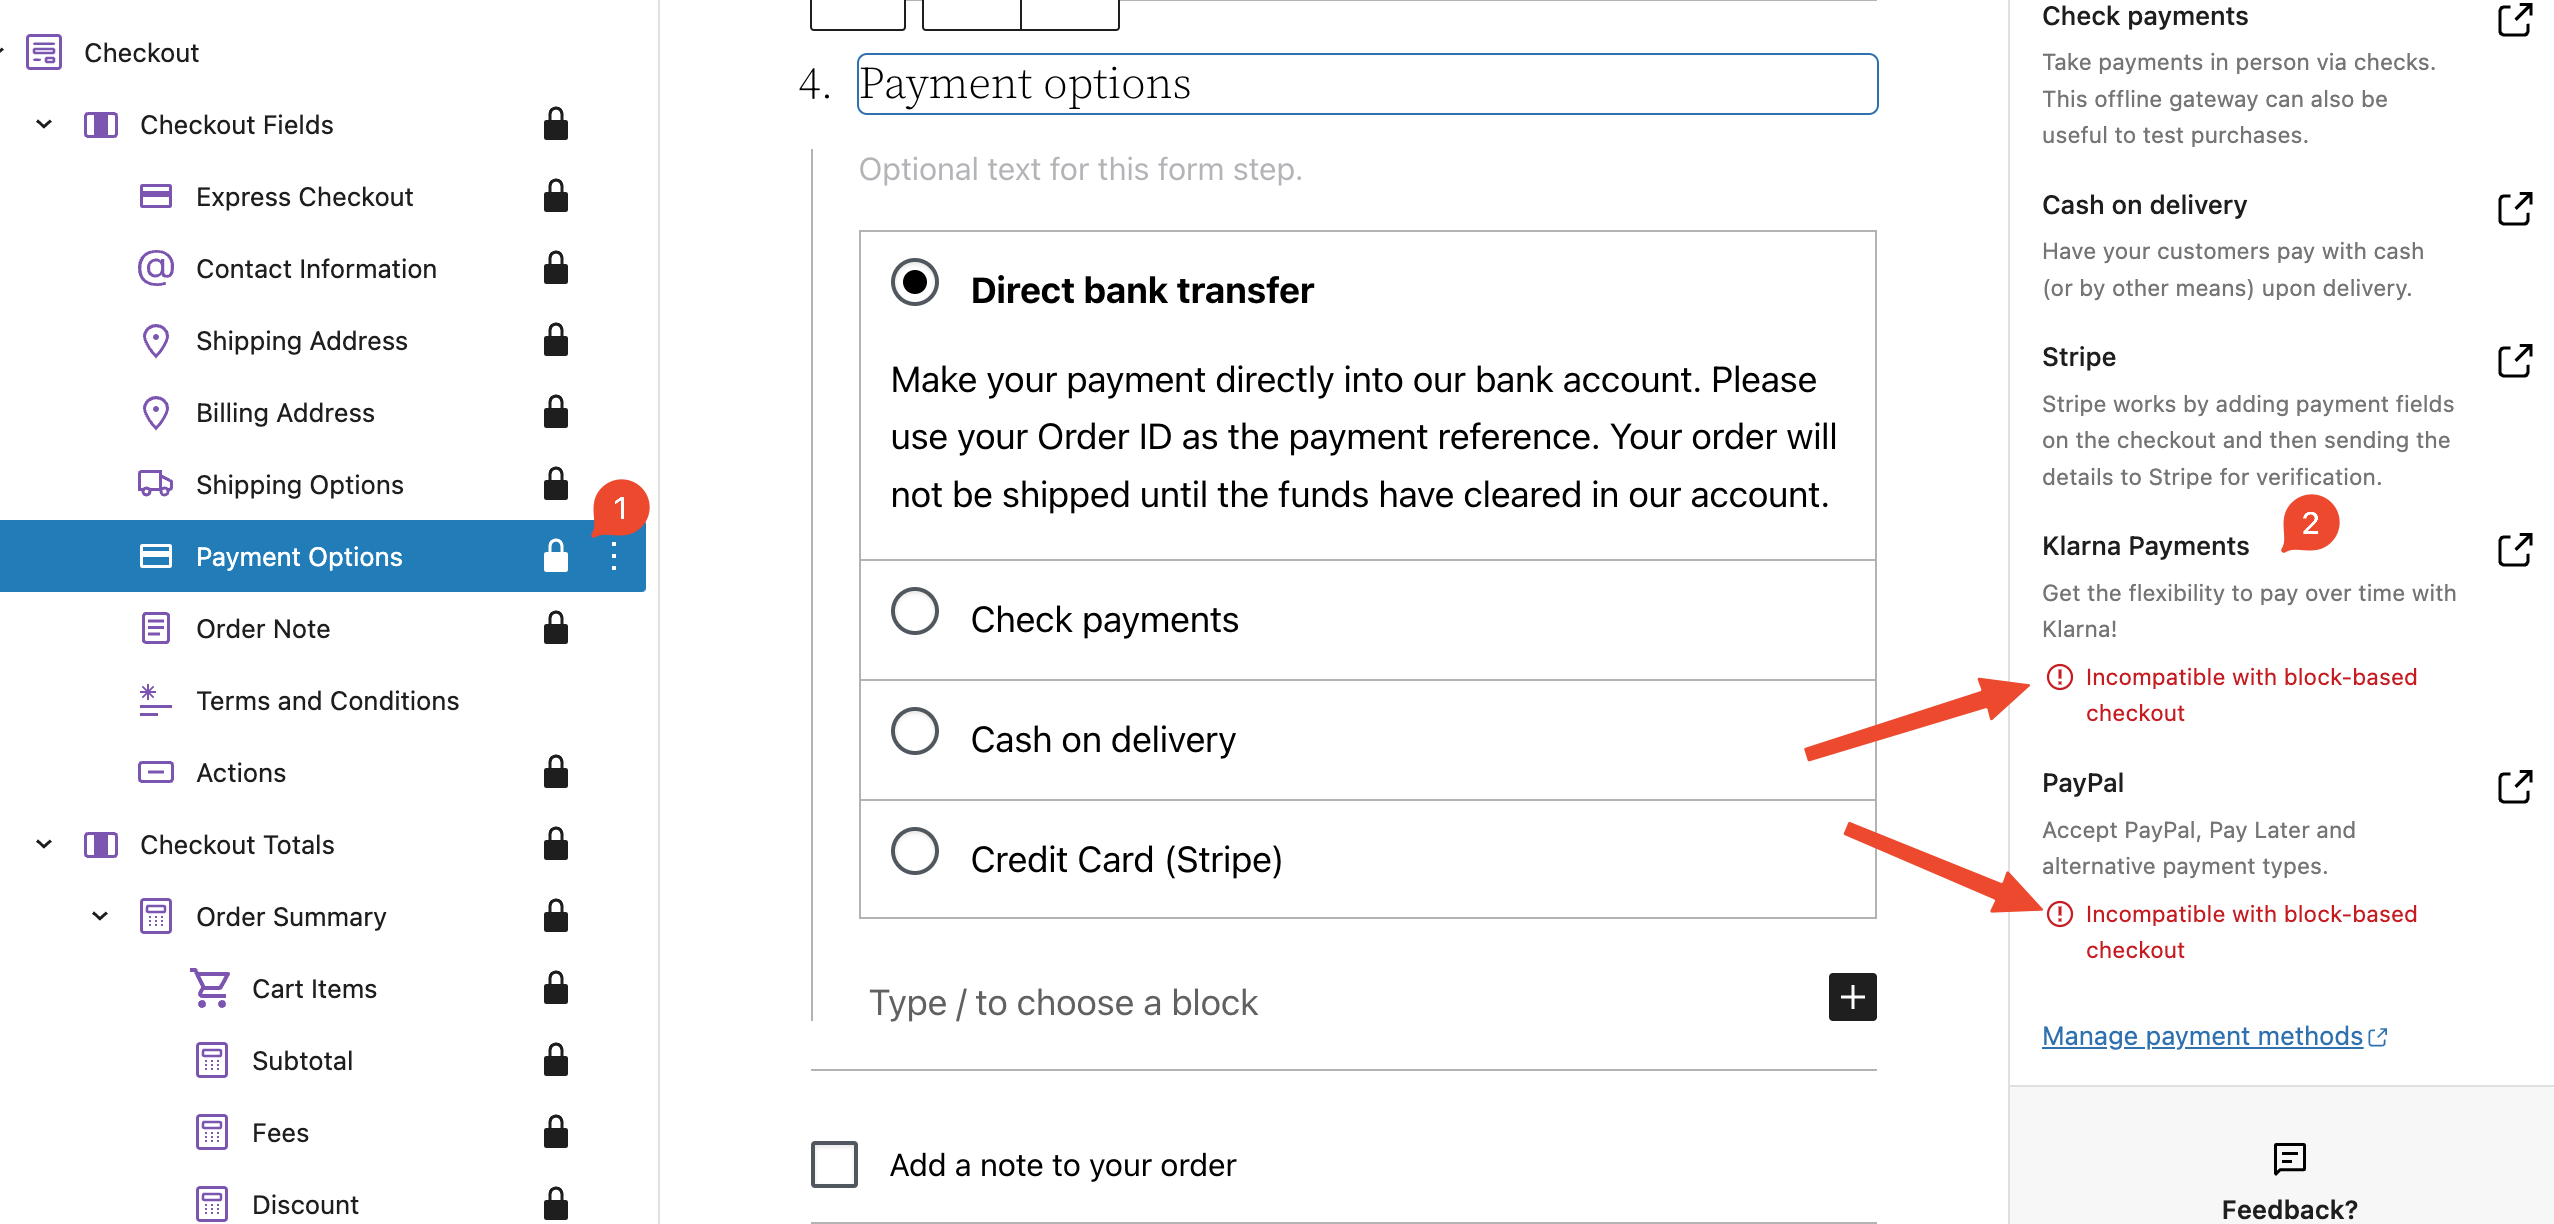
Highlight incompatible payment gateways within the Payment Options Block
Before:

|
After:
|
Testing
Highlight incompatible payment gateways using a sidebar notice
- Add incompatible payment gateways with the C&C Blocks (e.g., Paypal, Klarna Payments). You will need to configure them to be detected and used by WooCommerce.
- Create a new page and add the
Checkout Block - Verify there is a notice in the sidebar displaying the list of incompatible gateways. The
make as default&sidebar compatibilitynotices should be hidden while theincompatible gatewaysnotice is displayed.
- Select each inner block in the Checkout Blocks'
List Viewto ensure our notice is displayed for each one. - Dismiss the
incompatible gatewaysnotice by clicking the top rightXbutton. Themake as default&sidebar compatibilitynotices should be visible again.
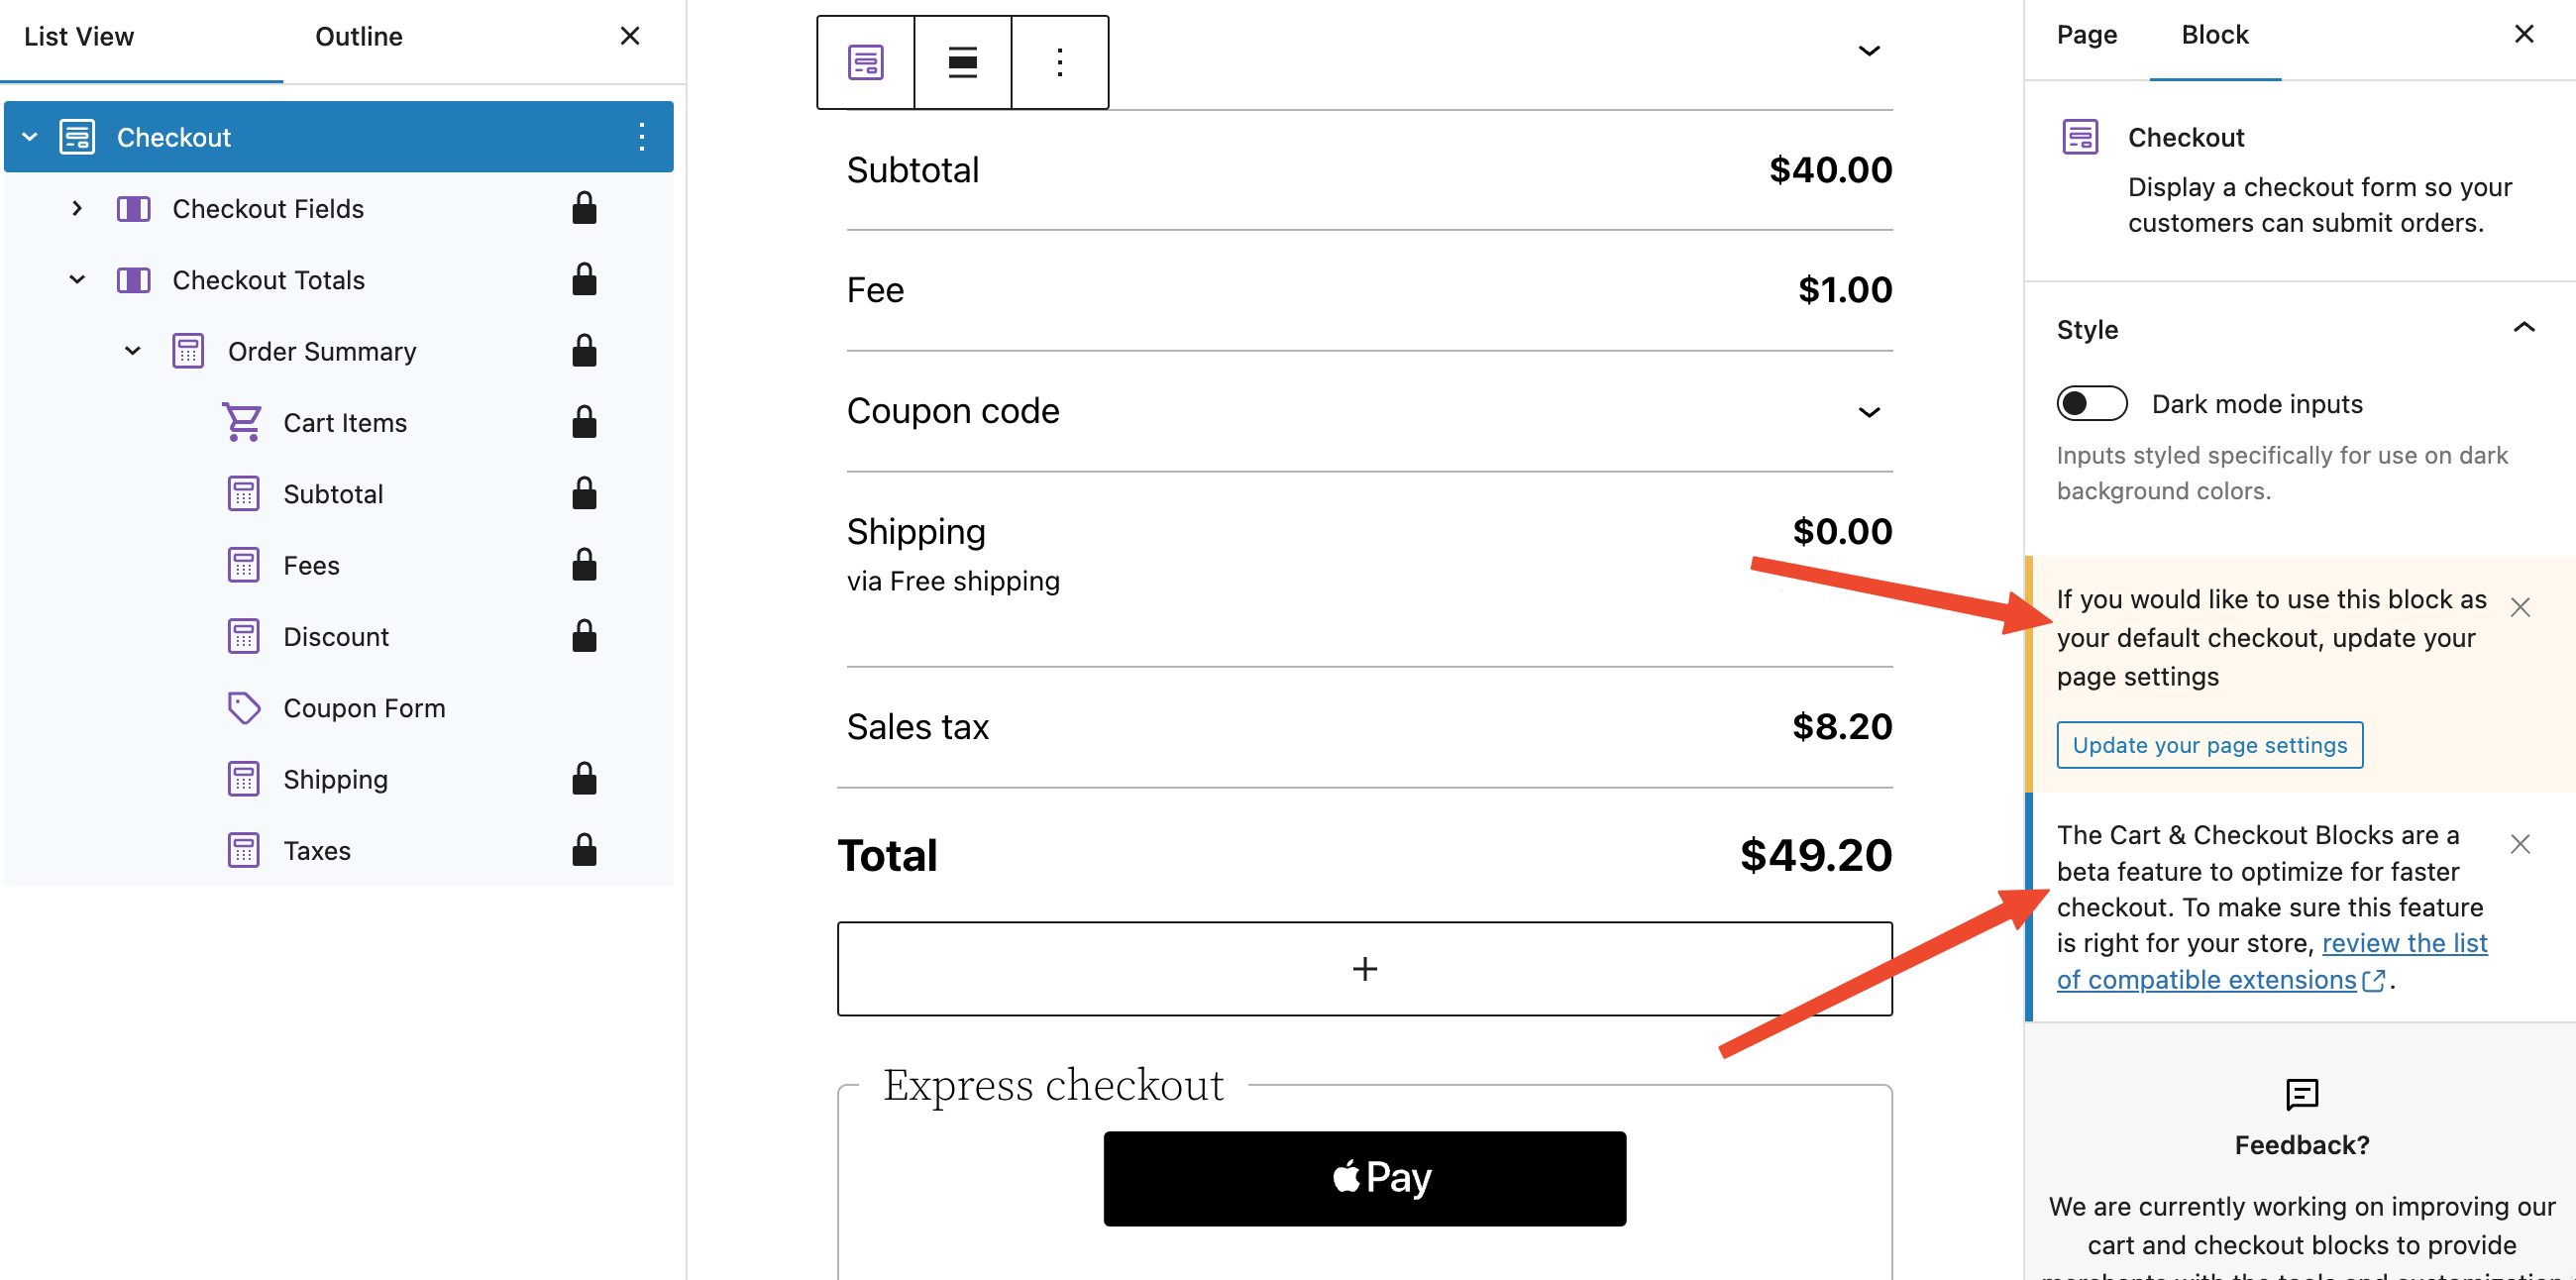
- Do the same test from step 2 to 5 using the
Cart Block
Highlight incompatible payment gateways within the Payment Options Block
- If it's not done already, add incompatible payment gateways with the C&C Blocks (e.g., Paypal, Klarna Payments)
- Create a new page and add the
Checkout Block - Select the
Payment Options Block, and check the list of available payment gateways underMethodsin the sidebar. The incompatible payment gateways should be highlighted (i.e.,Incompatible with block-based checkout)
Display "Add review" link if there's no product rating (7929)
Screenshots
| Case | Before | After |
|---|---|---|
| Products (Editor) |  |
 |
| Products (Frontend) |  |
 |
| All Products (Editor) |  |
 |
| All Products (Frontend) |  |
 |
Testing
Prerequisites:
- make sure you have at least one product with and at least one product without rating
All Products and Products blocks
Steps:
- Go to Editor and add All Products block
- Make sure Rating is included in product layout (Pencil icon > Use inserter > Add "Product Rating" block)
- Save the template
Expected:
- Both products, with and without rating, have the same layout.
- Products with no rating have "Add review" link
- Link is not clickable in Editor
- Go to the Frontend
Expected:
- Both products, with and without rating, have the same layout.
- Products with no rating have "Add review" link
- Link is interactive and redirects to Review section of the product
Repeat the same for the Products block!
Regression testing - Product view
- Go to product page of the product without rating.
Expected:
- There's no "Add review" link instead or rating stars
Regression testing - Rating alignment
- Check the Alignment settings in both: Products for both: stars and link!

Expected:
- Alignment is respected in Editor and Frontend for all: left, center and right alignment
Regression testing - Filer by Rating
- Add Filter by Rating block
- Save and go to Frontend
Expected:
- There's no "loading" placeholder in place of stars in the Filter by Rating
Don't check for validation on pushChange (8029)
- In Checkout, turn terms and condition block into a checkbox.
- Go to Checkout, fill out your address, notice that shipping rates update fine and your request makes it to the server.
- Check the terms and condition block.
- Back to the form, you should see the same behavior.
Use Woo Blocks instead Woo core translation within the Checkout order Summary block (7995)
Screenshots
Before:

|
After:

|
Testing
- Head over to
/wp-admin/options-general.phpand change the site language to Dutch. - Head over to
/wp-admin/update-core.phpand fetch the translations:Vertalingen → Vertalingen updaten - Create a test page and add the Checkout block to it.
- Head over to the frontend and add a product to the cart.
- Head over to the Checkout block and verify that the title of the shipping section shows
Verzendinginstead ofVerzendmethoden.
Add Customer account to patterns (7944)
- Create a new page and add all the
WooCommerce Headerpatterns in their two versions (light and dark). - Save the page and check the
Customer Accountblock shows as expected on the designs: CdRRBQ50zJiDvnY3AbDiXd-fi-76%3A9726 - Repeat for all the
WooCommerce Footerpatterns (light and dark).
Add 'Customer Account' block (7876)
- Create a new page and add the
Customer Accountblock. - Click on the block to open the sidebar settings and make sure there's a link
Manage account settingsthat goes to theAccounts & PrivacyWC admin page. - Check that you see the
Displaysection on the settings and that you can change the display style toIcon-only,Text-onlyandIcon and textand that you can choose between the two icon styles. - Change the display options, save the page, and make sure all these configurations are correctly rendered in the editor and front end.
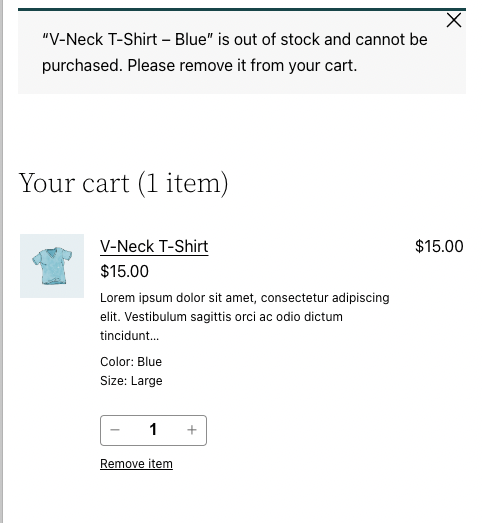
Mini Cart block - added notice support (7234)
Screenshots
Testing
- Open the FSE editor and add the Mini Cart Block in the header. Save.
- Go to the frontend and add the product to the Cart. Be sure that on Mini Cart Block any "notice" is visible on top.
- On the editor side, edit the product that you added and set it as out of stock. Save.
- On the frontend side, refresh the page. Go to the Cart page and see the notice.
- Open the Mini Cart block and be sure that the notice is visible.
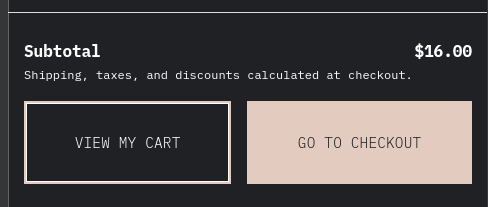
Refactor View Switcher to use Block Attributes (8006)
- Go to the page containing the Cart Block
- Click the Cart Block/Inner Blocks within the Cart Block
- Check that the view switcher is visible
- Change to "empty cart" view
- View should change and the parent cart block should be selected in the UI
- Repeat to switch back to the filled cart view
After testing the cart block, repeat the above tests for the mini cart block. With a block-based theme go here:
wp-admin/site-editor.php?postType=wp_template_part&postId=woocommerce%2Fwoocommerce%2F%2Fmini-cart
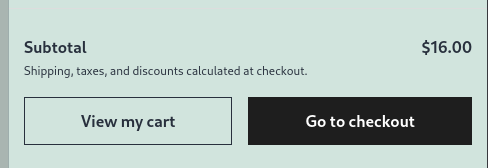
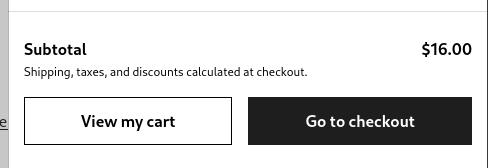
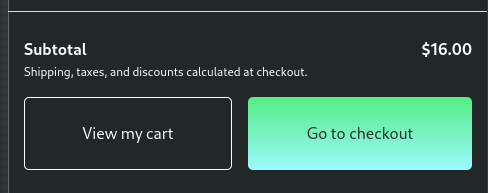
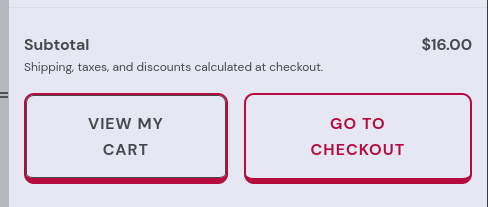
Remove opinionated styles from Button component on TT3 and Zaino themes (7992)
Screenshots
Screenshots are from the Mini Cart block, but these changes also impact the Cart and Checkout blocks.
| Theme | Before | After |
|---|---|---|
| Storefront |  |
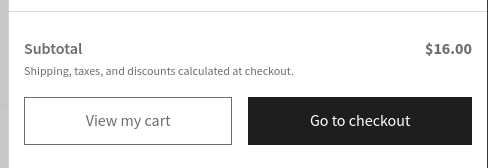 |
| Twenty Twenty One | 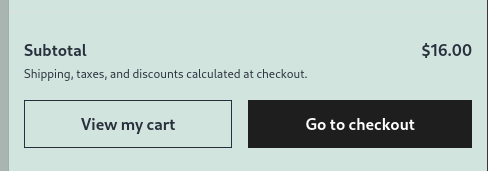 |
 |
| Twenty Twenty Two |  |
 |
| Twenty Twenty Three (Canary) | 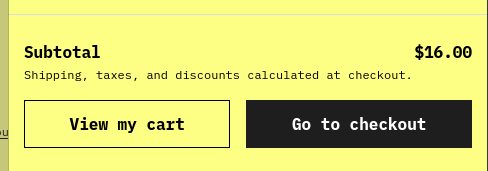 |
 |
| Twenty Twenty Three (Pilgrimage) | 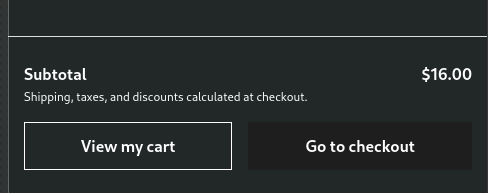 |
 |
| Twenty Twenty Three (Whisper) | 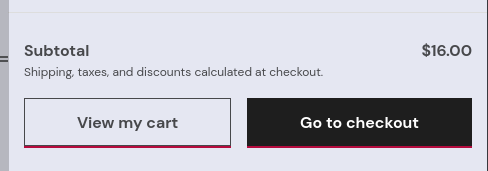 |
 |
| Zaino | 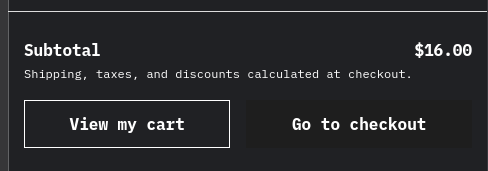 |
 |
Testing
Preparation:
Create three posts, one with the Mini Cart block, another one with the Cart block and the last one with the Checkout block.
Test different themes:
-
Twenty Twenty Three: 1.1. Install it from here: https://wordpress.org/themes/twentytwentythree/ 1.2. Go to the pages created in step 1 and verify the Mini Cart, Cart and Checkout buttons follow the theme styles. 1.3. Go to Apperance > Editor > Styles > Browse Styles and change between style variations. Verify the buttons follow the styles in all of them.
-
Twenty Twenty Two (or another block theme): 2.1. Install it from here: https://wordpress.org/themes/twentytwentytwo/ 2.2. Go to the pages created in step 1 and verify the Mini Cart, Cart and Checkout buttons don't follow the theme styles. Instead, they have opinionated styles.
-
Storefront (or another classic theme): 3.1. Install it from here: https://wordpress.org/themes/storefront/ 3.2. Go to the pages created in step 1 and verify the Mini Cart, Cart and Checkout buttons don't follow the theme styles. Instead, they have opinionated styles.
Cart Block > Ensure no console errors are displayed when an invalid coupon is applied (7969)
Screenshots
| Before | After |
|---|---|
 |
 |
Testing
- Add the Cart Block to a post/page and access it
- Apply a non-existent coupon
- Open the JS console on dev-tools and confirm no errors are listed.