348 lines
22 KiB
Markdown
348 lines
22 KiB
Markdown
# Testing notes and ZIP for release 10.1.0
|
|
|
|
Zip file for testing: [woocommerce-gutenberg-products-block.zip](https://github.com/woocommerce/woocommerce-blocks/files/11325682/woocommerce-gutenberg-products-block.zip)
|
|
|
|
## WooCommerce Core
|
|
|
|
### [Patterns]: Add new Featured Products 2 columns pattern ([#9072](https://github.com/woocommerce/woocommerce-blocks/pull/9072))
|
|
|
|
1. Create a new page or post
|
|
2. Make sure the `Featured products 2 columns` pattern appears under the WooCommerce category dropdown.
|
|
3. Insert in and make sure it shows as expected on the design.
|
|
|
|
### [Patterns] Add new Testimonials: 3 columns pattern ([#9159](https://github.com/woocommerce/woocommerce-blocks/pull/9159))
|
|
|
|
1. Create a new page or post
|
|
2. Make sure the `Testimonials 3 columns` pattern appears under the WooCommerce category dropdown.
|
|
3. Insert in and make sure it shows as expected on the design.
|
|
|
|
### Reinstate "Hide shipping costs until an address is entered" but disable it when using local pickup ([#8964](https://github.com/woocommerce/woocommerce-blocks/pull/8964))
|
|
|
|
1. Ensure you have some shipping rates set up in your store.
|
|
2. Disable WC Blocks local pickup (WooCommerce -> Shipping -> Local pickup).
|
|
3. Go to WooCommerce -> Shipping -> Shipping options, ensure you see the option "Hide shipping costs until an address is entered" with no additional text.
|
|
4. Check this box.
|
|
5. In an incognito window, add an item to your cart.
|
|
6. Go to the Cart block. Ensure you don't see any shipping rates shown.
|
|
7. Go to the Checkout block, ensure the shipping rate selector says "Shipping options will be displayed here after entering your full shipping address."
|
|
8. Enable WC Blocks local pickup and add a location (WooCommerce -> Shipping -> Local pickup)
|
|
9. Go to WooCommerce -> Shipping -> Shipping options, ensure you see the option "Hide shipping costs until an address is entered (Not available when using WooCommerce Blocks Local Pickup)" exactly as written.
|
|
10. Enter your address and ensure shipping rates show up.
|
|
11. Ensure this option is disabled, and turned off, ensure you cannot activate it by clicking the checkbox.
|
|
12. Close the incognito window from earlier and open a new one. Add an item to your cart.
|
|
13. Go to the Cart block. Ensure rates show up in the sidebar.
|
|
14. Go to the Checkout block, ensure the method selector (Shipping / Local Pickup) shows.
|
|
15. Ensure shipping rates show up when the "Shipping" method has been selected, even when no address is entered.
|
|
16. Place two orders, one using local pickup, the other using regular shipping.
|
|
17. Ensure these both appear correctly in the confirmation email and in the orders dashboard.
|
|
|
|
### Add theme-level global styles to Cart and Checkout block ([#8809](https://github.com/woocommerce/woocommerce-blocks/pull/8809))
|
|
|
|
1. Install and activate a block theme, e.g. [Twenty Twenty-Three](https://wordpress.org/themes/twentytwentythree/).
|
|
2. Create a test page with the Checkout block.
|
|
3. Create a test page with the Cart block.
|
|
4. Go to `WP Admin` » `Appearance` » `Editor.`
|
|
5. Open the Styles sidebar.
|
|
6. Adjust all `Typography ` and `Color` settings.
|
|
7. Go to the Checkout block page editor.
|
|
8. Confirm Global styles are applied successfully.
|
|
9. Go to the Cart block page editor.
|
|
10. Confirm Global styles are applied successfully.
|
|
11. Navigate to Cart and Checkout block page on the front-end.
|
|
12. Confirm Global styles are applied successfully.
|
|
|
|
### Fix filter by stock status dropdown ordering ([#9127](https://github.com/woocommerce/woocommerce-blocks/pull/9127))
|
|
|
|
1. Make sure you have at least one product with the stock status: "In stock", "Out of Stock" and/or "On backorder"
|
|
2. In the Editor add:
|
|
|
|
* Filter by Stock block - set it to Dropdown and Multiple
|
|
* Products block
|
|
|
|
3. In the frontend apply stock status filters: "In stock", "Out of Stock" and/or "On backorder"
|
|
4. Refresh the page if it hasn't refreshed itself
|
|
5. Expected: The order of the options stays the same before the refresh and after the refresh
|
|
|
|
### fix/8129: remove rounding the caused issue with UI ([#9118](https://github.com/woocommerce/woocommerce-blocks/pull/9118))
|
|
|
|
1. Use a wide screen (min. 1500px wide). Issue occurs on a smaller screens as well, but the position difference is smaller than the thumb radius, hence the glitch is "covered" by the thumb.
|
|
2. Create a new page
|
|
3. Add a Filter by Price block
|
|
4. Save and see go to frontend
|
|
5. Move the thumbs slowly
|
|
6. Expected: Thumb is in synced position with the slider
|
|
|
|
### add cursor:pointer to checkbox and radio fields ([#9102](https://github.com/woocommerce/woocommerce-blocks/pull/9102))
|
|
|
|
1. Add multiple shipping methods and enable multiple payment methods so that multiple radio input fields are shown on the Checkout page.
|
|
2. Add the Checkout block to the checkout page.
|
|
3. In the fix branch, observe all the radio/checkbox input fields on the Checkout page, hover over them and their associated labels and observe that the mouse cursor shows as a pointer.
|
|
4. Observe in the trunk branch, the cursor was shown as a mouse pointer instead.
|
|
|
|
### fix/8651: Use body background color as the Cart block sticky footer background color ([#9103](https://github.com/woocommerce/woocommerce-blocks/pull/9103))
|
|
|
|
1. Set your theme to a dark style (ie TT3 with Pilgrimage styling).
|
|
2. Go to the Cart block page on mobile.
|
|
3. Verify the sticky footer background (available on a mobile view) match the body background color.
|
|
|
|
### decodeEntities for display in checkout TextInput ([#9117](https://github.com/woocommerce/woocommerce-blocks/pull/9117))
|
|
|
|
1. Add a product to the cart.
|
|
2. Go to the checkout.
|
|
3. Place the order with the following address:
|
|
|
|
```text
|
|
Address : Stationsplein 151
|
|
Country/Region : Nederland
|
|
Postal code : 5211 BP
|
|
City : 's-Hertogenbosch
|
|
```
|
|
|
|
4. Place another order.
|
|
5. Verify that the prefilled city name appears with the entities decoded as in the after picture.
|
|
|
|
### fix/8946: replace ToggleGroupControl with ToggleControl ([#9098](https://github.com/woocommerce/woocommerce-blocks/pull/9098))
|
|
|
|
1. Go to widgets > add the Mini cart block and enable "Open cart in drawer".
|
|
2. Add any product to cart from the shop page.
|
|
3. Observe and verify that the drawer opens up.
|
|
4. Now disable "Open cart in drawer", repeat step (2) and verify that the drawer doesn't open up.
|
|
5. Verify this behaviour is consistent between trunk and the fix branch.
|
|
|
|
| Before | After |
|
|
| ------ | ----- |
|
|
| <img width="281" alt="Screenshot 2023-04-19 at 4 03 59 PM" src="https://user-images.githubusercontent.com/17757960/233048887-2a5e2f17-c36a-43f3-b1c4-f4913a685ede.png">|<img width="281" alt="Screenshot 2023-04-19 at 4 03 27 PM" src="https://user-images.githubusercontent.com/17757960/233048778-e74b9550-4672-4113-9042-e6e6d394cd09.png">|
|
|
|
|
### fix/8363: Match editor "Place Order" button UI with frontend ([#9094](https://github.com/woocommerce/woocommerce-blocks/pull/9094))
|
|
|
|
1. Create a page or post;
|
|
2. Add the Checkout block to it;
|
|
3. On the editor, edit the Checkout block and make sure the "Place Order" UI match with the front-end Place Order button UI.
|
|
|
|
### Fix - "Order received" page does not display the payment method information. ([#9092](https://github.com/woocommerce/woocommerce-blocks/pull/9092))
|
|
|
|
1. Install the WooCommerce Block plugin on a WordPress site.
|
|
2. Create a product and add it to the site's shopping cart.
|
|
3. Proceed to checkout using the "Checkout" Block, which can be added to a page using the "WooCommerce" block category.
|
|
4. Complete the checkout process and confirm the order.
|
|
5. On the "Order received" page, observe that the payment method information is available.
|
|
6. Also check payment method on New Order Email, Order Listing page in wp-admin
|
|
|
|
### Get product by ID if there's more products returned from useStoreProducts ([#9079](https://github.com/woocommerce/woocommerce-blocks/pull/9079))
|
|
|
|
1. Go to Editor
|
|
2. Add All Products and Products blocks
|
|
3. Smoke test them, so that they display a correct data in the Editor and Frontend
|
|
4. During testing disable the "Inherit query from template" option for Products block and when disabled change the Advanced filters and make sure products are still loaded properly
|
|
|
|
### Product SKU: fix product SKU when added in the product meta block ([#8966](https://github.com/woocommerce/woocommerce-blocks/pull/8966))
|
|
|
|
1. Go to Appearance > Editor > Template > Single Product.
|
|
2. Remove the Product SKU block inside the Product Meta block.
|
|
3. Add the Product SKU block again.
|
|
4. Be sure that it is visible on the editor
|
|
5. On the frontend, visit a product with a defined SKU and ensure the block is visible.
|
|
|
|
### Pass proper data to On Sale badge when used in the scope of Product Image ([#9021](https://github.com/woocommerce/woocommerce-blocks/pull/9021))
|
|
|
|
1. Go to Editor
|
|
2. Add a Products block
|
|
3. Add "On Sale badge" block to the Products
|
|
4. **Expected:** There's no regression, so "Sale" badge appears in both places: Product Image and On Sale Badge
|
|
5. Save and go to frontend
|
|
6. Confirm they appear on the frontend as well
|
|
|
|
### Product Stock indicator: Add support for background color, margin, padding & various typography controls ([#8954](https://github.com/woocommerce/woocommerce-blocks/pull/8954))
|
|
|
|
#### Test using blocks sidebar
|
|
|
|
1. Create a new page or post
|
|
2. Add the "Products" block to your post.
|
|
3. Add Product Stock Indicator block as an inner block if not included already
|
|
4. Select the Product Stock Indicator block and open the block settings in the right sidebar.
|
|
5. Customize the block using the new styling options available:
|
|
|
|
5.1. Change the text color, background color, font family, font size, font appearance, line height, letter spacing, text decoration, letter case, margin, and padding under the appropriate settings sections.
|
|
6. Verify that the styling changes are immediately visible and correctly applied within the editor.
|
|
7. Save the post, then view it on the front end to ensure the styling changes are visible and applied correctly.
|
|
|
|
#### Test using Global Styles
|
|
|
|
1. Open the Global Styles sidebar by clicking the "Styles" button at the top right corner of the editor.
|
|
|
|
2. In the Global Styles sidebar, locate the "Product Stock Indicator" block.
|
|
3. Customize the block using the new styling options available under the "Product Stock Indicator" block in the Global Styles sidebar:
|
|
|
|
3.1. Change the text color, background color, font family, font size, font appearance, line height, letter spacing, text decoration, letter case, margin, and padding under the appropriate settings sections.
|
|
4. Verify that these applied correctly within editor & on frontend:
|
|
|
|
4.1. Create a new post
|
|
|
|
4.2. Add Products block
|
|
|
|
4.3. Add Product Stock Indicator block as an inner block if not included already
|
|
|
|
4.4. Check the Product Stock Indicator block in both the editor and on the front-end to ensure that the changes made through the Global styles UI are accurately applied:
|
|
|
|
4.4.1. In the editor, inspect Product Stock Indicator block & ensure it matches the values set in the Global styles UI.
|
|
|
|
4.4.2. Save the post & publish it. On frontend, inspect Product Stock Indicator block & ensure it matches the values set in the Global styles UI.
|
|
|
|
> Also, verify the changes in All Products block, which also uses Product Stock Indicator block.
|
|
|
|
### Use consistent and semantically correct HTML elements in the Cart and Checkout blocks ([#9065](https://github.com/woocommerce/woocommerce-blocks/pull/9065))
|
|
|
|
1. Create a test page and add the Cart block.
|
|
2. Within the post editor, verify that the `CART TOTALS` element, with the CSS class `.wc-block-cart__totals-title`, is using a `<span>` instead of an `<h2>`.
|
|
3. Create another test page and add the Checkout block.
|
|
4. Within the post editor, verify that the `Order summary` element, with the CSS class `.wc-block-components-order-summary`, is using a `<div>` instead of an `<h2>`.
|
|
5. Go to the frontend and add a product to the cart.
|
|
6. On the page with the Cart block, verify that the `CART TOTALS` element, with the CSS class `.wc-block-cart__totals-title`, is using a `<span>` instead of an `<h2>`.
|
|
7. On the page with the Checkout block, verify that the `Order summary` element, with the CSS class `.wc-block-components-order-summary`, is using a `<div>` instead of an `<h2>`.
|
|
|
|
### Mini Cart: Remove excessive margin under cart items ([#9051](https://github.com/woocommerce/woocommerce-blocks/pull/9051))
|
|
|
|
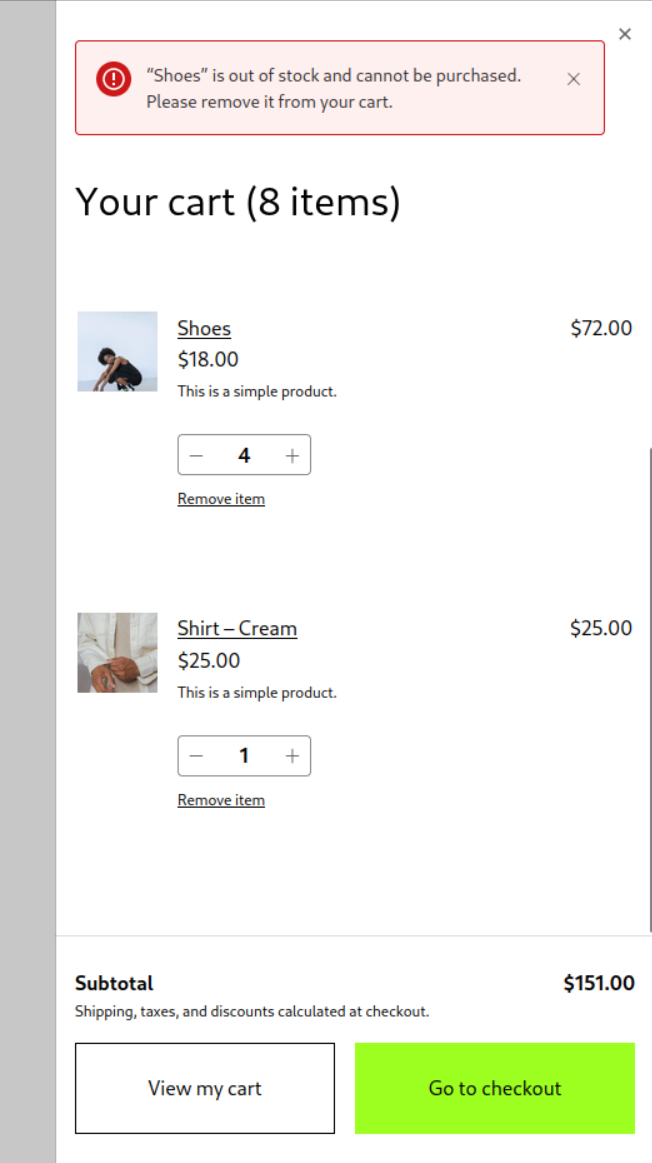
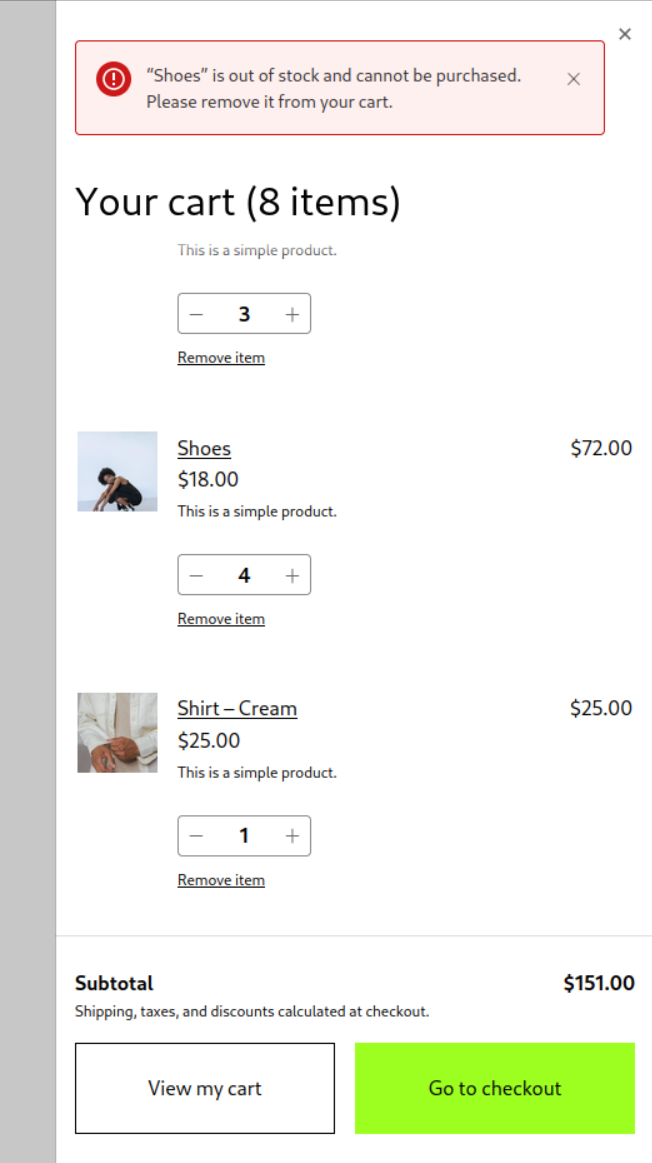
1. With a block theme, add the Mini Cart block to the header of your page (via Appearance > Editor).
|
|
2. In the frontend, open the Mini Cart drawer.
|
|
3. Verify the margin between cart items has been reduced (see screenshots).
|
|
4. Create a page with the Cart block and verify there are no visual regressions regarding the margins between cart items.
|
|
|
|
| Before | After |
|
|
| ------ | ----- |
|
|
|  |  |
|
|
|
|
### Fix Mini Cart drawer not opening in RTL locales ([#9066](https://github.com/woocommerce/woocommerce-blocks/pull/9066))
|
|
|
|
1. With a block theme, add the Mini Cart block to the header of your site.
|
|
2. In, wp-admin, go to Settings > General and change your store language to a RTL locale, like Arabic (`العربية`).
|
|
3. In the frontend, click on the Mini Cart button to open the drawer.
|
|
4. Verify the drawer is opened correctly from the left side of the screen.
|
|
|
|
### Fix JS error visible in the editor caused by Mini Cart Contents buttons ([#9039](https://github.com/woocommerce/woocommerce-blocks/pull/9039))
|
|
|
|
1. Open the _Console_ of the browser devtools (<kbd>F12</kbd>).
|
|
2. In the WP admin, go to Appearance > Editor > Template Parts > Mini Cart.
|
|
3. Make some edits to the Mini Cart.
|
|
4. Verify there is no JS error making reference to `EditableButton`.
|
|
|
|
_Image of the error that **shouldn't** be visible:_
|
|
|
|
<img src="https://user-images.githubusercontent.com/3616980/232009798-cb759e30-cae5-4a81-9aa6-4a060b497886.png" alt="" width="447" />
|
|
|
|
### Mini Cart template part: give user customized template priority over theme template ([#9005](https://github.com/woocommerce/woocommerce-blocks/pull/9005))
|
|
|
|
0. With [TT3](https://github.com/WordPress/twentytwentythree/), add the Mini Cart block to your store header via Appearance > Editor.
|
|
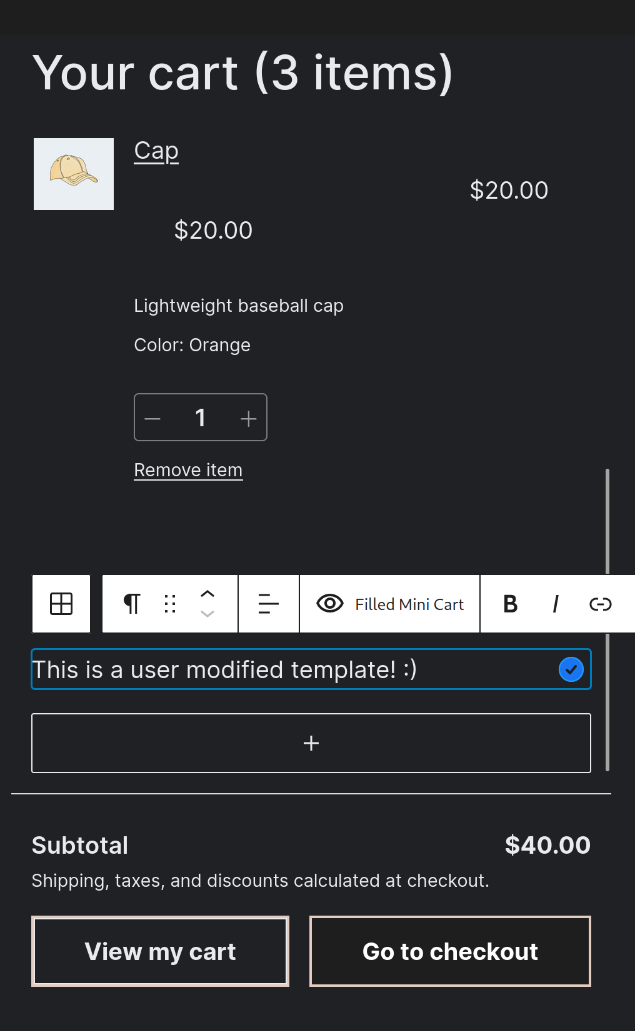
1. Also in Appearance > Editor, make some edits to the Mini Cart template part and save it.
|
|
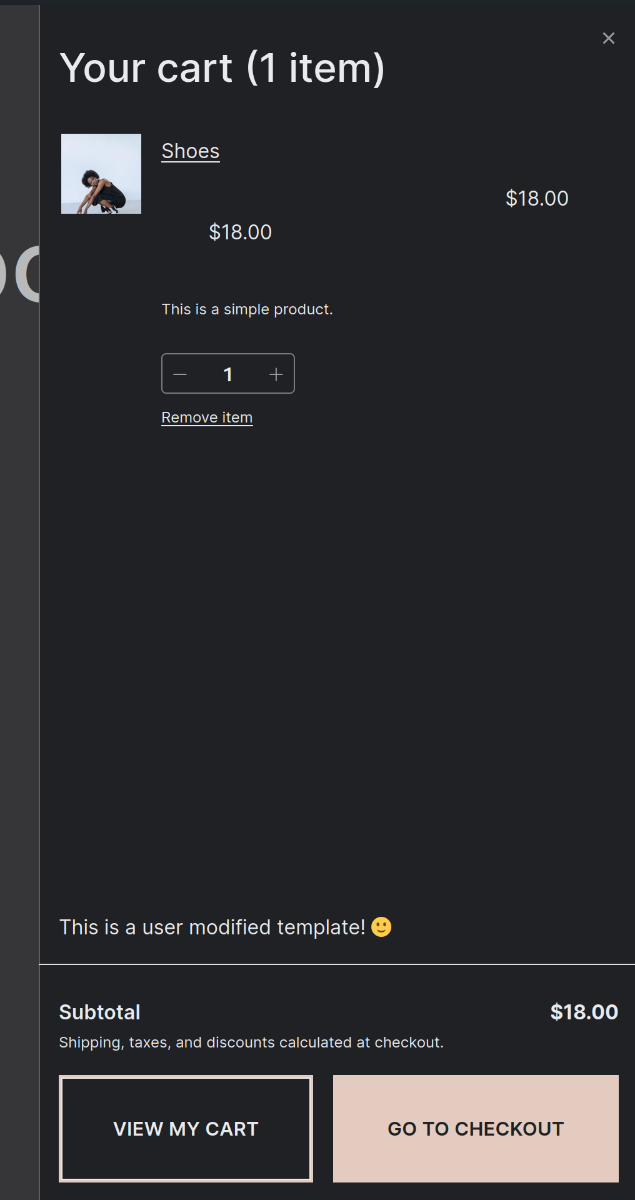
2. Verify the edits are visible in the frontend when you open the Mini Cart drawer.
|
|
3. Now, let's imagine TT3 releases an update which introduces a custom Mini Cart template part. To do so, install this ZIP as a theme (it's TT3 with a `parts/mini-cart.html` file): [twentytwentythree.zip](https://github.com/woocommerce/woocommerce-blocks/files/11200877/twentytwentythree.zip).
|
|
4. Verify that going to Appearance > Editor > Template Parts > Mini Cart shows the template you modified in step 1 (instead of the theme template).
|
|
5. Verify that in the frontend the Mini Cart drawer shows the template you modified in step 1 (instead of the theme template).
|
|
|
|
In other words, given that you created a custom template in step 1, you should never see the template from the theme.
|
|
|
|
Editor | Frontend
|
|
--- | ---
|
|
 | 
|
|
|
|
### Display Mini Cart overlay in template part editor ([#9014](https://github.com/woocommerce/woocommerce-blocks/pull/9014))
|
|
|
|
1. Go to Appearance > Editor > Template Parts > Mini Cart.
|
|
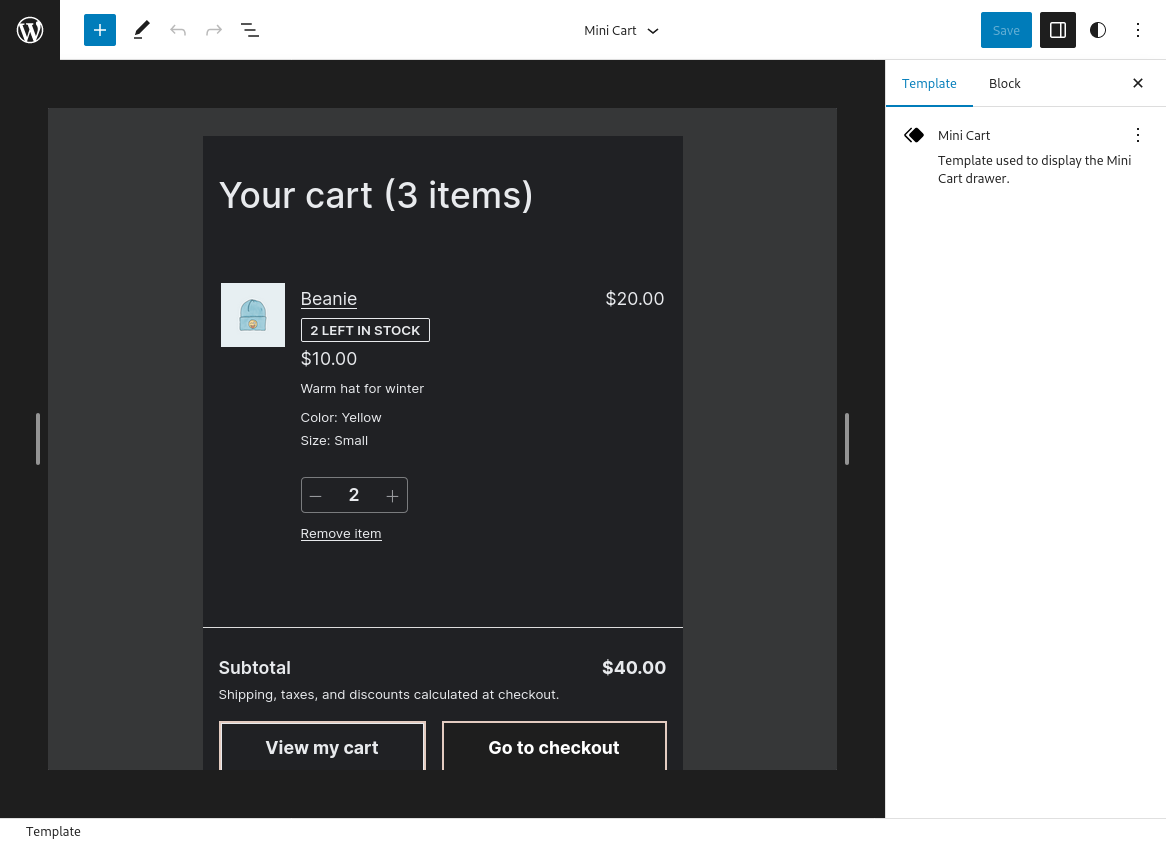
2. Verify the Mini Cart template part is surrounded by space with a dimmed background (like the frontend overlay).
|
|
|
|
Before | After
|
|
--- | ---
|
|
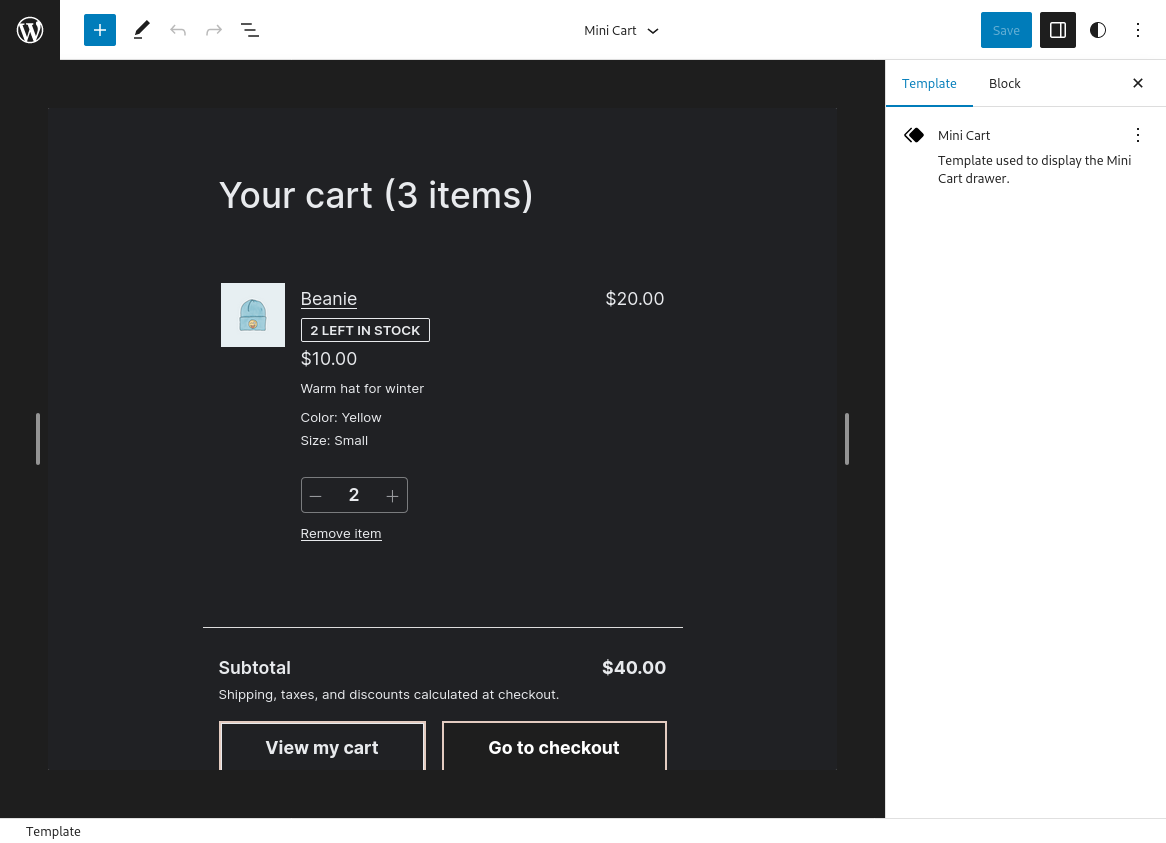 | 
|
|
|
|
### [Mini cart] Make the title customizable ([#8905](https://github.com/woocommerce/woocommerce-blocks/pull/8905))
|
|
|
|
_**Use Case 1**_
|
|
|
|
1. With the previous version of the plugin (or `trunk` branch), go to the Site Editor and clear the customizations (if any) on the `Mini Cart` template.
|
|
3. Add any customization (for example, change the colors of any button).
|
|
4. Update the plugin to this PR version (or go to this branch `6259/customize-mini-cart-title`).
|
|
5. Go to the frontend, open the `Mini Cart`, and check the title is still visible.
|
|
6. Go to the editor and make some customizations to the title. Save.
|
|
7. Check the customizations are applied in the editor and in the frontend.
|
|
|
|
_**Use Case 2**_
|
|
|
|
1. Go to the Site Editor and clear the customizations (if any) on the `Mini Cart` template.
|
|
2. Enter the `Mini Cart` template (wp-admin/site-editor.php?postId=woocommerce%2Fwoocommerce%2F%2Fmini-cart&postType=wp_template_part&canvas=edit).
|
|
3. Click on the `Mini Cart` title and make sure the `Mini Cart Title` block has two inner blocks: `Mini Cart Title Label` and `Mini Cart Title Items Counter`.
|
|
|
|
<img width="335" alt="Screenshot 2023-03-30 at 09 27 07" src="https://user-images.githubusercontent.com/186112/228761302-f3970777-effc-483f-addf-dbb9c917acf9.png">
|
|
|
|
5. Select the `Mini Cart Title Label` and add some customizations on the settings sidebar (colors, typography).
|
|
6. Select the `Mini Cart Title Items Counter` and add some customizations on the settings sidebar (colors, typography).
|
|
7. Check the customizations are applied in the editor and in the frontend.
|
|
|
|
### Customer Account block: Fix padding for the block in the Editor ([#9009](https://github.com/woocommerce/woocommerce-blocks/pull/9009))
|
|
|
|
1. Log in to your WordPress dashboard;
|
|
2. Go to Appearance > Themes, and select a block theme (for example: Twenty-twenty three);
|
|
3. Go to Appearance > Site Editor;
|
|
4. Click the Edit button;
|
|
5. Click on the "+" icon to add a new block and search for "Customer Account" block in the search bar;
|
|
6. Click on the "Customer Account" block to add it to your page or post;
|
|
7. On the right side, click on the dropdown menu inside the Icon Options section;
|
|
8. Select the "Icon-only" option;
|
|
9. Check that the Customer Account block is displayed as an Icon and that it has some spacing around the icon
|
|
|
|
| Before | After |
|
|
| ------ | ----- |
|
|
| 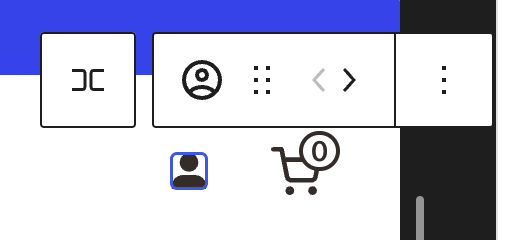 | 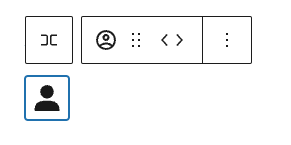 |
|
|
|
|
### Filter data count mismatch > Create the get_attribute_and_meta_counts method ([#8599](https://github.com/woocommerce/woocommerce-blocks/pull/8599))
|
|
|
|
1. With a block theme such as twenty-twenty-three enabled, head over to Edit Site > Templates > Product Catalog > Edit
|
|
2. Add the Products (Beta) block
|
|
3. Add the Filter by attribute block
|
|
4. Save and head over to your shop page
|
|
5. Ensure the filter is properly rendered, and when filtering the products, the counts always match the displayed results
|
|
6. Test all 7 combinations of filters as described and demonstrated in the description of this PR, ensure all of them work as expected.
|
|
|
|
### Create specific stylesheet for CartLineItemsTable component ([#8967](https://github.com/woocommerce/woocommerce-blocks/pull/8967))
|
|
|
|
0. Add the Mini Cart block to the header of your store (via Appearance > Editor).
|
|
1. Add a product to your cart.
|
|
2. Open the Mini Cart drawer and verify there are no styling regressions and the list of items looks correctly.
|
|
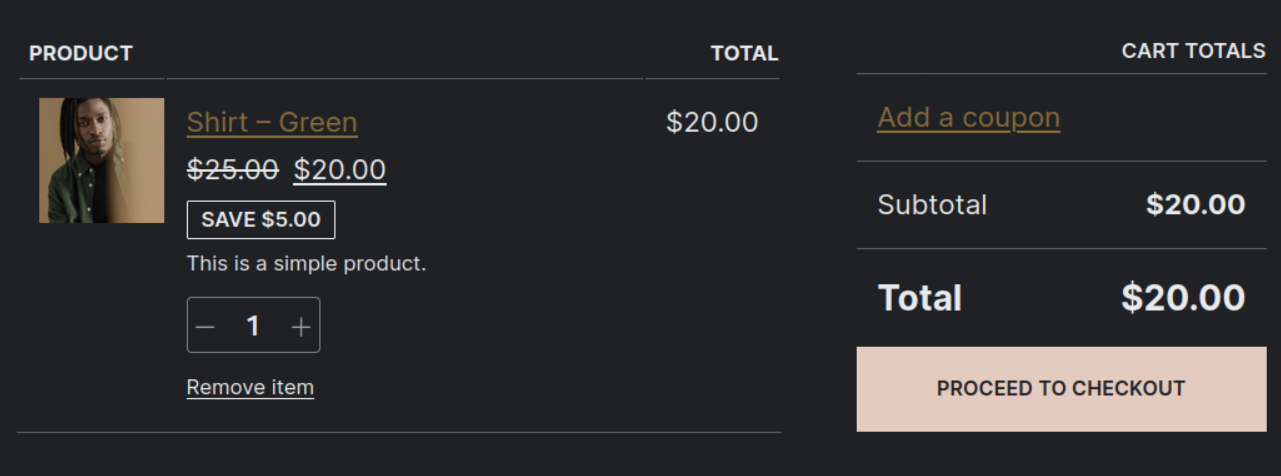
3. Open a page with the Cart block and verify there are no styling regressions and the list of items looks correctly.
|
|
|
|
Mini Cart | Cart
|
|
--- | ---
|
|
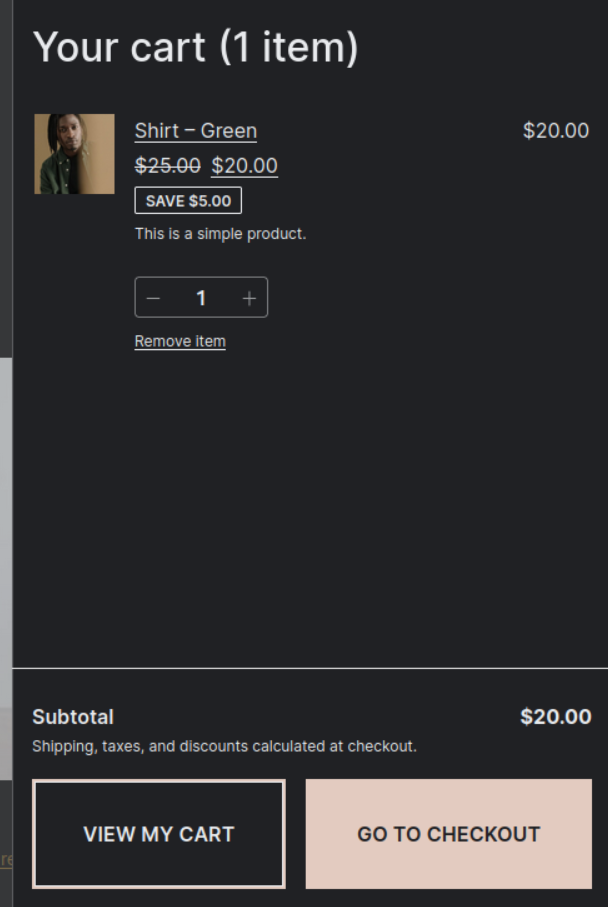 | 
|
|
|
|
### Mini Cart block: fix slide in animation ([#9195](https://github.com/woocommerce/woocommerce-blocks/pull/9195))
|
|
|
|
1. Add Mini Cart to the Header.
|
|
2. Go to the frontend.
|
|
3. Add some products to cart.
|
|
4. Open Mini Cart.
|
|
5. Verify the Mini Cart slides in and animation finishes when the Mini Cart covers viewport.
|
|
6. Repeat steps 4 and 5 with a narrow view simulating mobile (<kbd>F12</kbd> and then <kbd>Ctrl</kbd>+<kbd>Shift</kbd>+<kbd>M</kbd> in Firefox & Chrome).
|
|
7. (Only do this step if you are testing WC Blocks feature plugin) Go to Appearance > Editor > Template parts > Mini Cart and select the Mini Cart Contents block. Set it to a different width than its default and repeat steps 4-6.
|
|
8. Switch to a RTL language like Arabic (from Settings > General) and repeat steps 4-7.
|
|
|
|
## Feature plugin
|
|
|
|
### Mini cart: allow changing the drawer width ([#8930](https://github.com/woocommerce/woocommerce-blocks/pull/8930))
|
|
|
|
1. Go to the `Editor`, open the `Header` template, and insert the `Mini Cart` block.
|
|
2. Go to the `Editor > Template parts` and open the `Mini Cart` template.
|
|
3. Open the `List View` and click on the `Mini Cart Contents` block.
|
|
4. In the settings sidebar you should see a new `Dimensions` section with a width selector.
|
|
<img width="292" alt="Screenshot 2023-04-04 at 09 55 09" src="https://user-images.githubusercontent.com/186112/229725817-a5ab4f9d-edaa-4894-9d5b-031e2caaf5f0.png">
|
|
5. Change the width, see the changes are visible on the editor, and save.
|
|
6. Go to the front-end and check the changes are also reflected there.
|
|
|
|
### Set minimum width for the Mini Cart Contents block ([#9196](https://github.com/woocommerce/woocommerce-blocks/pull/9196))
|
|
|
|
1. Go to Appearance > Editor > Template Parts > Mini Cart.
|
|
3. Select the Mini Cart Contents block (you can use the List View to find it).
|
|
4. In the sidebar, set a custom width lower than 300px.
|
|
5. Verify when you move the focus somewhere else, it's set to 300px.
|
|
6. Remove the value from the custom width input.
|
|
7. Verify it gets resetted to the default (480px).
|
|
8. Try setting an allowed value (ie: 350px, 500px, etc.).
|
|
9. Verify the value persists.
|