7.6 KiB
7.6 KiB
Testing notes and ZIP for release 8.3.0
Zip file for testing: woocommerce-gutenberg-products-block.zip
Feature plugin and package inclusion in WooCommerce
Enable the Cart and Checkout blocks when WooCommerce Blocks is bundled in WooCommerce Core. (6805)
Cart Block:
- In the Cart Block in the editor, ensure the shipping calculator is enabled.
- Enable coupons on your site (WooCommerce -> Settings -> General -> Enable the use of coupon codes) and add one.
- Add two shipping methods for different locations, e.g. two for USA and two for UK.
- Do not add items to your cart.
- Go to the Cart Block and ensure the empty cart is displayed.
- Add items to your cart and revisit the Cart Block.
- Enter your address in the shipping calculator, ensure the correct shipping prices are displayed based on your location.
- Enter a coupon and ensure it works, and the price is modified accordingly.
- Modify the quantities of items in your cart, ensure it works and the prices update properly.
- If you have express payments enabled and working, try checking out from the Cart Block using GPay or Apple pay.
- If you don't, hit proceed to checkout and ensure it works correctly.
Checkout Block:
- Go to WooCommerce -> Settings -> Accounts & Privacy and enable
Allow customers to create an account during checkoutandAllow customers to log into an existing account during checkout. - Go to Checkout Block editor, select contact information block and enable
Allow shoppers to sign up for a user account during checkout. - Enable the Stripe payment method, COD, and cheque.
- Log out of the site then add items to your cart and go to the Checkout Block.
- Check the
create accountbox when entering your details. - Remove the coupon added in the Cart testing steps, and try re-adding it.
- Change shipping methods and ensure the prices update.
- Change address, ensure shipping prices update when the country changes.
- Leave some fields empty on the address form, ensure you get an error.
- Re-fill them and enter an invalid ZIP code. (Set country to UK and enter 234345 as the Postcode). Ensure you see an error at the top of the block.
- Correct the error (A valid one is
SW19 1AAif in UK). - Check out and ensure it works and the order is logged correctly.
- Ensure you received emails relating to your order (if using Local WP you can go to your site -> tools -> mailhog to check this).
Refactor Product Categories block to use block.json. (6875)
WooCommerce Blocks:
- Add Product Categories List block as a widget (Appearance → Widgets)
- Open block settings
- Test block controls, save, and review if it still renders correctly in the frontend
WPCOM:
- Add Product Categories List block as a widget (Appearance → Widgets)
- Open block settings
- Open Advanced and click on "Add new rule" under Visibility
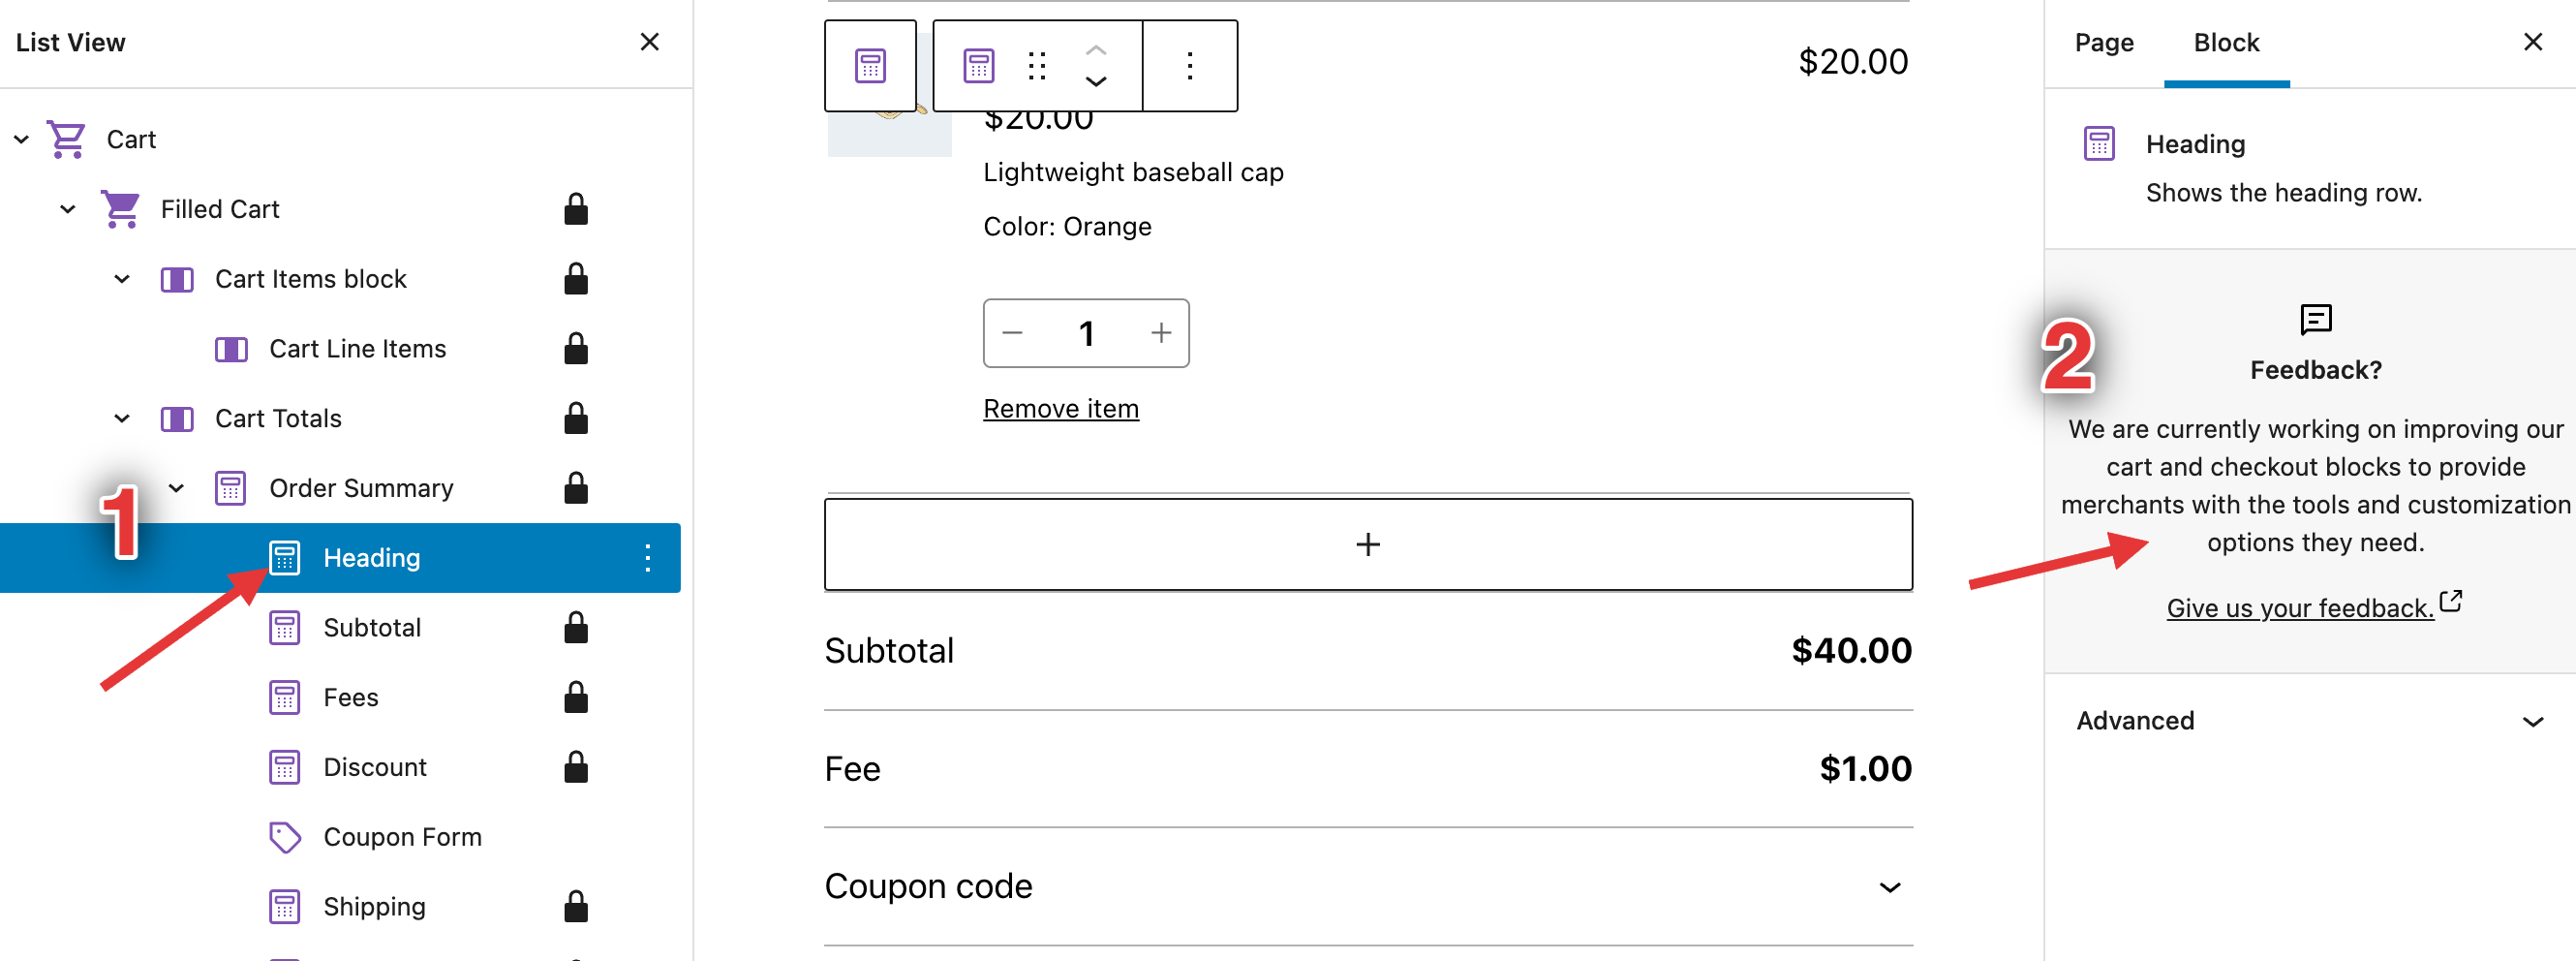
Add feedback box to the Cart & Checkout Inner Blocks in the inspector. (6881)
- Go to the Cart and Checkout editor pages
- Select the Block and each of its inner blocks. You should notice the feedback box in the inspector.
Add notice to Cart and Checkout blocks' inspector controls which links to the list of compatible plugins. (6869)
- Go to the editor, insert the Checkout block.
- Select it, verify you see the notice. Click through each and every inner block and ensure the notice displays for it.
- Dismiss the notice, click back through the inner blocks and ensure the notice is gone. Reload the page, ensure the notice is still gone.
- Go to the editor, insert the Cart block.
- Select it, verify you see the notice. Click through each and every inner block and ensure the notice displays for it.
- Dismiss the notice, click back through the inner blocks and ensure the notice is gone. Reload the page, ensure the notice is still gone.
- Clear local storage again.
- Go back to the Cart and Checkout blocks and ensure the notice is back.
- Create a new page. Add the Checkout Block. Select it and verify the sidebar contains the default warning:
 .
Verify the wording says checkout.
.
Verify the wording says checkout. - Add the Cart Block, ensure the same notice appears but ensure it says cart.
Add the ability to register patterns by adding them under the "patterns" folder and add the new "WooCommerce Filters" pattern. (6861)
- Create a new page with the
All Productsblock. - Open the block inserter, go to the patterns tab, and select the WooCommerce category from the dropdown
- Make sure you see a pattern under that category named:
WooCommerce Filters - Click on it to insert it on the page.
- Check that all 4 filter blocks (by attribute, price, stock, and active filters) are added.
- Complete the filter by attribute by selecting one of them.
- Save the page and make sure all the filters are rendered on the front-end.
Override the description to prevent infinite loop. (6849)
- Make sure you are using a block theme (ie: Twenty Twenty Two).
- Go to Appearance > Editor > Templates.
- Click on Add New and select Single Item: Product.
- Select any product from the list (ie: Hoodie).
- In the template, add the Hand-picked Products block and select the same product.
- Visit that product page in the frontend and notice the correct product is selected.
Update billing address when shipping address gets change in shipping calculator at Cart block. (6823)
- Add a product to the cart and go to the Cart block.
- Add a new address with a valid zip code in the Shipping calculator, different from what you already used.
- Click on the Update button and wait for the update.
- Proceed to Checkout.
- In the Checkout block, see the new address for shipping being added to the Shipping address.
- Uncheck the checkbox for
Use same address for billing. - Look at the Billing address form and confirm it has the same address which was selected in the shipping calculator.
Feature plugin
Fix: Add font-weight controls to the Mini Cart block text. (6760)
- Make sure you have a blocks theme active (like Twenty Twenty-Two).
- Navigate to Appearance > Editor (Beta) and add a Mini Cart block somewhere in your site.
- In the editor, select the Mini Cart block and, in the block settings, choose Font Weight under the Typography section.
- Adjust the font weight to something other than the Default.
- Confirm changes are present in the editor.
- Save changes and preview the frontend to confirm the changes have persisted.
We're hiring! Come work with us!
🐞 Found a mistake, or have a suggestion? Leave feedback about this document here.